This document is an instruction manual for the Blaupunkt BP720B 720p HD Compact Projector. It provides comprehensive guidance on the projector's operation, setup, and maintenance.
The projector is designed to display video and images onto a flat surface, such as a wall or screen, offering a versatile viewing experience for various media types. Its compact size suggests portability and ease of placement in different environments.
Function Description:
The Blaupunkt BP720B projector serves as a display device, taking input from various media sources and projecting it onto a larger surface. It supports the playback of movies, music, and photos, making it suitable for entertainment, presentations, or casual viewing. The projector features a user-friendly interface with both on-device controls and a remote control for convenient operation from a distance.
Usage Features:
Controls and Navigation:
The projector is equipped with both physical buttons on the unit and a remote control for comprehensive management.
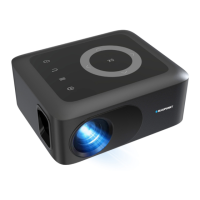
- On-Device Controls:
- POWER Button: Used to turn the projector on (single press) and off (double press).
- NAVIGATOR Buttons (Arrows and OK): These buttons allow users to navigate through on-screen menus and make selections.
- RETURN Button: Functions to go back to a previous page or setting in the on-screen menus.
- MENU Button: Provides access to the projector's main menus and options.
- SOURCE Button: Used to change the media source mode, allowing selection between different input types.
- TRAPEZOIDAL ADJ. Knob: This knob is for adjusting the trapezoidal distortion of the image, ensuring a rectangular projection even when the projector is not perfectly aligned with the screen.
- FOCUS ADJ. Knob: Used to sharpen the image by rotating the focus knob, ensuring clarity of the projected content.
- ANGEL ADJ. Knob: Likely used for adjusting the projection angle or height.
- Remote Control: The remote control mirrors many of the on-device functions and adds several others for enhanced convenience.
- Power Button: Same functionality as the on-device power button.
- Mute Button: Instantly mutes the audio output.
- Previous / Next Buttons: Used to skip between chapters or tracks during media playback.
- Back / Fwd Buttons: Allows searching through an individual chapter or track.
- Stop Button: Stops media playback.
- VOL+ / VOL- Buttons: Adjusts the audio level.
- Flip Button: Rotates the display image by 180 degrees, useful for different projection orientations.
- Source Button: Selects the media source (AV, PC, HDMI, MEDIA).
- Play/Pause Button: Plays or pauses an individual chapter or track.
- Exit Button: Exits menus.
- Arrows/OK Buttons: Navigates and confirms selections in settings and other menus.
- Menu Button: Accesses projector settings.
- Go To/Number Keypad: Allows entering specific chapter or track numbers, with the Play button initiating playback.
- Zoom Button: Zooms the display image in or out.
Connectivity:
The projector offers multiple input and output options to connect with various devices:
- DC IN Jack: For connecting the power adapter.
- USB Port: For playing media directly from USB storage devices.
- HDMI Port: For high-definition audio and video input from devices like laptops, gaming consoles, or Blu-ray players.
- MICRO SD Slot: For playing media directly from Micro SD cards.
- AV OUT Jack: For audio/video output.
- EAR PHONE Jack: For connecting headphones or external speakers.
First Time Setup:
The manual emphasizes placing the projector on a flat and stable surface to ensure a straight projection. The initial setup involves plugging the power adapter into the DC IN jack and then into a wall power socket.
Installation and Viewing Options:
The projector is versatile in its installation, supporting various viewing options:
- Projection Distance: The manual provides a table with recommended projection distances and corresponding screen sizes (e.g., 1m for 30 inches, 2m for 68 inches, 3m for 98 inches). It notes that light and brightness can affect these distances.
- Projection Position: It is recommended to place the projector in front of the center of the screen for optimal viewing.
- Mounting Options: The projector can be used on a front table, front ceiling, rear ceiling, or rear table. For ceiling installations, it advises purchasing a recommended projector mount and following professional installation instructions, ensuring the ceiling structure can support the weight. The manual explicitly states that the projector mount and screws are not included.
- Image Adjustment: The FOCUS ADJ. Knob and TRAPEZOIDAL ADJ. Knob are crucial for achieving a clear and properly shaped image.
Home Dashboard:
Upon turning on, the projector displays a home dashboard, which allows users to select file types (Movie, Music, Photo) to view, depending on the connected device, and access menu options (Setting).
The projector's settings are organized into several categories, accessible via the MENU button on the remote control:
- Picture Settings:
- Picture Mode: Offers predefined modes like Standard, Soft, Vivid, and User. In User mode, contrast, brightness, sharpness, and color can be adjusted.
- Contrast, Brightness, Color, Tint, Sharpness: Individual sliders for fine-tuning image quality.
- Color Temperature: Adjusts the color balance (Medium, Cool, Warm).
- Noise Reduction: Reduces visual noise in the image (Off, Low, Middle, High, Default).
- Audio Settings:
- Sound Mode: Includes Standard, Music, Movie, Sports, and User modes. In User mode, Treble and Bass can be adjusted.
- Treble & Bass: Individual sliders for adjusting audio frequencies.
- Balance: Adjusts the audio balance between the left and right speakers.
- Auto Volume: Toggles automatic volume adjustment (ON or OFF).
- Option Settings:
- OSD Language: Changes the on-screen display language (English is default).
- Aspect Ratio: Adjusts the video aspect ratio.
- Projection Mode: Configures the projection orientation (Front, F/Ceiling, Rear, Rear/ceiling).
- Reset: Resets all projector settings to default.
- Info: Displays information about the projector.
- Time Settings:
- Clock: Sets the time and date for the projector.
- Off Time: Configures a specific time for the projector to turn off (Day, Month, Year, Hour, Minutes).
- On Time: Configures a specific time for the projector to turn on (Off, Once, Every day, Hour, Minutes).
- Sleep Timer: Sets a timer for the projector to turn off (Off, Once, Every day, Hour, Minutes).
- Auto Sleep: Configures an automatic sleep function after a set period (Off, 1 hour, 2 hours, 4 hours, 8 hours).
Maintenance Features:
General Safety and Care:
The manual provides crucial safety guidelines that also serve as maintenance advice:
- Placement: Ensure the projector is placed on furniture that can safely support it, without overhanging edges. Avoid placing it on high furniture without securing both the furniture and the product. Do not place it on cloth or other conductive materials.
- Environmental Protection:
- Avoid exposing the appliance to rain or moisture to prevent fire or electric shock.
- Do not expose the product to splashing or water contact.
- Do not place objects filled with liquids (e.g., vases) on top of the product.
- Keep the projector away from direct sunlight, heaters, splashes, food, and excessive dust or grease.
- Do not install the equipment in a confined space or near heat-producing appliances.
- Ensure sufficient ventilation by installing the unit at a reasonable distance from walls and not covering ventilation openings with items like newspapers or curtains.
- Power Management:
- Verify that the outlet voltage matches the product's rating label.
- Do not use damaged power cords, plugs, or loose outlets.
- Avoid plugging multiple devices into the same outlet to prevent overheating and fire.
- Do not bend, twist, or kink the power adapter excessively, and do not allow anything to rest on or roll over it.
- Unplug the projector during lightning storms or when unused for long periods.
- Cleaning: To maintain the product, use only a dry cloth to wipe down marks or dust, and always unplug the product from the power socket before cleaning. Do not use chemical or wet cleaning agents.
- Troubleshooting: If unusual odors or smoke are noticed, immediately disconnect the unit from the outlet and contact the service center.
- Ventilation: Do not cover the vents, as they are essential for releasing hot air and preventing overheating and permanent damage to the projector.
Remote Control Battery Care:
- Do not mix old and new batteries or different types of batteries.
- Remove batteries if the unit will not be used for a long time.
- Keep batteries away from children and pets.
- Never dispose of batteries in a fire.
- Avoid dropping or impacting the remote control, as this voids the warranty.
- The remote control operates effectively within a range of 5 to 6 meters.
- Do not expose the remote control sensor to bright light.
Lens Safety:
- CAUTION: Do not look directly into the projector lens when it is turned on, as this can cause damage to eyes.
- Ensure the projector is out of reach of children or babies to prevent them from looking into the lens.
By following these instructions, users can ensure safe and optimal operation, as well as prolong the lifespan of their Blaupunkt BP720B projector.