Page 4 of 9
Changing Between Fixed and Dynamic IP Address
Via the BlipNode L2i’s built-in web server persistent settings can be read and changed.
This can be used to use a fixed IP address instead of retrieving IP address via DHCP (and vice versa).
By default the BlipNode will use DHCP.
Connect to the BlipNode:
In a web browser running on a PC on the same subnet as the BlipNode type in the IP address of the
BlipNode.
On the Windows platform you can also enter the MAC address. The MAC address is located on the
back of the BlipNode.
E.g. if the MAC address is 00:12:ca:01:03:6e you should type http://0012ca01036e/
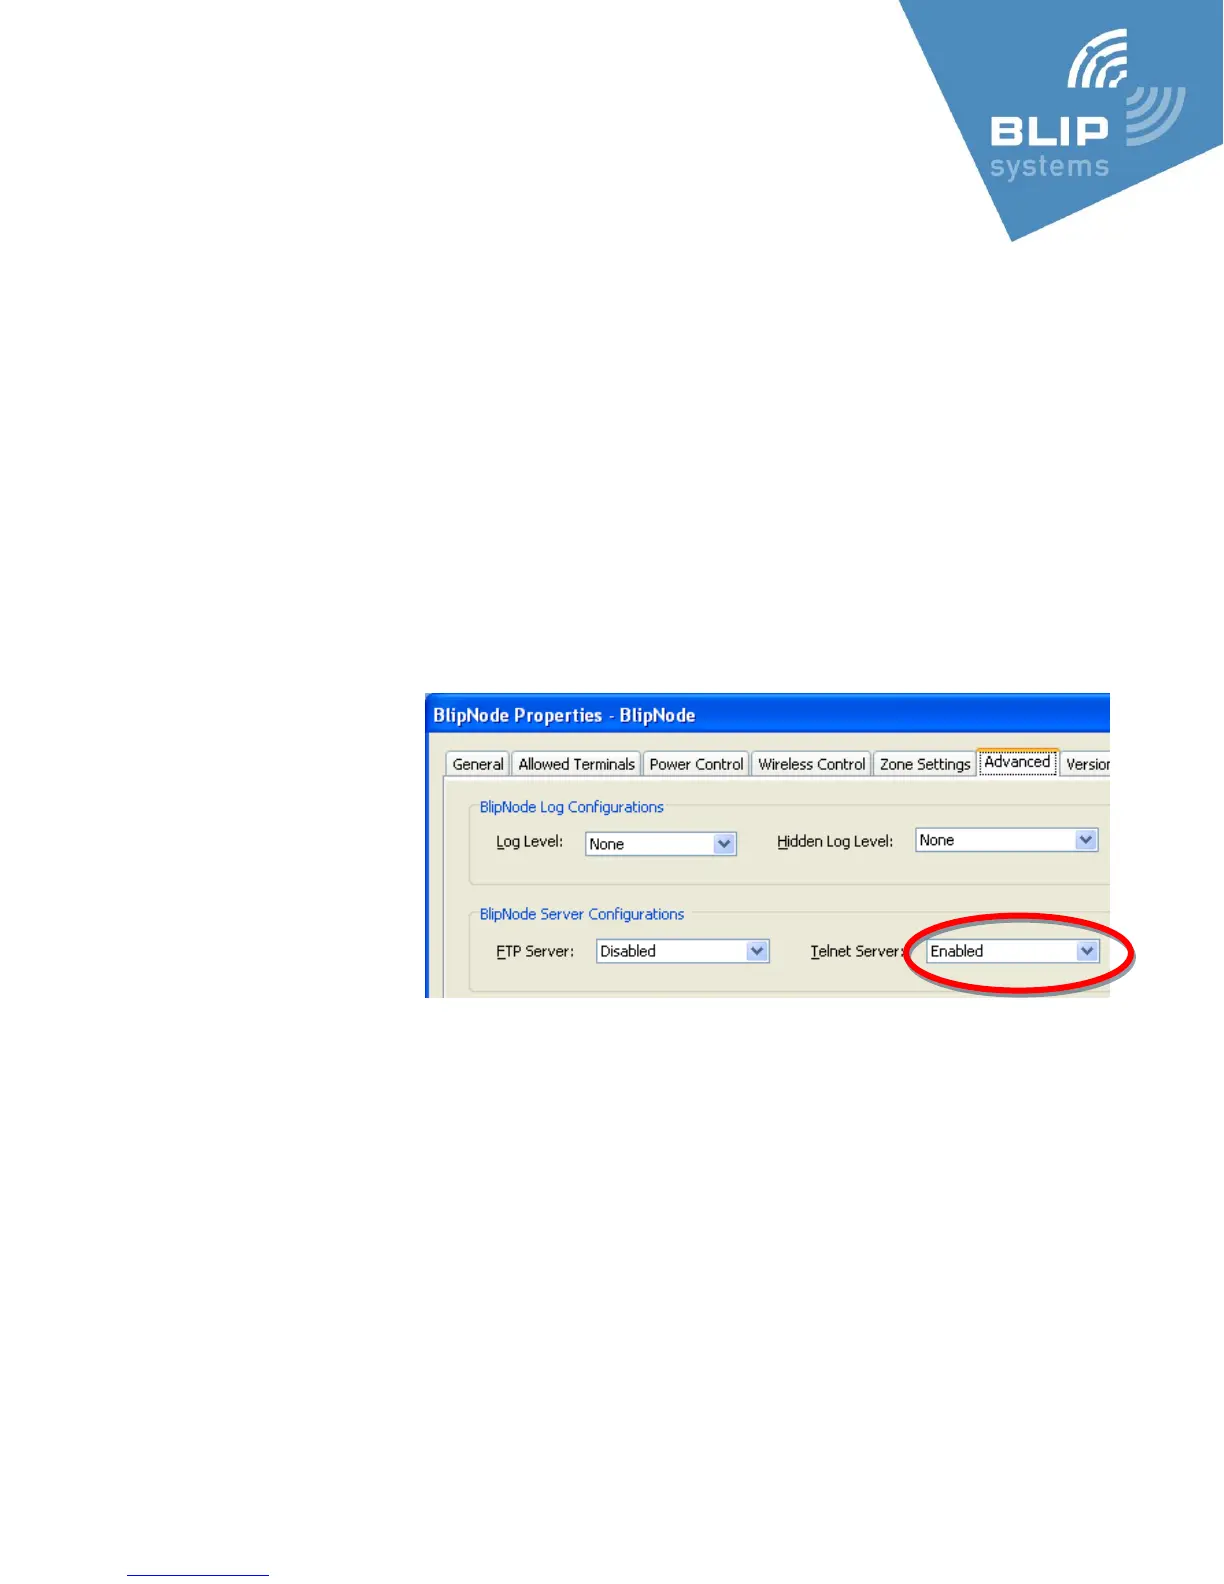
Enable the telnet server:
By default you can only view the settings of the BlipNode.
When you want to change the settings you need to enable the Telnet-server of Bluetooth Module 1
(the lowest Bluetooth
Address) of the BlipNode
(via the BlipManager ->
BlipNode Settings ->
Advanced -> Telnet Server)
…
The BlipNode will reboot
after this change.
If the BlipNode is not
connected to a BlipServer it
will automatically enable the telnet server after being turned on for 5 minutes.
When the telnet server is enabled:
Press the Settings link on the web-page (connected to in the previous section), and type in the new
settings (e.g. static IP settings).
Press the Submit. The BlipNode will reboot with the new settings.
If it fails to start up with the new settings it will revert to the previous settings after approximately 5
minutes.
Remember to disable the telnet server (via BlipManager) after the changes are completed.