4
To connect power to the DVR: If you have been supplied with one power adapter (it would be within the DVR box) connect
this to the power splitter supplied and connect the splitter ends to the DVR and cameras. If you have been supplied with two
power adapters, use the power adapter in the DVR box to power the DVR. Then connect the additional power adapter to the
power splitter supplied to power the cameras. Using the power/video CCTV cable plug one end to the Camera (both
DC Plug and BNC plug) and plug the other end to a BNC port on the DVR and the power splitter supplied. This
will result in power being provided to the camera and Video Data being provided to the DVR.
Connect DVR via HDMI/VGA port to a suitable display monitor. NOTE: Please be aware – If connected directly
to a TV you may need to adjust the resolution first through the DVR to be compatible with the TV. In this case,
connect it first to a display monitor to view and adjust the DVR’s Display settings. Once connected to the
Display Monitor turn the DVR on and wait for the boot up screen to finish loading access the ‘Main Menu’ by
right clicking on the home screen and click ‘main menu’ from the drop down box then click ‘systems’ then click
‘Display’ here you can adjust the ‘resolution’ output to one suitable to work with your TV.
To enable network/local/remote/mobile viewing, plug a Network Cable from the DVR’s RJ45 port to an RJ45
port on your Router. Once connected, the LED lights on the RJ45 port on the back of the DVR will begin to
flash with green and yellow LED’s. This means that the connection was successful. NOTE: To set up remote
login you will still need to follow the instructions in the next section.
Connect the supplied mouse to the DVR via one of the two USB ports on the rear of the DVR. This will
enable you to easily navigate the DVR.
Machine/Network/Mobile Set up (Section 2):
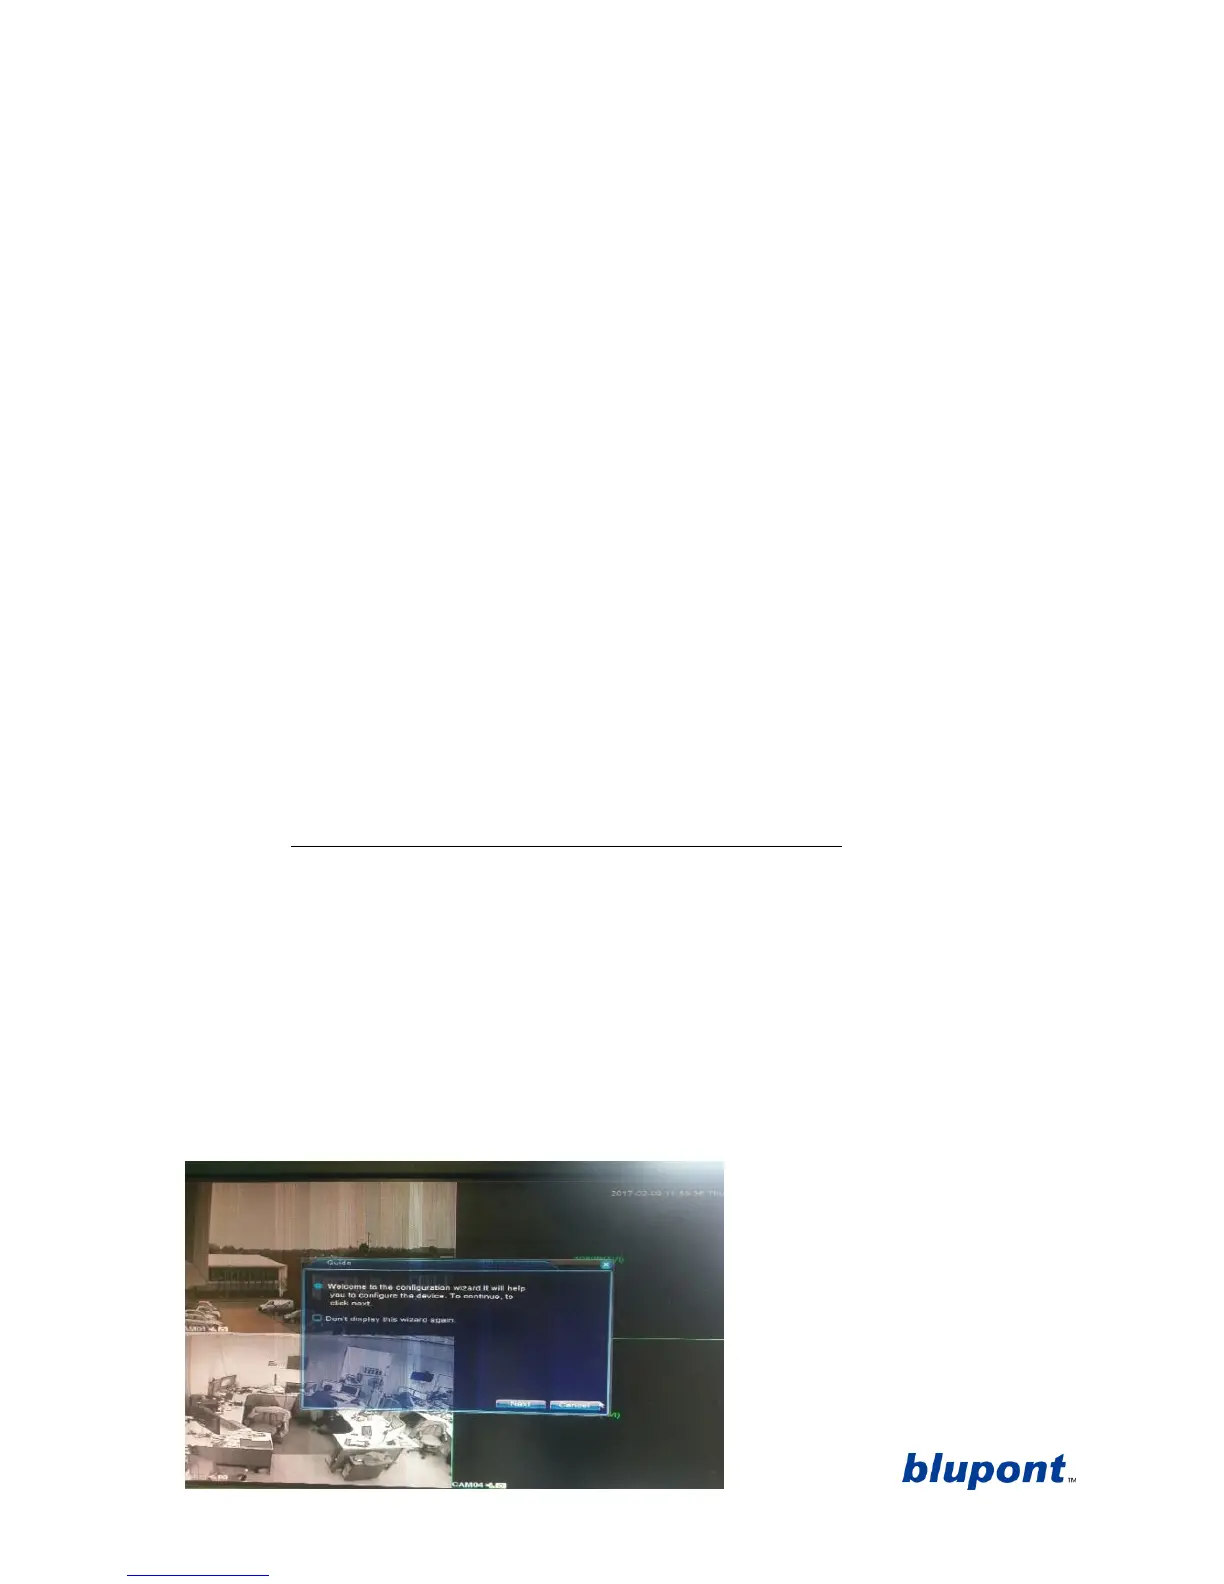
1. Once power is connected to the DVR a red LED light on the front will confirm it is on. Wait whilst the DVR
boots up with the blupont Logo.
2. It will then take you to the Set-up Wizard. See picture below. If the cameras have already been
connected, with the CCTV cables provided, you will now be able to view the cameras in the background
of the main page, whilst the set-up wizard (shown below), is running. Click ‘Next’ to continue with the
DVR set up Wizard.
NOTE: to exit the set-up wizard at any time click ‘cancel’. This will take you to the main page showing
camera channels. To re-access the set-up wizard on the main page right click for the drop down menu
click ‘Guide’
then the set-up wizard will begin again.
3. System login will then appear. See
picture below. Keep the username as
‘Admin’ and the password blank
(these can be changed in the main
settings later). Click ‘OK’.
 Loading...