5
4. Configure the date and time, then click ‘Next’.
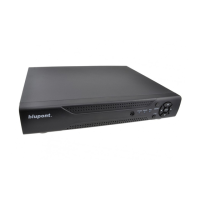
5. Network Test will now begin. If the DVR connects automatically it will confirm all connections are OK.
See picture below. Click ‘Next’.
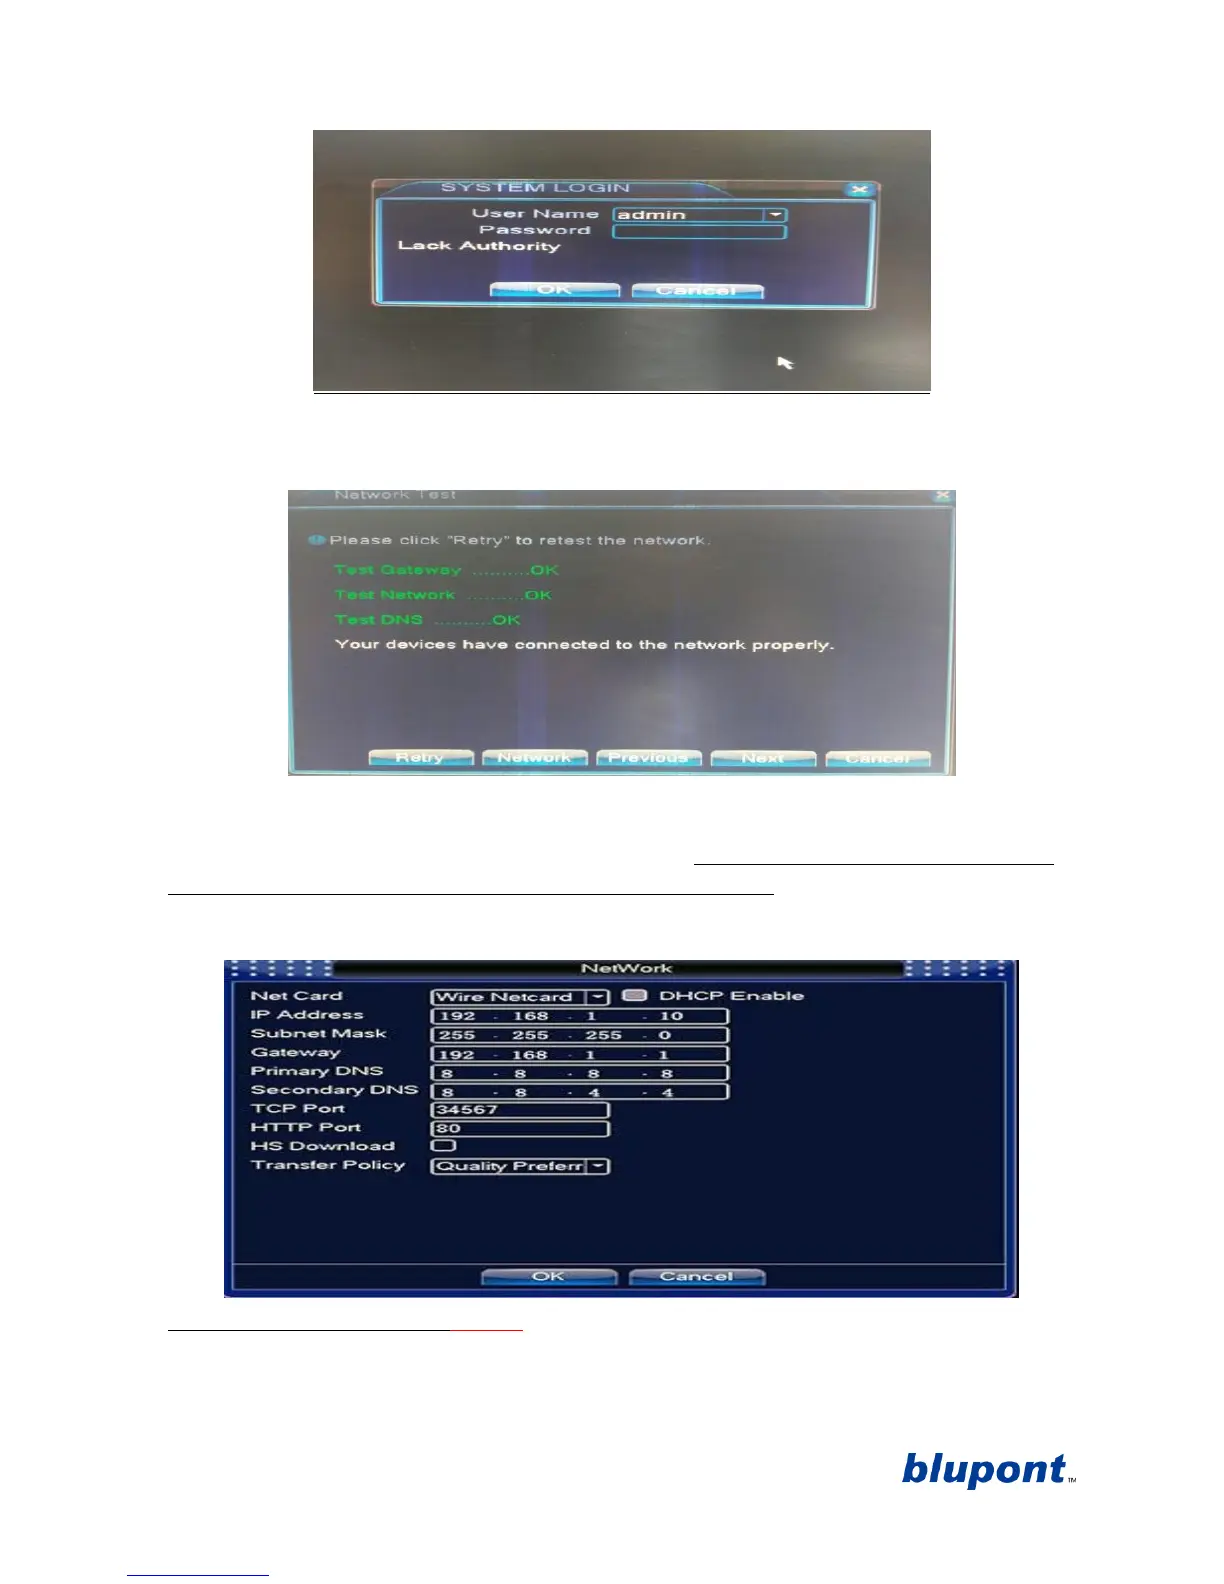
6. If the network test fails, it will be because the default IP address of the DVR (192.168.1.10) as shown
below is already allocated on your network. Click ‘network’ and configure with an IP address you know
is available and the correct gateway address for your router. Alternatively, tick the ‘DHCP Enable’ and
the DVR will automatically assign a free IP address on your Network. See picture below (example only).
Once completed click ‘ok’ and then click ‘retry’ to test the connection. Once all the test results confirm it
is ‘OK’ click ‘next’ to advance to the next stage of the set-up wizard.
7. Using Mobile/Tablet application xmeye
a. To connect the device to your smartphone/tablet for remote viewing. Scan the QR Code
which is applicable to your phone model (Android and IOS only). See picture. NOTE: If you do