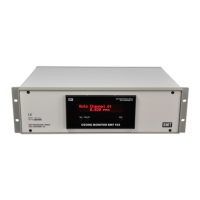
OZONE MONITOR BMT 932 Manual, Rev. 02/2021
32
To enable an alarm, its parameter Threshold has to be set to a valid alarm threshold and
Enable/Disable has to be set to Enabled. The Low-Alarm threshold always has to be below the
High-Alarm threshold.
Both alarms are equipped with a hysteresis, which means an alarm ozone concentration has to fall
0.2 % of range below the threshold, before the alarm is cleared.
Whether an alarm will be cleared also depends on the setting of Latching: if set the alarm will
continue, also if the triggering condition ( concentration above threshold) does not exist any-
more. The alarm can be cleared by pressing the button ENTER. To only stop the beeper without
clearing the alarm, the BACK key may be used in case the menu on the front panel is on its basic
level. For operation of the Relay Box see Appendix R.
For workplace safety applications BMT Messtechnik recommends to use a low concentra-
tion alarm threshold of 0.1 ppm and a high alarm threshold of 0.3 ppm. When they leave the
factory, the monitors are already set to these thresholds. These recommendations are based
an the following:
In many countries regulations require the workplace ozone concentration never to exceed
0.1 ppm. In the United States OSHA (www.osha.gov) has established a Permissable Exposure
Limit (PEL) of 0.1 ppm TWA (8 hour Time Weighted Average). This limit is federal law
(29 CFR 1910.1000). The same threshold value is recommended by ACGIH (www.acgih.org)
for light work and NIOSH (www.niosh.org).
In addition OSHA recommends a STEL (15 minute Short-Term Exposure Limit) of 0.3 ppm.
Local regulations may require to set the alarm thresholds to other values.
16 Error Handling
The BMT 932 has divers possibilities to recognize errors, to signal them and to early-warn against
them. Warnings and errors are displayed on the front panel. Depending on the importance of the
error, the Error Relay (pins 14-15-16) as well as the error contact Lamp Low (Pins 12-13) are
activated. Warnings and errors are always accompanied by an acoustic signal. In case the menu on
the front panel is on its basic level, the BACK key may be used to stop the beeper.
During warmup or with no power applied the Error Relay is in the error position.
Warnings and Errors are also sent out over the serial interface (s. p. 30) and are documented in
the Error-Log. The actual status can be read out in Link-Mode with the command *86#.
The following conditions will lead to warnings respectively errors:
Lamp Low Warning
This warning usually will occur before a Lamp Low Error. The message
Warning:Lamp Low