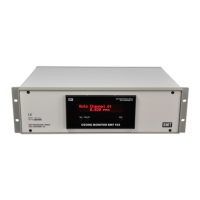
OZONE MONITOR BMT 932 Manual, Rev. 02/2021
49
C2 Pneumatic Installation
Pneumatic installation is simple. The sample tubing has to have an OD of 1/4".
Tubing 6 mm OD may never be used!
As the tubing material we recommend the clear transparent 1/4" FEP tubing type TIHB07N
by SMC Corporation. The tubing has to simply be pushed through the according cable feed-
through
1
at the right side of the BMT 932 C cabinet. Inside of the cabinet - opposite to the feed-
through - the tubing now has to be inserted into the according One-Touch-Fitting (SMC Corp.).
Installation instructions by SMC are (essentially) as follows:
Installation of tubing
Take an FEP tubing 1/4" having no flaws on its periphery and cut it off at a right angle using the Tube Cut-
ter TK-3. Hold the tubing and slowly insert it all the way into the fitting. Insertion depth is about 15 mm. Af-
ter inserting the tubing, pull on it lightly to confirm that it will not come out.
Removal of tubing
Sufficiently depress the release bushing and tubing, making sure to apply even pressure around the release
bushing. Pull out the tubing while depressing the release bushing so that it does not pop out. If the release
bushing is not depressed sufficiently, there will be an increased bite on the tubing and it will become more
difficult to pull out. When the removed tubing is reused, first cut off the section of the tubing which has been
clamped. Reusing the clamped portion of the tubing can cause problems such as leakage, difficulties in re-
moval.
In the OZONE MONITOR BMT 932C accessories kit a Tube Cutter TK-3 (SMC Corp.) is in-
cluded. This cutter tool should be used to cut the front end of the tubing.
We strongly recommend installation of the BMT 932C together with new sample gas tubing. In
case some old sample tubing is still in place from a former ozone monitor installation it should
be replaced by a fresh FEP tubing TIHB07N (or equivalent).
The OZONE MONITOR BMT 932 intentionally has no internal dust filter. An external dust
filter thus must be installed at the inlet port of each sample tube. These sample gas filters, and the
according fittings, are provided with every instrument. Refer to chapter 10 (page 13).
C3 Electric Connections
All signalling connections are made inside the cabinet with detachable screw terminals. Splash-
proof feed-throughs are provided for the signal cables to be connected. Cable diameters should
be 5-10 mm for the signal cables. Shielded cables must be used. Connect shields to housing inside
the cabinet. Following is the layout of the terminals of the cabinet version:
The installation of the mains connector has to be made by a person aquainted with the
safety problems involved. Do not connect or disconnect the voltage carrying connector,
except in an emergency.
The power connector should be easily accessible for fast interruption of power, or other means
for switching off power should be provided.
1
To seal all those cable feedthroughs which are not used their central holes are closed with small rubber plugs. Be-
fore inserting a sample tubing this small plug has to be removed.
Mains connector: 1 mains
} (100 to 240 VAC, 35 VA, 50/60 Hz)
2 mains
3 (free)
Protective Ground