EasyManua.ls Logo

BONANZA BEECHCRAFT User Manual

BONANZA BEECHCRAFT
14 pages
To Next Page IconTo Next Page
Page #1 background imageLoading...
Page #1 background image
SPECIFICATIONS
Wingspan:.........................1580mm (62.2in)
Length:.............................1190mm (46.8 in)
Electric Motor:.....................See next pager
Glow Engine:.................... .46 2-T / .70 4-T
RTF Weight: 3.2Kg / 7.05lbs (Will vary with
Equipment Used).
Radio:......................6 Channel / 7-8 Servos
Function: Ailerons-Elevator-Rudder-Throttle
Flaps-Optional Retractable Landing Gear.
WARNING! This radio controlled model is NOT a toy. If modified or flown carelessly it could go out of controll and
cause serious human injury or property damage. Before flying your airplane, ensure the air field is spacious enough.
Always fly it outdoors in safe areas and seek professional advice if you are unexperienced.
ACHTUNG! Dieses ferngesteuerte Modell ist KEIN Spielzeug! Es ist für fortgeschrittene Modellflugpiloten bestimmt,
die ausreichende Erfahrung im Umgang mit derartigen Modellen besitzen. Bei unsachgemässer Verwendung kann
hoher Personen- und/oder Sachschaden entstehen. Fragen Sie in einem Modellbauverein in Ihrer Nähe um
professionelle Unterstätzung, wenn Sie Hilfe im Bau und Betrieb benötigen. Der Zusammenbau dieses Modells ist
durch die vielen Abbildungen selbsterklärend und ist für fortgeschrittene, erfahrene Modellbauer bestimmt.
Radio control model / Flugmodel
ALL BALSA, PLYWOOD CONSTRUCTION AND ALMOST READY TO FLY
BEECHCRAFT
Instruction manual / Montageanleitung
PICHLER
ARF BY
TECHNISCHE DATEN
Spannweite:...................................1580mm
Lange:............................................1190mm
Elektroantrieb.............(siehe nächste Seite)
Verbrennerantrieb:...............7.45cc - 11.5cc
Fluggewicht:.......................................3.2Kg
Fernsteuerung.............6 Kanal / 7-8 Servos
VQ No: VQA136GE - VQA136US
Question and Answer IconNeed help?

Do you have a question about the BONANZA BEECHCRAFT and is the answer not in the manual?

BONANZA BEECHCRAFT Specifications

General IconGeneral
BrandBONANZA
ModelBEECHCRAFT
CategoryToy
LanguageEnglish

Summary

Beechcraft Bonanza Model Overview

Model Identification and Specifications

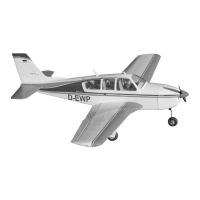
Details the model's identity and key specifications like dimensions and weight.

Critical Safety Warnings

Essential safety precautions for operating this radio-controlled model aircraft.

Preparation and Requirements

Components Required for Operation

Lists necessary radio, servos, engine, and battery for model function.

Essential Tools and Adhesives

Lists the tools and materials needed for model assembly and maintenance.

Metric to Imperial Conversion

Table for converting metric measurements to imperial units for building.

Wing Assembly - Ailerons and Flaps

1-Aileron and Flap Servo Installation

Install aileron and flap servos into the wing structure.

2-Aileron/Flap Control Horns

Attach control horns to the aileron and flap surfaces.

3-Aileron/Flap Linkages

Connect control horns to servos using pushrods for control surface actuation.

Landing Gear Installation

4-Electric Retract Installation

Install the electric retract mechanism for the landing gear system.

5-Fixed Gear Assembly

Assemble and prepare the fixed landing gear components.

6-Fixed Gear Mounting

Attach the fixed landing gear assembly to the wing structure.

Horizontal Stabilizer Installation

7-Horizontal Stabilizer Attachment

Fit, align, and glue the horizontal stabilizer to the fuselage.

Vertical Stabilizer Installation

8-Vertical Stabilizer Fitting

Install and secure the vertical stabilizer to the fuselage.

Rudder Installation

9- Rudder Attachment and Hinging

Attach and hinge the rudder to the vertical stabilizer.

Nose Gear Setup

10-Nose Gear Assembly and Installation

Assemble and install the nose landing gear and steering linkage.

Electric Retract Landing Gear Notes

Information regarding the use of electric retract landing gear and struts.

Engine and Fuel System

11-Engine Mounting and Installation

Mount the engine onto the fuselage firewall and engine mounts.

12-Fuel Tank Setup for Glow Engine

Install and check the fuel tank system for glow engine models.

Motor and Cowling

13-Electric Motor Mounting

Mount the electric motor and its plate to the firewall.

14-Cowling Installation and Modification

Attach the cowling and cut openings for engine access.

Servos and Control Linkages

15-Servo Placement in Fuselage

Position servos for throttle, elevator, and rudder within the fuselage.

16-Linkages and Pushrods

Connect control surfaces to servos using pushrods and linkages.

Wing Attachment to Fuselage

17-Wing Installation Preparation

Prepare fuselage for wing mounting by cutting covering.

18-Main Wing Mounting

Attach the main wing assembly to the fuselage.

Final Assembly Steps

19-Wing Securing Mechanism

Secure the wing to the fuselage using screws.

20-Nose Gear Door Installation

Install the nose gear doors onto the fuselage.

20-Sticker Application Guide

Apply decorative stickers, managing bubbles and curves.

Finishing Touches and Flight Preparation

21-Canopy Attachment

Attach the canopy to the model fuselage.

22-Center of Gravity (CG) Balance

Check and adjust the model's center of gravity for optimal flight stability.

23-Control Surface Dimensions

Specifications for rudder, elevator, aileron, and flap dimensions.

Model Cleaning Recommendations

Guidance on cleaning the model to preserve its finish and color.