Maintenance and service
55
830 ES – 6 720 644 936 (2021/08)
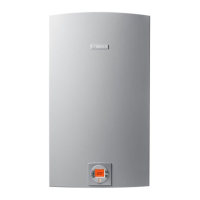
▶ Turning the slotted screw counter clockwise will raise P1
CO
2
levels and clockwise will lower P1 CO
2
levels.
Adjustments to the slotted screw will also change P2 CO
2
levels.
▶ After bringing the P1 CO2 readings in proper range, press
the button to enter the P2 mode. Verify CO
2
readings
in P2 mode.
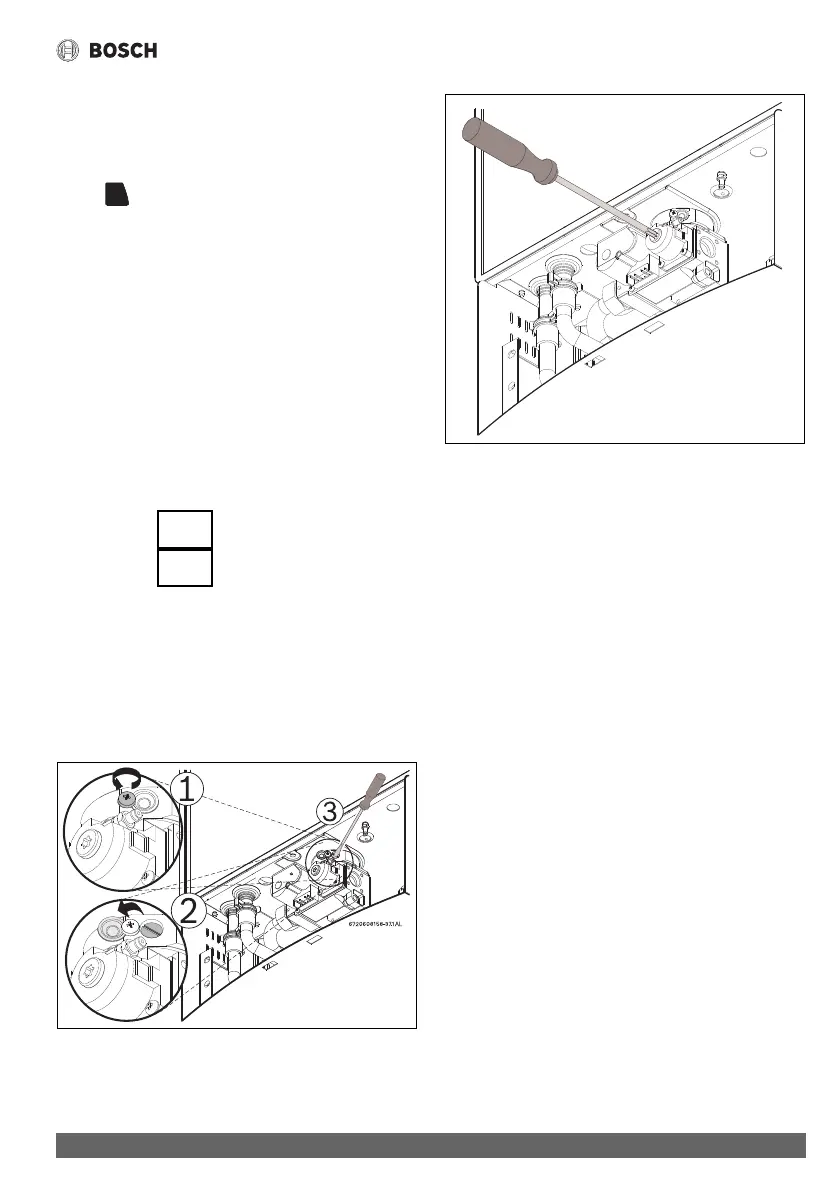
2. If P2 CO
2
level is off:
▶ Remove yellow painted #40 Torx cover from the front of the
gas valve. (fig. 62) A plastic #40 Torx screw will be
revealed.
▶ Turning the plastic #40 Torx screw counter clockwise will
lower P2 CO
2
levels and clockwise will raise P2 CO
2
levels.
Note: This screw adjustment is very sensitive and should be
made in small increments. It may take several minutes for
readings to stabilize.
3. Verify both P1 and P2 CO
2
readings are within the ranges
specified in table 36. Repeat steps 1 and 2 as necessary until
CO
2
values are within the specified ranges.
Final Readings
P1 CO
2
Reading: % CO
2
P2 CO
2
Reading: % CO
2
D. Returning to Service:
1. Return slotted screw cover to original position.
2. Reinstall Torx cover.
3. Remove CO
2
analyzer probe and reinstall flathead screw
with gasket in exhaust collar.
4. Press ON/OFF button to turn OFF the heater and then turn
ON the heater.
5. Heater is ready for normal operation.
Fig. 61 Adjusting P1 CO
2
level
Fig. 62 Adjusting P2 CO
2
level