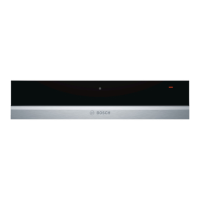
This document is an instruction manual for a Bosch warming drawer, specifically models BIC630N.1B, BIC630N.1A, and BID630N.1A. The manual provides comprehensive guidance on the safe and correct operation, maintenance, and troubleshooting of the appliance.
Function Description
The Bosch warming drawer is designed for domestic use, primarily for keeping food warm and preheating plates. It can be used up to a maximum height of 4000 meters above sea level. The appliance features a fan and heating element to ensure even warming.
The warming drawer offers several functions, selectable via a function selector:
- Off (0): The appliance is switched off.
- Proving yeast dough, thawing frozen food (1): This setting is suitable for delicate tasks like proving yeast dough or gently thawing frozen items.
- Keeping bread warm, thawing frozen food, preheating cups and glasses (2): This setting provides a moderate warmth, ideal for keeping bread warm, thawing various frozen foods, and preheating smaller items like cups and glasses.
- Keeping food warm (3): This is the primary setting for maintaining the warmth of cooked food.
- Preheating crockery (4): This highest setting is specifically for rapidly preheating plates and other ovenware.
An operating indicator light flashes when the appliance is switched on and lights up continuously once the drawer is closed and heating.
Usage Features
Opening and Closing:
For appliances without a handle, the drawer is opened or closed by pressing its middle. It pops out slightly, allowing the user to pull it out completely.
Preheating Ovenware:
Preheating ovenware helps food stay warm for longer. The drawer can hold up to 25 kg of ovenware. For optimal results, ovenware should be distributed over the entire surface. Tall stacks of plates take longer to warm than individual pieces. The recommended setting for preheating crockery is 4. Drinks containers, such as espresso cups, should always be heated on setting 2 to prevent them from becoming excessively hot and causing injury. Preheating time varies depending on the material, thickness, quantity, and arrangement of the ovenware, typically taking 15-25 minutes for dinnerware for 6 people. Ovenware should be removed using oven gloves or an oven cloth as the heating plate and ovenware bases can become very hot.
Keeping Food Warm:
The appliance is suitable for keeping a variety of foods warm, including meat, poultry, fish, sauces, vegetables, side dishes, and soups. To keep food warm, it should be placed in the drawer, and the function selector set to 3. The appliance should be preheated for 10 minutes before adding food. Food should be covered with a heat-resistant lid or aluminum foil to retain warmth and moisture. It is recommended not to keep food warm for longer than an hour. Hot saucepans or pans should not be placed directly on the glass surface immediately after removal from a hot drawer, as this could damage the surface.
Settings Table and Tips:
The manual includes a detailed table outlining various uses for each function selector level, along with specific notes. For example:
- Level 1: Thawing delicate frozen foods (e.g., cream cakes, butter, sausages, cheese) and proving yeast dough (covered).
- Level 2: Thawing frozen foods (e.g., meat, cakes, bread), keeping eggs warm (e.g., cooked eggs, scrambled eggs - preheat crockery, cover food), keeping bread warm (e.g., toast, rolls - preheat crockery, cover food), preheating cups and glasses (e.g., espresso cups), and warming delicate foods (e.g., cooked meat - cover crockery).
- Level 3: Keeping food warm, keeping drinks warm, keeping flatbreads warm (e.g., pancakes, wraps, tacos), keeping cakes warm (e.g., crumbles, muffins), melting blocks of chocolate or couverture chocolate (preheat crockery, reduce liquids), and melting gelatin (open, approx. 20 minutes).
- Level 4: Preheating crockery (not suitable for cups and glasses).
Slow Cooking:
Slow cooking is an ideal method for tender cuts of meat that are to be cooked rare or very rare, resulting in juicy and tender meat. This method offers flexibility in meal planning due to longer cooking times and the ability to keep slow-cooked meat warm easily. Suitable ovenware includes glass, porcelain, or ceramic dishes with a lid, such as a glass roasting dish.
The process involves preheating the warming drawer with ovenware at setting 4. Meat is then seared in a pan over high heat, transferred to the warmed ovenware, covered, and placed back in the warming drawer to complete cooking at setting 3.
Notes on slow cooking emphasize using high-quality, fresh meat, carefully removing sinews and fat. The meat should not be turned, even large joints. It can be cut immediately after cooking. Slow-cooked meat is not as hot as conventionally cooked meat, so serving with hot sauce is recommended. Plates can be warmed in the drawer for the last 20-30 minutes. Slow-cooked meat can be kept warm for up to 45 minutes for small pieces and up to two hours for large pieces by turning the oven back to setting 2.
Maintenance Features
Cleaning:
The appliance should only be cleaned when switched off (function selector at position 0). High-pressure cleaners or steam jets must not be used.
Appliance Exterior:
The exterior should be wiped with water and a mild detergent, then dried with a soft cloth. Caustic or abrasive cleaning products are not suitable. Any contact with such substances on the frontage should be immediately washed off with water.
Stainless Steel Surfaces:
Spots of limescale, grease, cornflour, and egg white should be removed immediately to prevent corrosion. Clean with water and a mild detergent, then dry with a soft cloth.
Appliances with Glass Fronts:
The glass front should be cleaned with glass cleaner and a soft cloth. A glass scraper should not be used.
Heating Plate:
The heating plate can be cleaned using warm water and a little detergent.
Troubleshooting:
The manual provides a troubleshooting guide for common issues:
- Crockery or food stays cold: Check if the appliance is switched on, if there's a power cut, and if the drawer is completely closed.
- Crockery or food does not get warm enough: This may be due to insufficient warming time or the drawer being open for too long.
- Operating indicator light is flashing: Check if the drawer is completely closed.
- Indicator light is flashing quickly when the warming drawer is closed: Contact after-sales service.
- Operating indicator light does not light up: The indicator light may be defective; consult after-sales service.
- Fuse in the fuse box blows: Pull out the mains plug and consult after-sales service.
Customer Service:
For repairs or advice, users are instructed to provide the full product number (E no.) and production number (FD no.), found on the rating plate when the appliance door is open. Contact details for customer service in Great Britain and Ireland are provided. Users are advised to rely on trained service technicians who use original spare parts.
Environmental Protection:
The manual also includes information on environmentally-friendly disposal of packaging and the appliance itself, in accordance with European Directive 2012/19/EU (WEEE).