en Getting to know your appliance
10
--------
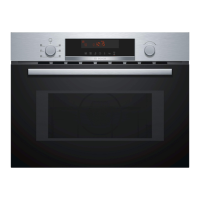
Display
The display is structured so that the information can be
read at a glance in any situation.
The value that you can currently set is highlighted. It is
highlighted by a red bar displayed under the set value.
The value that is highlighted can be changed directly
using the rotary selector.
Display elements
Here you can find a short explanation of the various
display elements.
--------
Drip tray and water tank status display
The status display only lights up when the rip tray or
water tank is required for the selected operating mode.
It can display various statuses and informs the user
when action is required.
Water tank status display
Drip tray status display
Temperature indicator
The red bar at the bottom of the display shows that the
appliance is heating up.
If a heating function is in use, the bar turns red from left
to right as the cooking compartment heats up.
If you are using the grill or steam mode, the entire bar
lights up red immediately.
The bar does not light up when the microwave function
is in use.
When you are preheating the appliance, the optimal
time to place your food in the cooking compartment is
as soon as all five sections of the line have turned red.
Note: Due to thermal inertia, the actual temperature
inside the cooking compartment may be slightly
different to the temperature that you set.
Night mode
To save energy, the display brightness is automatically
reduced to a lower level between 10p.m. and
5.59a.m.
Rotary selector
Use the rotary selector to change the adjustment values
that are shown in the display and highlighted.
In most selection lists, e.g. programmes, the first
selection follows the last.
For values, e.g. weight, you have to turn the rotary
% Programmes Call up the programme selection, use
the rotary selector to select the pro-
gramme number.
0 Time-setting
options
Select the "Time-setting options" sym-
bol and use the rotary selector to set
the time-setting options you require.
] Rapid preheat-
ing/childproof
lock
Press briefly: Activate/deactivate
rapid preheating.
Press and hold: Activate/deactivate
the childproof lock.
~/1 Temperature/
weight
Select and set the temperature/
weight using the rotary selector.
start
l
stop
Start/stop Starts or pauses the operation
Note: Pressing and holding ends the
current operation and the settings for
the operating mode selected are reset
to the default values.
Symbol Meaning
t Timer If the symbol is highlighted, the timer
will appear on the display.
y Cooking time If the symbol is highlighted, the cook-
ing time will appear on the display.
0 Clock If the symbol is highlighted, the clock
will appear on the display.
h:min Hours/minutes Cooking time in hours and minutes
min:sec Minutes/seconds Cooking time in minutes and seconds
D Childproof lock If this symbol lights up, the childproof
lock is activated.
# Drip tray Drip tray status display
$ Water tank Water tank status display
G Rapid heating If this symbol lights up, rapid heating
is activated.
Ê Descaling If the symbol lights up, the appliance
must be descaled.
Symbol Meaning
$
Symbol lights up,
arrow flashes
Water tank is in the tank recess and
needs filling.
Symbol without
arrow flashes
Water tank is not in the tank recess
and needs fitting in place.
Symbol without
arrow lights up
Water tank is in the tank recess. No
further action necessary.
Symbol Meaning
#
Symbol lights up,
arrow flashes
Drip tray is in the tank recess and
needs emptying.
Symbol without
arrow flashes
Drip tray is not in the tank recess.
Insert the drip tray into the tank
recess.
Symbol without
arrow lights up
Drip tray is in the tank recess. No fur-
ther action necessary.
Getting to know your appliance en
11
selector back the other way when you reach the
minimum or maximum value.
Operating modes
Your appliance has various operating modes which
make your appliance easier to use.
You can find more precise descriptions of these in the
corresponding sections.
--------
Types of heating
To make sure you always use the right type of heating
to cook your food, we have explained the differences
and applications below.
The symbols for each type of heating help you to
remember them.
--------
Default values
For each type of heating, the appliance specifies a
default temperature or level. You can accept this value
or change it in the appropriate area.
Steam
You can use the steam function on its own or in
combination with all types of heating and the microwave
function.
To ensure optimum use of the steam function, remove
the wire rack. Insert the glass tray at shelf position
3and insert the steam container into the glass tray.
Steam levels
Different intensity levels are available when using the
steam function. The steam levels can be selected by
touching ". The selected steam level is shown in the
display.
Microwave
A variety of microwave power settings that are suitable
for different types of food and food preparation are
available. The microwave settings do not always
correspond exactly to the wattage used by the
appliance.
The following microwave settings are available.
--------
Operating mode Use
Types of heating
~ "Operating the appliance"
on page 15
There are various finely tuned heating
types for the optimal preparation of
your food.
Microwave
~ "Microwave" on page 16
You can use the microwave to cook,
heat up or defrost your dishes more
quickly.
Steam
~ "Steam" on page 19
There are various finely tuned steam
levels for the optimal preparation of
your food.
Microwave combined opera-
tion
~ "Setting the microwave to
combined operation"
on page 18
In addition to a type of heating, you
can switch the microwave on for this.
Steam combination
~ "Setting the steam
combination" on page 20
In addition to a type of heating, you
can switch the steam function on for
this.
Cleaning
~ "Cleaning function"
on page 31
Different cleaning functions are avail-
able: Descaling and rinsing.
Basic settings
~ "Basic settings"
on page 28
You can change your appliance's
basic settings to suit your needs.
Type of heating Tempera-
ture
Use
<
Hot air 40 °C Let yeast dough rise, defrost
cream cakes.
100-230°C For baking and roasting on one
level.
(
Grill Grill settings:
1= low
2= medium
3= high
For grilling flat items, such as
steaks or sausages, for making
toast, and for au gratin dishes.
4
Hot air grill-
ing
100-190°C For roasting poultry, whole fish
and larger pieces of meat.
Level Intensity Use Display indicator
1 low For defrosting vegeta-
bles, meat, fish and fruit.
2 medium For preparing desserts,
fish and sausages.
3 high For cooking vegetables,
fish, side dishes, for
extracting juice from
fruit and for blanching.
Microwave setting Maximum cooking time
90 1hour 30mins
180 1hour 30mins
360 1hour 30mins
600 1hour 30mins
1000 30minutes
 Loading...