D1255TD Installation Instructions
© 2004 Bosch Security Systems Page 7 74-06859-000-D
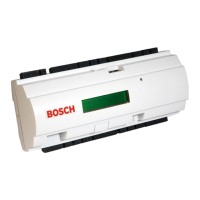
D1255TD
9.0 Wiring the D1255TD
A 4-wire flying lead is required for the data and power connections between the D1255TD and the panel. The D1255TD
comes with a wiring assembly consisting of four color-coded flying leads and a female 4-pin connector plug at one end. The
maximum recommended wire run for each D1255TD is 2000 ft. (610 m) with 22 gauge wire.
To wire the D1255TD:
1. Power down the panel.
2. Using a small flat-bladed screw-driver, gently push in the two bottom tabs of the D1255TD enclosure cover.
As the tabs are pushed back, lift the D1255TD cover away from the base.
3. Set the address switches as shown in section 7.0 DIP Switch Settingss and Associated Functions, p.5.
4. Connect the flying leads of the wiring assembly (provided) to the wires from the panel, as shown in Table 1:
Wiring Connections, p. 2.
5. Turn the command center over and plug in the wiring connector through the opening in the back of the
enclosure base.
6. Mount the command center base in the desired location. Secure it in place using the mounting holes inside the
enclosure base.
7. Replace the cover. Align and insert the top two tabs of the enclosure cover into the top two tab slots of the
enclosure base. Hold the top edges of the enclosure cover and base in position. Push the tabs inward and press
the enclosure and cover together until the cover snaps into place.
8. Press each key on the keypad toward the top of the command center to ensure proper alignment and operation
of each key through the mating keypad faceplate openings.