-10-
Initial Operation
• Loudaudio signals will sound under
certain conditions while operating the
tool. Therefore, keep the tool away from
your ear or other persons. The loud audio
signal can cause hearing damage.
• Protect the tool against moisture and
direct sun light.
• Do not subject the tool to extreme
temperatures or variations in
temperature. As an example, do not
leave it in vehicles for extended periods
of time. In case of large fluctuations in
temperate, allow the tool to adjust to the
ambient temperate and then perform an
accuracy check before continuing work (see
“Leveling Accuracy” section, page 12). In
case of extreme temperatures or variations
in temperature, the accuracy of the tool can
be impaired.
• Avoid heavy impact ordropping of the
tool. After heavy exterior impact on the
tool, an accuracy check should always be
carried out before continuing to work (see
“Leveling Accuracy”).
•Switch the tool off during transport.
When switching off, the leveling unit, which
can be damaged in case of intense
movement, is locked.
Switching On and Off
Do not leave the
switched on tool
unattended and switch the tool off after
use.
Do not point the laser
beam at persons
or animals and do not look into the laser
beam yourself, not even from a large
distance.
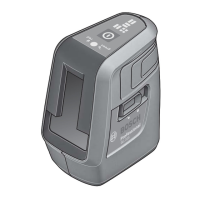
To switch on the tool, slide the On/
Off switch 7 to the “
on”. position (when
working without automatic leveling) or to the
“
on” position (when working with automatic
leveling). Immediately after switching on,
the tool sends laser beams out of the exit
openings 1.
To switch off the tool, slide the On/Off switch
7 to the “off” position. When switching off, the
leveling unit is locked.
When exceeding the maximum permitted
operating temperature of 104°F, the tool
switches off to protect the laser diode. After
cooling down, the tool is ready for operation
and can be switched on again.
Operation
Inserting/Replacing the Battery
Alkaline batteries are recommended for
the tool.
To open the battery compartment 11, slide
the latch 10 in the direction of the arrow and
fold the battery lid up. Insert the batteries.
Insert batteries using correct polarity as
illustrated on the inside of battery lid.
When the batteries become weak, a
5 s audio signal will sound. The battery low
indicator 2 continuously flashes red.
When the batteries are weak when switching
on the tool, the 5 s audio signal will sound
directly after switching on the tool.
Always replace all batteries at the same time.
Only use batteries from one brand and with
the identical capacity.
• Remove the batteries from the tool
when not using it for extended periods.
When storing for extended periods, the
batteries can corrode and discharge
themselves.
LED Charge Condition
Continuous lighting, green 100–75 %
Continuous lighting, yellow 75–35 %
Continuous lighting, red 35–10 %
No light – Battery pack defective
– Batteries empty
If the battery pack or the batteries are running low, the laser
lines will gradually become dimmer.
Immediately replace a fault battery pack or empty batteries.
Preparation
2610056508 GLL3-300 03-20.indd 10 3/5/20 8:14 AM
 Loading...