Indirect Distance Measurement
For indirect length measurements, three measuring
modes are available. Each measuring mode can be
used for determining different distances.
The indirect distance measurement is used to meas-
ure distances that cannot be measured directly be-
cause an obstacle would obstruct the laser beam or
no target surface is available as a reflector. This meas-
uring procedure can only be used in vertical direction.
Any deviation in horizontal direction leads to measur-
ing errors.
Note: Indirect distance measurement is always less
accurate than direct distance measurement. Depend-
ing on application, greater measuring errors are pos-
sible than with direct distance measurement. To im-
prove the measuring accuracy, we recommend using
a tripod (accessory).
The laser beam remains switched on between the in-
dividual measurements.
a) Indirect Height Measurement (see figure B)
Select the indirect height measurement .
Ensure that the measuring tool is at the same height
as the lower measuring point. Then tilt the measuring
tool around the reference level and measure the dis-
tance “1” as for a length measurement (displayed as
a red line).
Upon completion of the measurement,
the result for the sought distance “X” is
displayed in the result line e. The meas-
uring values for the distance “1” and
the angle “α” are displayed in the meas-
ured-value lines d.
b) Double indirect Height Measurement
(see figure C)
The measuring tool can indirectly measure all distanc-
es, which lie in the vertical level of the measuring tool.
Select the double indirect height measurement .
Measure distances “1” and “2” in this sequence as for
a length measurement.
Upon completion of the measurement,
the result for the sought distance “X” is
displayed in the result line e. The meas-
uring values for the distances “1”, “2”
and the angle “α” are displayed in the
measured-value lines d.
Pay attention that the reference plane of the measure-
ment (e.g. the rear edge of the measuring tool) re-
mains exactly at the same location for all individual
measurements within a measuring sequence.
14.142 m
45°
20.000 m
45.0°
8.765 m
-10°
10.154 m
45.0°
12.208 m
c) Indirect Length Measurement (see figure D)
Select the indirect length measurement .
Pay attention that the measuring tool is positioned at
the same height as the sought measuring point. Now,
tilt the measuring tool around the reference plane and
measure distance “1” as for a length measurement.
Upon completion of the measurement,
the result for the sought distance “X” is
displayed in the result line e. The meas-
uring values for the distance “1” and
the angle “α” are displayed in the meas-
ured-value lines d.
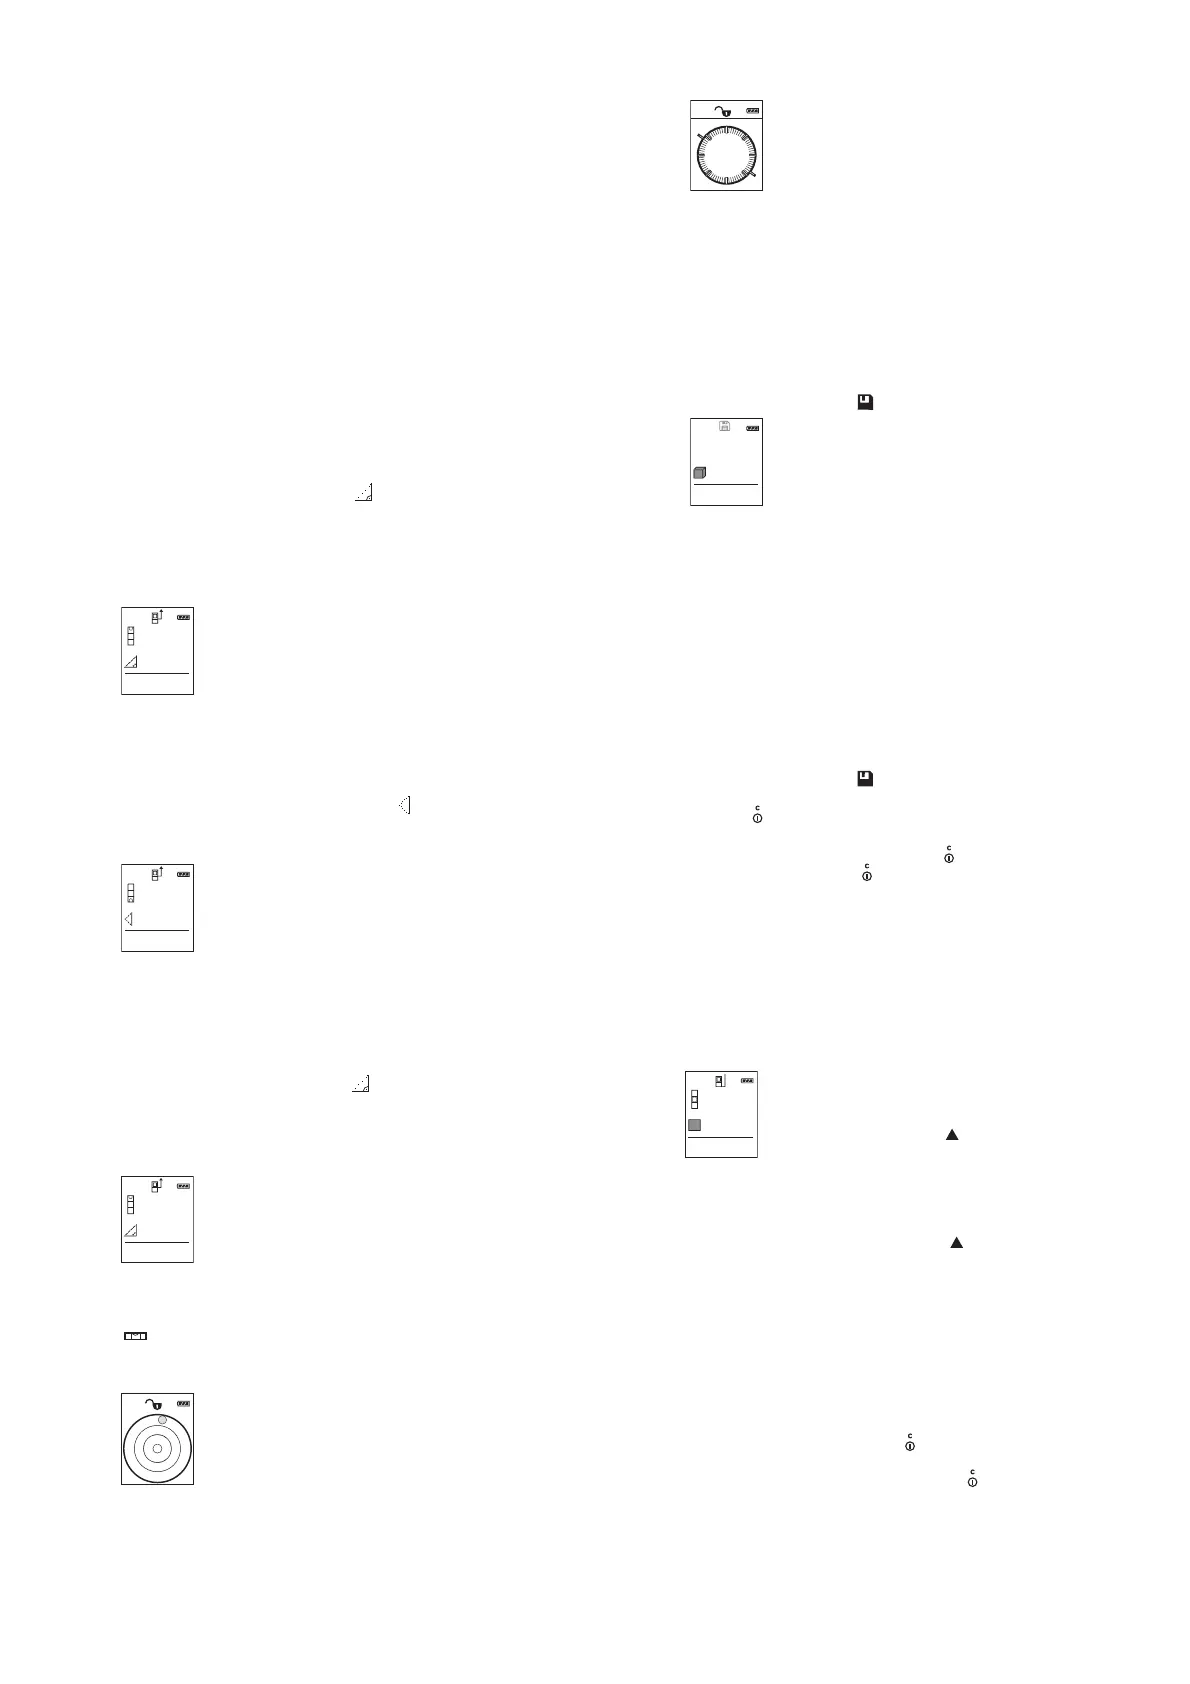
Gradient Measurement/Digital Spirit Level
Select the gradient measurement/digital spirit level
.
The measuring tool automatically switches between
two states.
The digital spirit level is used to check
the horizontal or vertical alignment of
an object (e.g. washing machine, refrig-
erator, etc.).
When the inclination 3° exceeds, the
ball in the display lights red.
10.000 m
60°
20.000 m
60.0°
1°2° 3°
Gradient measurement is used to meas-
ure a slope or incline (e.g. of stairs, rail-
ings, when fitting furniture, laying
pipes, etc.).
The left-hand side of the measuring tool
serves as the reference level for grade
measurement. If the display flashes during measure-
ment, the measuring tool has been tipped too heavily
to the side.
Memory Functions
The value or end result of each completed measure-
ment is automatically saved.
Memory Value Display
Maximum 20 values (measured values or end results)
can be retrieved.
Press the memory button 6 [].
The number of the memory value is
shown at the top of the display, the cor-
responding memory value is shown at
the bottom and the corresponding
measuring function is shown on the left.
Press button 3 [+] to browse forwards
through the saved values.
Press button 8 [–] to browse backwards through the
saved values.
36.0°
430.16 m
8.890 m
3
7.620 m
6.350 m
4
If there is no value available in the memory, “0.000”
is shown at the bottom of the display and “0” at the
top.
The oldest value is located in position 1 in the memo-
ry, while the newest value is in position 20 (when 20
memory values are available). When a further value is
saved, the oldest value in the memory is always delet-
ed.
Deleting the Memory
Press the memory button 6 [ ] to delete the con-
tents of the memory. Then briefly press the On/Off
button 5 [ ] to delete the displayed value.
To delete all values in the memory, press the 4 button
and the On/Off button 5 at the same time, [ ] then
release the On/Off button 5 [].
Adding/Subtracting Values
Measured values or end results can be added or sub-
tracted.
Adding Values
The following example describes the addition of are-
as:
Measure an area as described in section “Area Meas-
urement”, see page 25.
Press the button 3 [+]. The calculated
area and the symbol “+” will be dis-
played.
Press the measuring button 2 [] t o
143.45 m
2
start another area measurement. Meas-
ure the area as described in section “Ar-
ea Measurement”, see page 25. Once the second
measurement is completed, the result of the second
area measurement is displayed below.To show the
end result, press the measurement button 2 []
once more.
Note: With a length measurement, the end result is
displayed immediately.
To exit addition, press button 7 [Func].
Subtracting Values
To subtract values, press button 8 [–]. The subse-
quent steps are the same as for “Adding Values”.
Deleting Measured Values
Briefly pressing the On/Off button 5 [ ] will delete
the last measured value in all measuring functions.
Repeated brief pressing of the On/Off button 5 []
will delete the measured values in reverse order.
+93.406 m
2
50.039 m
0.0°
2

 Loading...