24 | English
2 609 932 684 | (14.10.09) Bosch Power Tools
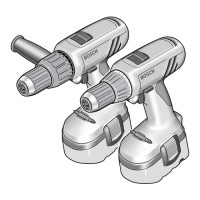
To remove the battery 8, press the unlocking
button 7 and pull out the battery toward the
front. Do not exert any force.
Battery Charge-control Indication (only for
3.0 Ah battery) (see figure A)
The three green LEDs of the battery charge-con-
trol indicator 14 indicate the charge condition of
the battery 8. For safety reasons, it is only pos-
sible to check the status of the charge condition
when the machine is at a standstill.
Press button 13 to indicate the charge condi-
tion. This is also possible when the battery 8 is
removed.
When no LED lights up after pushing button 13,
then the battery is defective and must be re-
placed.
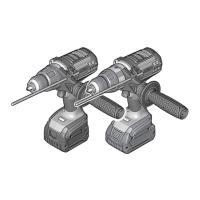
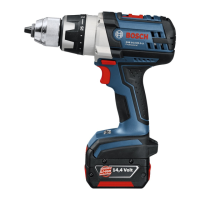
Auxiliary Handle (GSR 18 VE-2 LI/
GSB 18 VE-2 LI) (see figure B)
f Operate your machine only with the auxilia-
ry handle 5.
The auxiliary handle 5 can be set to any position
for a secure and low-fatigue working posture.
Turn the bottom part of the auxiliary handle 5 in
counterclockwise direction and swivel the auxil-
iary handle 5 to the desired position. Then
retighten the bottom part of the auxiliary handle
5 by turning in clockwise direction.
The clamping band 15 of the auxiliary handle
must be seated in the corresponding groove.
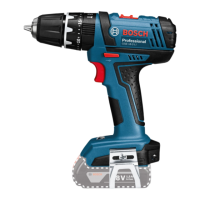
Changing the Tool (see figure C)
f Before any work on the machine (e. g.,
maintenance, tool change, etc.) as well as
during transport and storage, set the rota-
tional direction switch to the centre posi-
tion. Unintentional actuation of the On/Off
switch can lead to injuries.
The drill spindle is locked when the On/Off
switch 11 is not pressed. This makes quick, con-
venient and easy changing of the tool in the drill
chuck possible.
Open the keyless chuck 1 by turning in rotation
direction n, until the tool can be inserted. Insert
the tool.
Firmly tighten the collar of the keyless chuck 1
by hand in rotation direction o until the locking
action (“click”) is no longer heard. This automat-
ically locks the chuck.
The locking is released again to remove the tool
when the collar is turned in the opposite direc-
tion.
Dust/Chip Extraction
f Dusts from materials such as lead-containing
coatings, some wood types, minerals and
metal can be harmful to one’s health. Touch-
ing or breathing-in the dusts can cause aller-
gic reactions and/or lead to respiratory infec-
tions of the user or bystanders.
Certain dusts, such as oak or beech dust, are
considered as carcinogenic, especially in
connection with wood-treatment additives
(chromate, wood preservative). Materials
containing asbestos may only be worked by
specialists.
– Provide for good ventilation of the work-
ing place.
– It is recommended to wear a P2 filter-
class respirator.
Observe the relevant regulations in your
country for the materials to be worked.
Operation
Starting Operation
Inserting the Battery
f Use only original Bosch lithium ion batter-
ies with the voltage listed on the nameplate
of your power tool. Using other batteries can
lead to injuries and pose a fire hazard.
LED Capacity
Continuous lighting 3 x green
≥ 2/3
Continuous lighting 2 x green
≥ 1/3
Continuous lighting 1 x green
<1/3
Flashing light 1 x green
Reserve
OBJ_BUCH-690-007.book Page 24 Wednesday, October 14, 2009 3:14 PM
 Loading...