WW
WW
W
ARNINARNIN
ARNINARNIN
ARNIN
GG
GG
G
LP & NLP & N
LP & NLP & N
LP & N
G ARE EXTREMELG ARE EXTREMEL
G ARE EXTREMELG ARE EXTREMEL
G ARE EXTREMEL
Y FLY FL
Y FLY FL
Y FL
AMMABLE SOAMMABLE SO
AMMABLE SOAMMABLE SO
AMMABLE SO
TT
TT
T
AKE EXTRA PRECAAKE EXTRA PRECA
AKE EXTRA PRECAAKE EXTRA PRECA
AKE EXTRA PRECA
UTIONS WHENUTIONS WHEN
UTIONS WHENUTIONS WHEN
UTIONS WHEN
PERFPERF
PERFPERF
PERF
ORMINORMIN
ORMINORMIN
ORMIN
G ANY WG ANY W
G ANY WG ANY W
G ANY W
ORK TORK T
ORK TORK T
ORK T
O THE HEAO THE HEA
O THE HEAO THE HEA
O THE HEA
TERTER
TERTER
TER
CT-26
page 1 of 1
rev 10/06
Bosch Water Heating
340 Mad River Park, Waitsfield, VT 05673
©BBT NORTH AMERICA CORPORATION
Bosch Group
REPLACING ELECTRO VALVES
MODELS: 1600H, 425HN
Tools
Philips head screwdriver
Pliers
8mm or adjustable wrench.
Preparation
This procedure should be performed by a
licensed gas technician
Before attempting to replace either electro valve,
turn off gas supply to the water heater and turn ON
(I) /OFF (O) switch to the OFF (O) position.
Removing Electrovalve
1. Locate the pilot and burner electro valves on the
lower front of the water heater just to the left of the
temperature control knob and water valve (See
Fig.1).
2. Determine which electro valve is going to be re-
placed. The upper electro valve (orange) is respon-
sible for the pilot and the lower electro valve (green)
is responsible for the burners.
3. Using pliers, disconnect wire at spade connection on
electro valve needing replacement.
4. Remove the two Philips head screws on each side of
the Electrovalve.
5. Remove the electro valve from the gas valve housing.
Be careful not to misplace the rubber o-ring that
seals the electro valve to the gas valve. If a new o-
ring is provided with new electro valve, discard the
original o-ring.
NN
NN
N
OO
OO
O
TE:TE:
TE:TE:
TE: If removing the pilot electro
valve, remove the pilot orifice from the top of the
electro valve by unscrewing the 8mm orifice nut with
appropriate wrench (See Fig. 1). Do not lose the
pilot orifice.
Installing electro valve
1. If installing the pilot electro valve, insert and tighten
the pilot orifice nut from the old valve into the top of
the new pilot Electrovalve.
2. Insert the rubber o-ring into the groove of the electro
valve housing on the gas valve. Failure to do this may
result in a gas leak.
3. Insert electro valve into the electro valve housing on
the gas valve making sure to align the screw holes
between the two.
4. Reconnect wire from the electronic control box to
the electro valve.
5. Turn on the gas supply to the water heater and chekc
for gas leaks.
6. Return the heater to service. If the unit does not
ignite at first, try cycling the water off and on to
make sure that air has been sufficiently bled from
the gas line.
NN
NN
N
oo
oo
o
tt
tt
t
ee
ee
e: It may take several cycling at-
tempts to purge all the air out.
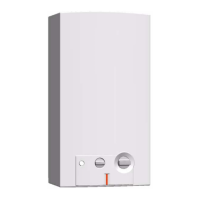
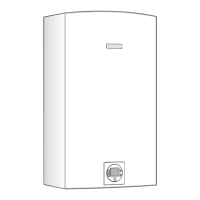
FIGURE 1
Burner electro valvePilot electro valve
 Loading...