English - 4
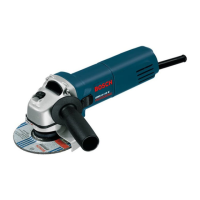
4 Grinder spindle
5 Protection guard
6 Screw
7 Mounting flange
8 Grinding-/cutting disc*
9 Clamping nut
10 Hand guard*
11 Rubber sanding plate*
12 Sanding sheet*
13 Round nut*
14 Cup brush*
* Not all of the accessories illustrated or described are
included as standard delivery.
The machine is intended for cutting, roughing and
brushing metal and stone materials without using
water. For cutting stone, a cutting guide is re-
quired.
For machines with electronic control: With ap-
proved sanding tools, the machine can be used
for sanding and polishing.
Slots in structural walls are subject to the Stand-
ard DIN 1053, Part 1 or country-specific regula-
tions.
These regulations are to be observed under all
circumstances. Before beginning work, consult
the responsible structural engineer, architects or
the construction supervisor.
■ Before any work on the machine itself, pull
the mains plug.
Protection Guard
■ For work with grinding or cutting discs, the pro-
tection guard 5 must be mounted.
Place the protection guard 5 on the spindle collar.
Adjust the position of the protection guard 5 to
the requirements of the work process. Clamp with
the screw 6.
The closed side of the protection guard 5
must always point to the operator.
Auxiliary Handle
■ For all work with the machine, the auxiliary
handle must be mounted.
Screw the auxiliary handle 2 on the right or left of
the machine head depending on the working
method.
Hand Guard
For work with the rubber sanding plate 11 or with
the cup brush 14/disc brush/flap disc, the hand
guard 10 (accessory) is to be mounted. The hand
guard 10 is fastened with the auxiliary handle 2.
■ Before any work on the machine itself, pull
the mains plug.
Use only grinding tools with a permissi-
ble speed at least as high as the no-load
speed of the machine.
Grinding and cutting discs become very
hot while working; do not touch until
they have cooled.
■ Clean the grinder spindle and all parts to be
mounted. For clamping and loosening the
grinding tools, lock the grinder spindle 4 with
the spindle lock button 3.
Actuate the spindle lock button 3 only when
the grinder spindle is at a standstill!
Grinding-/Cutting Disc
■ Observe the dimensions of the grinding discs.
The hole diameter must fit mounting flange 7.
Do not use any reducers or adapters.
For mounting, see the illustration page.
Screw on the clamping nut 9 and tighten with the
two-pin spanner.
Mounting flange for
grinding spindle
M 10
The supporting
flange 7 can be used
on both sides.
Do not use any re-
ducers or adapters.
☞
After mounting the grinding tool and be-
fore switching on, check that the grind-
ing tool is correctly mounted and that it
can turn freely.
Intended Use
Information on Structures
Mounting the
Protective Devices
Mounting the Grinding Tools
7
1 609 929 H79.book Seite 4 Donnerstag, 17. März 2005 1:49 13
9 • 1 609 929 H79 • 05.04
 Loading...
