5
■ Appliance door as a seat, shelf or worktop: Do not sit on the
appliance door, or place or hang anything on it. Do not place
any cookware or accessories on the appliance door.
■ Inserting accessories: depending on the appliance model,
accessories can scratch the door panel when closing the
appliance door. Always insert the accessories into the
cooking compartment as far as they will go.
■ Carrying the appliance: do not carry or hold the appliance by
the door handle. The door handle cannot support the weight
of the appliance and could break.
Your new oven
Here you will learn about your new oven. The control panel and
the individual operating controls are explained. You will find
information on the cooking compartment and the accessories.
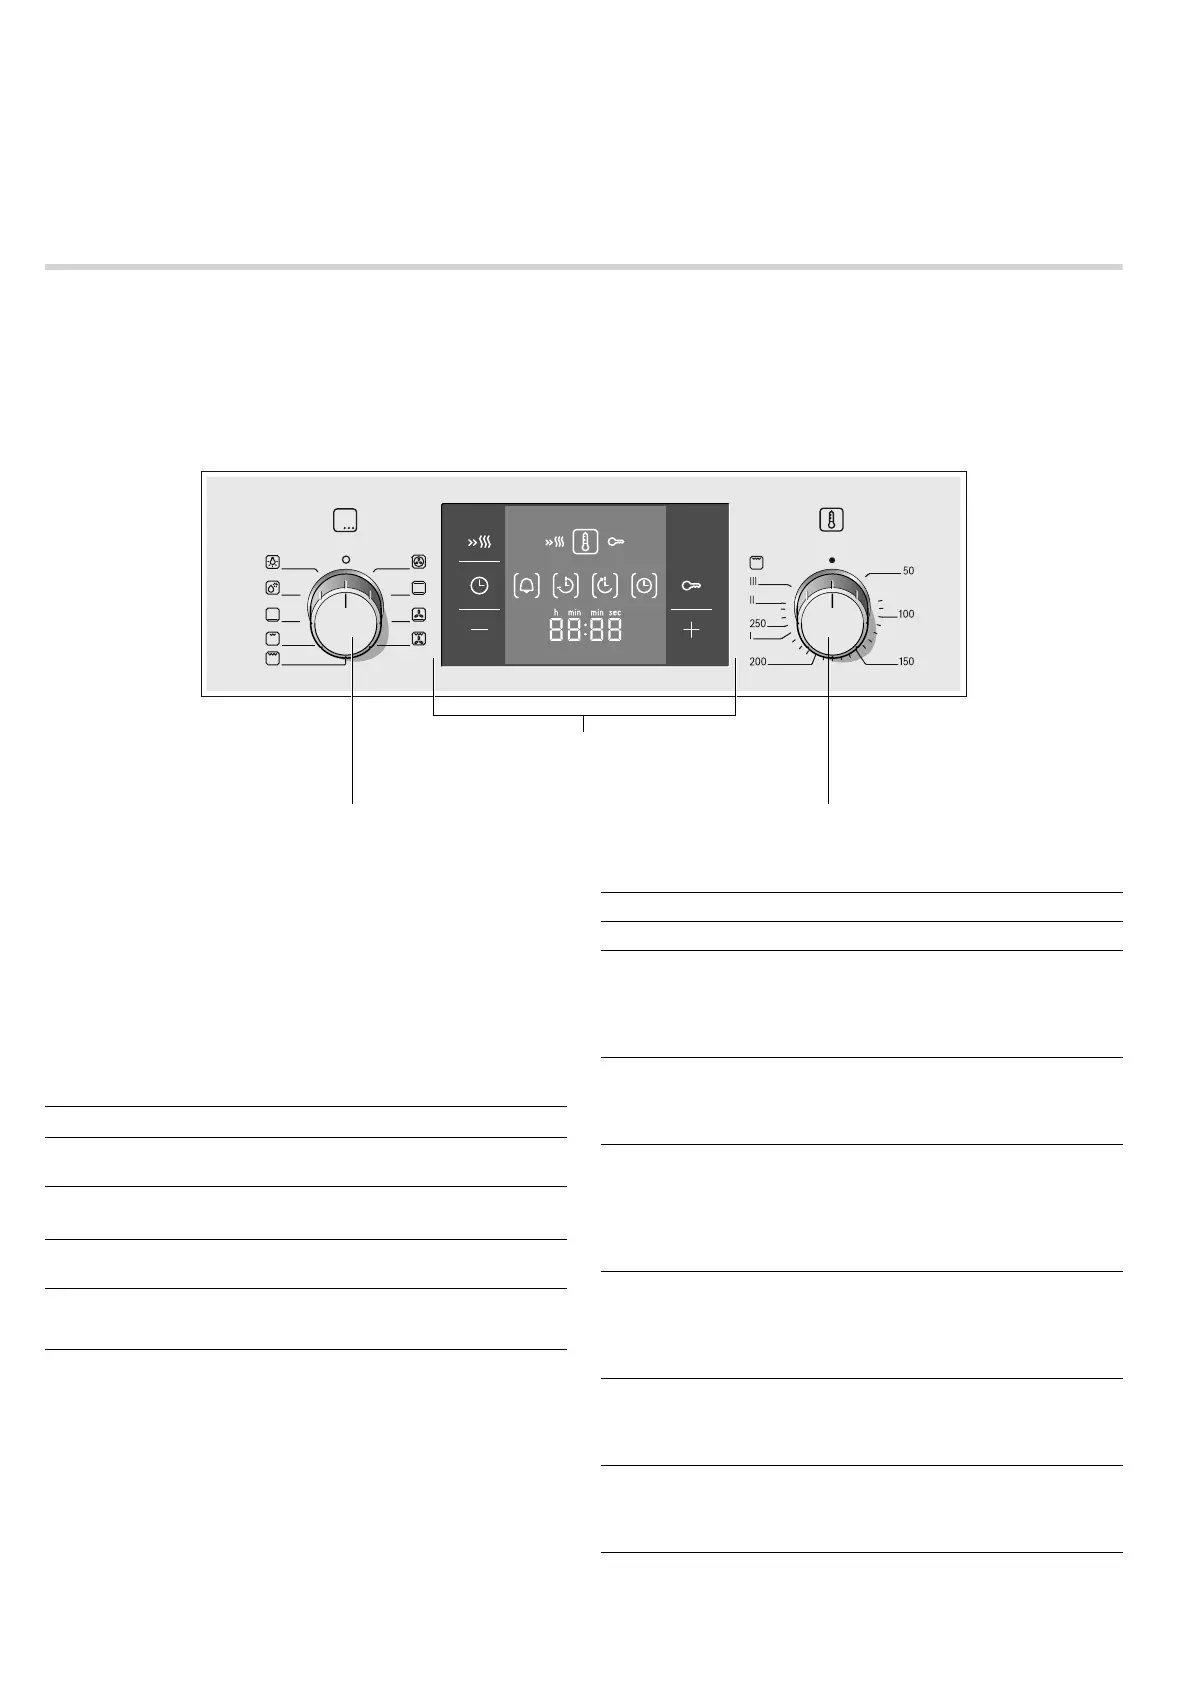
Control panel
Here, you will see an overview of the control panel. All of the
symbols never appear in the display at the same time.
Depending on the appliance model, individual details may
differ.
Control knobs
The control knobs are retractable. To lock it in or out, press the
control knob in the off position.
Buttons
The sensors are located under the individual buttons. They
must not be pressed too firmly. Only touch the corresponding
symbol.
Buttons and display
You can use the buttons to set various additional functions. You
can read the values that you have set in the display.
The time-setting option that is currently selected in the display
is indicated by the brackets [ ] around the corresponding
symbol. Exception: for the clock, the
0 symbol only lights up
when you are making changes.
Function selector
Use the function selector to set the type of heating.
)XQFWLRQVHOHFWRU
%XWWRQVDQGGLVSOD\
7HPSHUDWXUHVHOHFWRU
Button Use
c
Rapid heating Heats up the oven particularly
quickly.
0
Time-setting options
Selects the timer
U, cooking
time
r, end time p and clock 0.
D
Childproof lock Locks and unlocks the control
panel.
A
@
Minus
Plus
Decreases the set values.
Increases the set values.
Setting Use
Û
Off position The oven switches off.
<
3D hot air* For cakes and pastries on one to
three levels. The fan distributes the
heat from the heating ring in the
back panel evenly around the
cooking compartment.
%
Top/bottom heating For cakes, bakes and lean joints of
meat (e.g. beef or game) on one
level. Heat is emitted evenly from
the top and bottom.
6
Pizza setting For the quick preparation of frozen
products without preheating,
e.g. pizza, chips or strudel. The
bottom heating element and the
ring heating element in the back
panel heat up.
7
Hot air grilling For roasting meat, poultry and
whole fish. The grill element and
the fan switch on and off alter-
nately. The fan causes the hot air
to circulate around the dish.
(
Grill, large area For grilling steaks, sausages,
bread and pieces of fish. The
whole area below the grill heating
element becomes hot.
*
Grill, small area For grilling small amounts of
steaks, sausages, bread and
pieces of fish. The centre part of
the grill element becomes hot.
* Type of heating used to determine the energy efficiency class
in accordance with EN50304.