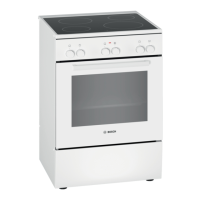
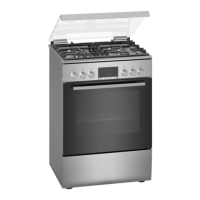
This document describes a Bosch free-standing cooker, model HKR39C2.0, providing comprehensive information on its functions, technical specifications, usage, and maintenance.
Function Description
The Bosch free-standing cooker is designed for preparing meals and drinks in private households. It features a hob with multiple hotplates and a cooking compartment (oven) with various heating types and functions.
Hob Functions:
The hob includes single-circuit hotplates, dual-circuit hotplates, and roasting zones. Each hotplate has a residual heat indicator to show when it is still hot after use. The hotplates regulate temperature by switching heat on and off, even at the highest settings, to protect components and ensure optimal cooking results. Multi-circuit hotplates may switch inner filament circuits and activations on and off at different times.
Oven Functions:
The oven offers several heating types:
- 3D hot air: Bakes or roasts on one or more levels, distributing heat evenly with a fan from a ring-shaped heating element.
- Hot air gentle: Cooks selected dishes gently on one level without preheating, using a fan to distribute heat evenly and cooking in phases with residual heat. This mode is used for energy consumption and efficiency class determination.
- Pizza setting: Heats with the bottom heating element and the ring-shaped heating element for dishes requiring intense heat from below.
- Bottom heating: Emits heat from below, suitable for final baking or cooking in a bain-marie.
- Full-surface grill: Heats the entire area below the grill element for grilling flat items like steak, sausages, toast, or gratins.
- Hot air grilling: Roasts poultry, whole fish, or large pieces of meat, with the grill element and fan switching on and off alternately to circulate hot air.
- Top/bottom heating: Traditionally bakes or roasts on one level, suitable for cakes with moist toppings, with heat emitted evenly from above and below. This mode is used for energy consumption and efficiency class determination in conventional mode.
Additional Oven Functions:
- Rapid heating: Quickly preheats the cooking compartment without accessories.
- Oven light: Illuminates the cooking compartment without heating.
- Cooling fan: Switches on and off based on appliance temperature, expelling hot air above the door to cool the appliance more quickly after operation.
- Childproof lock: Secures the appliance to prevent accidental switching on or changes to settings.
Important Technical Specifications
- Altitude: Operates up to a maximum altitude of 4000 m above sea level.
- Electrical Connection: Requires connection to the mains by a licensed expert, complying with electricity supplier requirements. It is a safety class I appliance and must be used with a safety earth terminal. H 05 VV-F or equivalent cables are recommended. An all-pole isolating unit with a contact clearance of at least 3 mm must be available if the plug is not accessible after installation.
- Power Cord: Must not be damaged, kinked, crushed, modified, or severed. Replacement must be done by a qualified electrician.
- Halogen Bulb: Heat-resistant, 25-watt, 230 V halogen bulbs are used for oven lighting.
- Temperature Range: Oven temperatures can be set from 50-275 °C. Above 250 °C, the appliance reduces the temperature to approx. 240 °C after 10 minutes for most heating types, except top/bottom heating or bottom heating.
- Grill Settings: Offers low (1), medium (2), and high (3) settings for different grilling needs.
- Time-setting options: Timer can be set up to 23 hours and 59 minutes. Cooking time can be set up to 23 hours and 59 minutes. End time can be delayed up to 23 hours and 59 minutes.
Usage Features
Control Panels:
The appliance features touch-sensitive buttons and a display for active functions and time-setting options. A function selector sets heating types and other functions, turning clockwise or anti-clockwise from the zero setting. A temperature selector sets the temperature or grill setting. Four hotplate switches control the output of individual hotplates.
Accessories:
The cooking compartment has five shelf positions, numbered from bottom to top, allowing accessories like wire racks, universal pans, and baking trays to be placed at different heights. Pull-out rails facilitate easy insertion and removal of accessories.
Initial Configuration:
Upon first use or after a power cut, the time flashes in the display (default "12:00") and must be set.
Rapid Heating:
Shortens preheat time, recommended for temperatures over 100 °C, particularly with 3D hot air or top/bottom heating. Food should only be placed in the oven after rapid heating is complete.
Time-Setting Options:
- Timer: Operates independently of the oven, with an audible signal when elapsed.
- Cooking Time: Automatically stops heating once the set time has elapsed.
- End Time: Delays the start of operation so cooking finishes at a desired time.
Energy Saving Tips:
- Preheat only when recommended.
- Use dark-coloured, black-coated, or enamelled baking tins.
- Open the appliance door as little as possible.
- Cook multiple dishes in succession or parallel.
- Switch off the appliance 10 minutes before the cooking time ends for long cooking times.
- Remove unused accessories.
- Defrost frozen food before cooking.
- Use cookware with a base diameter matching the hotplate.
- Cover saucepans with suitable lids, preferably glass lids.
- Turn down to a lower power level early on.
Cooking Recommendations:
Detailed tables provide recommended settings for various foods including cakes, biscuits, bread, pizza, savoury cakes, bakes, gratins, poultry, meat, fish, vegetables, side dishes, yoghurt, and preserving. Tips are provided for achieving optimal results, such as even browning, preventing sticking, and determining readiness.
Acrylamide Reduction:
Tips are provided to minimize acrylamide formation, including keeping cooking times short, cooking until golden brown, using large/thick pieces of food, and setting appropriate temperatures for baking and oven chips.
Drying and Preserving:
Instructions for drying fruit, vegetables, and herbs using hot air, and for preserving fruit and vegetables in airtight jars, including preparation, setting values, and safety warnings.
Maintenance Features
Cleaning Agents:
Specific cleaning agents are recommended for different surfaces:
- Stainless steel: Hot soapy water, special stainless steel cleaning products.
- Enamel, plastic, painted, screen-printed surfaces (control panel): Hot soapy water. Do not use glass cleaner or a glass scraper.
- Knobs: Hot soapy water. Do not remove or scrub.
- Ceramic hob: Glass ceramic cleaner, glass scraper for heavy soiling.
- Plinth drawer: Hot soapy water.
- Door panels/door handle: Hot soapy water.
- Door seal: Hot soapy water.
- Enamelled cooking compartment surfaces: Hot soapy water, vinegar water, oven cleaner for heavy soiling.
- Self-cleaning surfaces: Follow specific instructions for heating the compartment. Do not use oven cleaners or abrasive aids.
- Glass cover on oven light: Hot soapy water, oven cleaner for heavy soiling.
- Rails/Pull-out system: Hot soapy water, brush for heavy soiling. Do not clean pull-out rails in dishwasher.
Cleaning Procedures:
- General cleaning: Wipe with a damp sponge cloth and hot soapy water, then dry with a soft cloth.
- Hob cleaning: Clean after every use when cold, removing heavy soiling with a glass scraper and using glass ceramic cleaner.
- Hob surround cleaning: Clean with hot soapy water and a soft cloth.
- Self-cleaning surfaces: Remove accessories and coarse dirt, then heat the oven with 3D hot air at a specified temperature for one hour. Wipe with a damp cloth after cooling.
- Cleaning aid: A fast alternative for occasional cleaning. Involves adding detergent to water on the oven floor, heating with bottom heating at 80 °C for four minutes, then wiping and drying the compartment after cooling.
- Removing/Attaching Rails: Lift the front rail upwards, unhook, then push the entire rail forward. Reattach in reverse.
- Removing/Attaching Appliance Door: Open locking levers on hinges, close door to limit stop, grip sides, and remove. Reattach in reverse, ensuring hinges engage correctly.
- Removing/Fitting Door Panes: Detach oven door, position on a cloth, press tabs on upper cover to remove. Lift top pane. Reassemble in reverse, ensuring "top right" lettering is correctly oriented.
Troubleshooting:
Provides solutions for common malfunctions such as the appliance not working (check circuit breaker, power cut), not switching off fully (turn function selector to off), time flashing (reset time), childproof lock activated (deactivate), or error messages (reset time, contact customer service).
Replacing Oven Light Bulb:
Instructions for replacing the 25-watt, 230 V halogen bulb, emphasizing safety precautions like disconnecting power and allowing the compartment to cool.
Transportation:
Advises using original packaging, securing all moving parts, placing cardboard between front and rear glass, and transporting upright. If original packaging is unavailable, use protective packaging and avoid holding by the door handle or rear connections.