English | 27
Bosch Power Tools 1 609 929 S69 | (20.4.09)
Auxiliary Handle
f Operate your machine only with the auxilia-
ry handle 3.
Screw the auxiliary handle 3 on the right or left
of the machine head depending on the working
method.
Vibration-dampening Auxiliary Handle
The vibration-dampening auxiliary handle reduc-
es the vibrations, making operation more com-
fortable and secure.
f Do not make any alterations to the auxiliary
handle.
Do not continue to use an auxiliary handle if it
is damaged.
Hand Guard
f For operations with the rubber sanding
plate 16 or with the cup brush/wheel
brush/flap disc, always mount the hand
guard 14.
The hand guard 14 is fastened with the auxiliary
handle 3.
Mounting the Grinding Tools
f Before any work on the machine itself, pull
the mains plug.
f Grinding and cutting discs become very hot
while working; do not touch until they have
cooled.
Clean the grinder spindle 4 and all parts to be
mounted.
For clamping and loosening the grinding tools,
lock the grinder spindle with the spindle lock
button 1.
f Actuate the spindle lock button only when
the grinder spindle is at a standstill. Other-
wise, the machine may become damaged.
Grinding/Cutting Disc
Pay attention to the dimensions of the grinding
tools. The mounting hole diameter must fit the
mounting flange without play. Do not use reduc-
ers or adapters.
When using diamond cutting discs, pay atten-
tion that the direction-of-rotation arrow on the
diamond cutting disc and the direction of rota-
tion of the machine (see direction-of-rotation ar-
row on the machine head) agree.
See graphics page for the mounting sequence.
To fasten the grinding/cutting disc, screw on
the clamping nut 10 and tighten with the two-
pin spanner; see Section “Quick-clamping Nut”.
f After mounting the grinding tool and before
switching on, check that the grinding tool is
correctly mounted and that it can turn free-
ly. Make sure that the grinding tool does
not graze against the protection guard or
other parts.
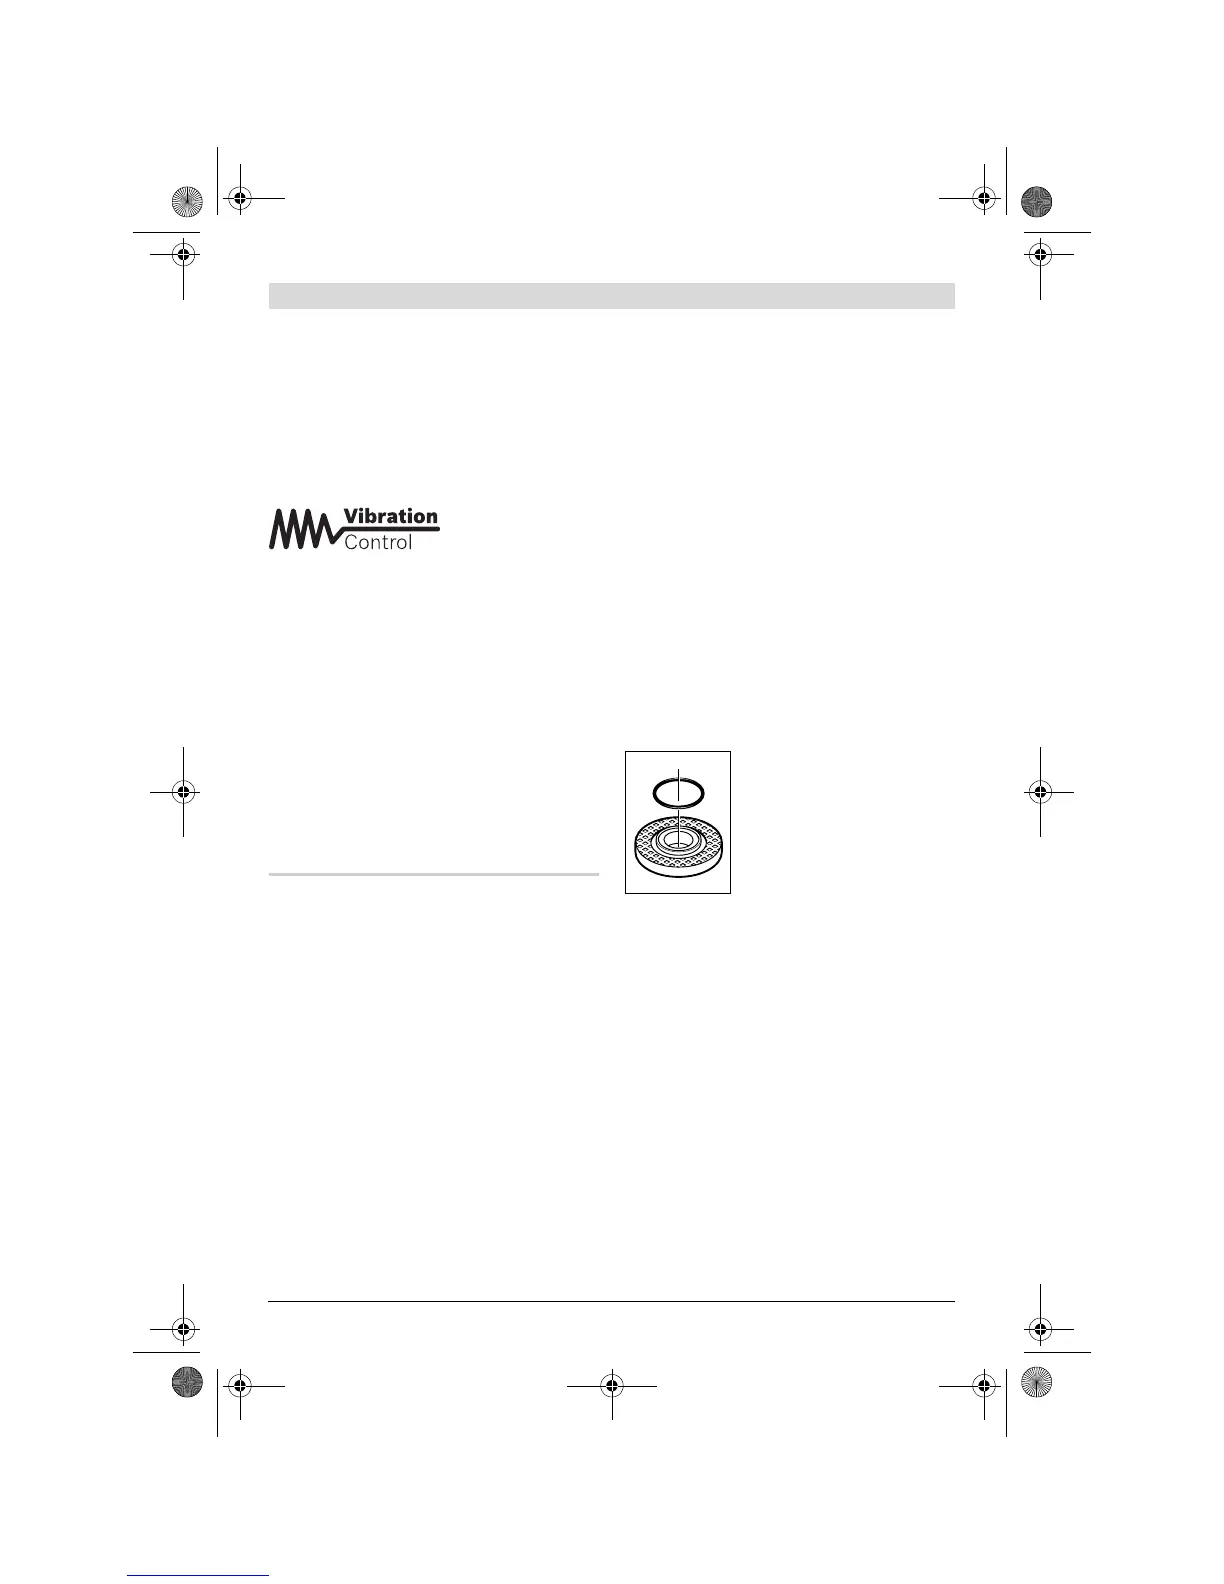
An O-ring (plastic part) is in-
serted in the mounting flange 8
around the centring collar. If
the O-ring is missing or is
damaged, it must in all cases
be replaced (article number
1 600 210 039) before the
mounting flange 8 is mounted.
Flap Disc
f For operations with the flap disc, always
mount the hand guard 14.
Rubber Sanding Plate
f For operations with the rubber sanding
plate 16, always mount the hand guard 14.
See graphics page for the mounting sequence.
Before mounting the rubber sanding plate 16,
put the 2 spacer discs 15 onto the grinder spin-
dle 4.
Screw on the round nut 18 and tighten with the
two-pin spanner.
OBJ_BUCH-976-001.book Page 27 Monday, April 20, 2009 8:21 AM
 Loading...