Router Table Setup
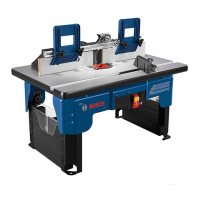
TOOL BOXES (Fig. 14)
Your router table (A) comes with two tool boxes
(9) with hinged covers. The tool boxes are
permanently mounted to the left and right leg
assemblies (8 and 10). Both tool boxes have
hinged covers with latching tabs on the front.
Please note the tool boxes are an integral part of
the leg assemblies and should not be removed.
MOUNTING THE ROUTER TABLE TO A
WORK SURFACE OR WORKBENCH
Before operating the
router in the router table,
ensure that the table legs are fully extended
and in the locked position. The entire unit
(router table with router) is placed on and
secured to a solid, flat, level surface that will
not tip. Such precautionary measures reduce
the risk of table shifting unexpectedly while in
use resulting in property damage or serious
personal injury.
HELPFUL TOOLS AND PARTS
(not included)
•
C-clamps
•
Phillips screwdrivers
•
Small adjustable wrench
•
Electric or hand drill with drill bits
(depending on mounting method used)
•
Fasteners
— 4 #10-16 x 3/4" pan-head wood screws
and 4 washers (for solid wood surfaces
or workbenches)
OR
— 4 3/16" pan-head machine screws,
8 washers, and 4 hex nuts
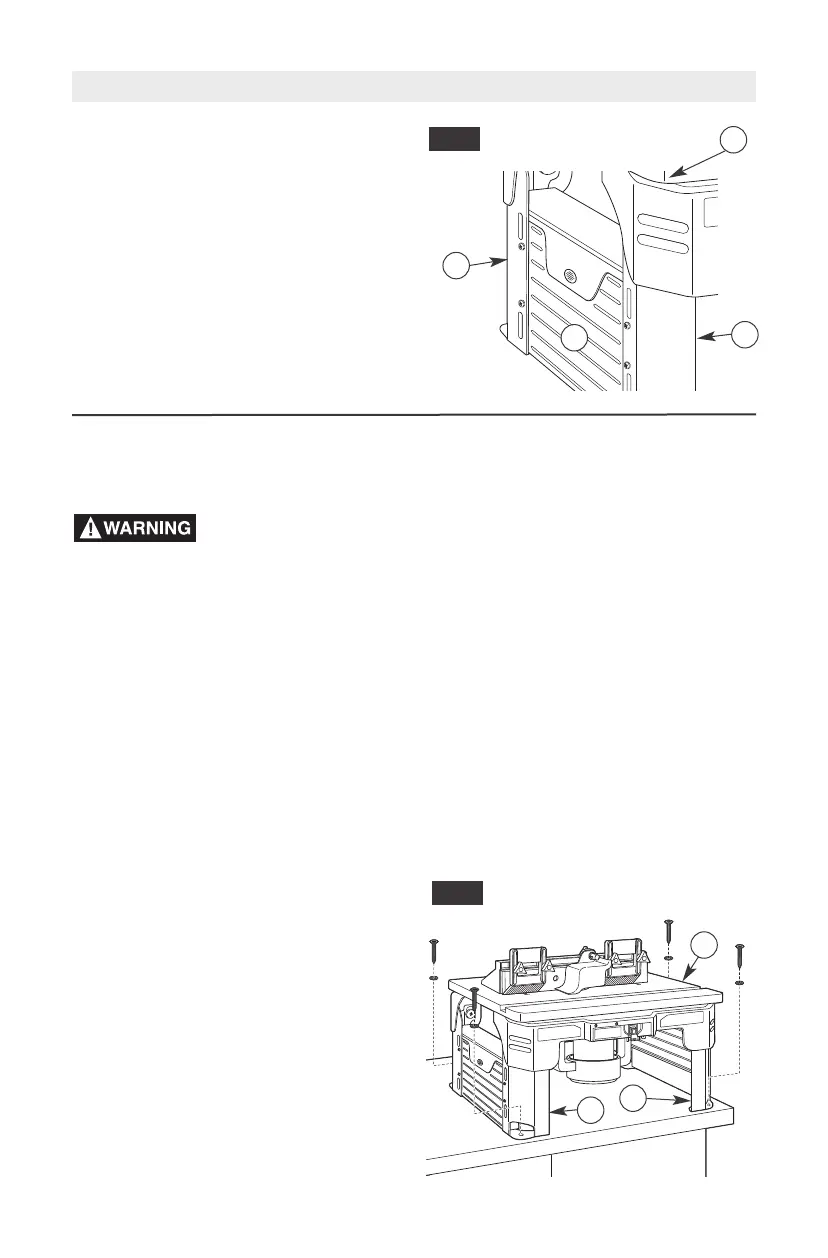
FIG. 15
1. Set the router table (A) on a workbench or
other stable and sturdy surface with the
FRONT (switch side) of the router table
facing towards you.
2.
While holding the router table in the desired
position, mark the location of the four
mounting holes (one in each leg [8 and 10]).
Remove the router table (A) from the
workbench and set it aside.
Drill suitable pilot holes (for wood screws) or
through-holes (for machine screws) at the
marked locations.
Place the router table (A) on the workbench
and align the mounting holes in the router
table legs (8 and 10) with the holes drilled in
the workbench.
Secure the router table (A) in place using the
wood screws and washers (not provided). If
using wood screws, applying a thin coat of
soap or wax to the screw threads will make it
easier to thread the screws into the pilot
holes.
TIGHTEN all screws SECURELY.
3.
4.
5.
6.
7.
10
8
A
17
8
A
9
8
FIG. 14
NOTE: Method 1 and Alternate Method
1 will provide the best support for
the router table.
METHOD 1 (Fig. 15)