CHARGING
RANGE EXTENDER
40
Charging - A Bosch eBike battery from the system generation the smart
system must only be charged using an original Bosch charger from the
system generation the smart system.
Note: The eBike battery is supplied partially charged. To ensure full
capacity of the eBike battery, fully charge the battery in the charger
before using it for the rst time. To charge the eBike battery, read and
follow the instructions in the operating manual for the charger. The eBike
battery can be charged at any state of charge. Interrupting the charging
process does not damage the eBike battery. The eBike battery has a
temperature monitoring function that only allows it to be charged within a
temperature range of 0 °C to 40 °C.
the correct temperature range. Do not reconnect the eBike battery to the
charger until it has reached the correct charging temperature.
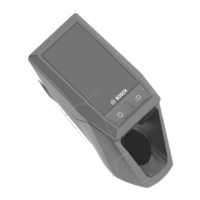
Note: The PowerMore battery charge indicator (2) switches back off as
soon as the eBike battery is switched on. The ve LEDs on the battery
charge indicator (2) show the battery’s state of charge when the eBike
battery is switched on.
Each LED represents approximately 20 % of the charging capacity.
When the eBike battery is fully charged, all ve LEDs will be lit. The eBike
battery’s state of charge when switched on is also shown on the display
of the on-board computer. Read and follow the instructions in the
operating manuals for the drive unit and on-board computer. If the eBike
battery’s capacity is less than 10%, the last remaining LED will ash. Once
charging is complete, disconnect the eBike battery from the charger and
the charger from the mains.
If the temperature of the eBike battery is outside
this charging range, three of the LEDs on the
battery charge indicator (2) will ash. Disconnect
the eBike battery from the charger and let it reach
INSERTING & REMOVING THE POWERMORE
Inserting and Removing the PowerMore Battery
• When inserting the battery into the holder or removing it from the
holder, always switch off the eBike battery and the eBike beforehand.
• Once you have inserted the eBike battery, check that it is correctly
positioned and secure in all directions.
• Only leave the PowerMore battery with the cable connected to the
eBike.
• Once the PowerMore battery is installed, the connection socket of the
battery must not face upwards.
Inserting the PowerMore Battery (see gure B)
To insert the battery (1), place its guide grooves (12) onto the guide rails
(11). Ensure that the battery is aligned correctly and that the battery is
positioned in both guide rails. Slide the battery (1) into the holder (9)
until it audibly clicks into place. Insert the cable connector (4) into the
connection socket (3). Ensure that the cable connector (4) is aligned
correctly. Insert the cable connector (7) into the eBike charging socket (8).
Ensure that the cable connector (7) is aligned correctly.
Removing the PowerMore Battery (see gure C)
Firstly, disconnect the cable (6) by opening the cable lock as directed
by the eBike manufacturer. Pull the release mechanism (14) towards you
and remove the cable connector (7) from the eBike charging socket .
Press the release buttons (13) and remove the cable connector (4) from
the connection socket.
To remove the battery (1), press the release button (10) and pull the
battery (1) sideways out of the holder (9).
Note: As a result of varying designs, the PowerMore battery may need
to be inserted and removed using a different method. Read the eBike
manufacturer’s operating instructions for how to do this.
1
2