57
CBA
C
A
Tools required to remove the Top-Tube Controller:
• T10 Torx Screwdriver
B
INFO: Many bolts will feature a coloured thread-lock patch
applied to secure xing under torque. Repeated removal and
installation may remove the thread-lock over time. In this
scenario ensure the thread is cleaned to remove dirt and
grease. Add new liquid thread-lock during installation.
Top-Tube Controller Removal.
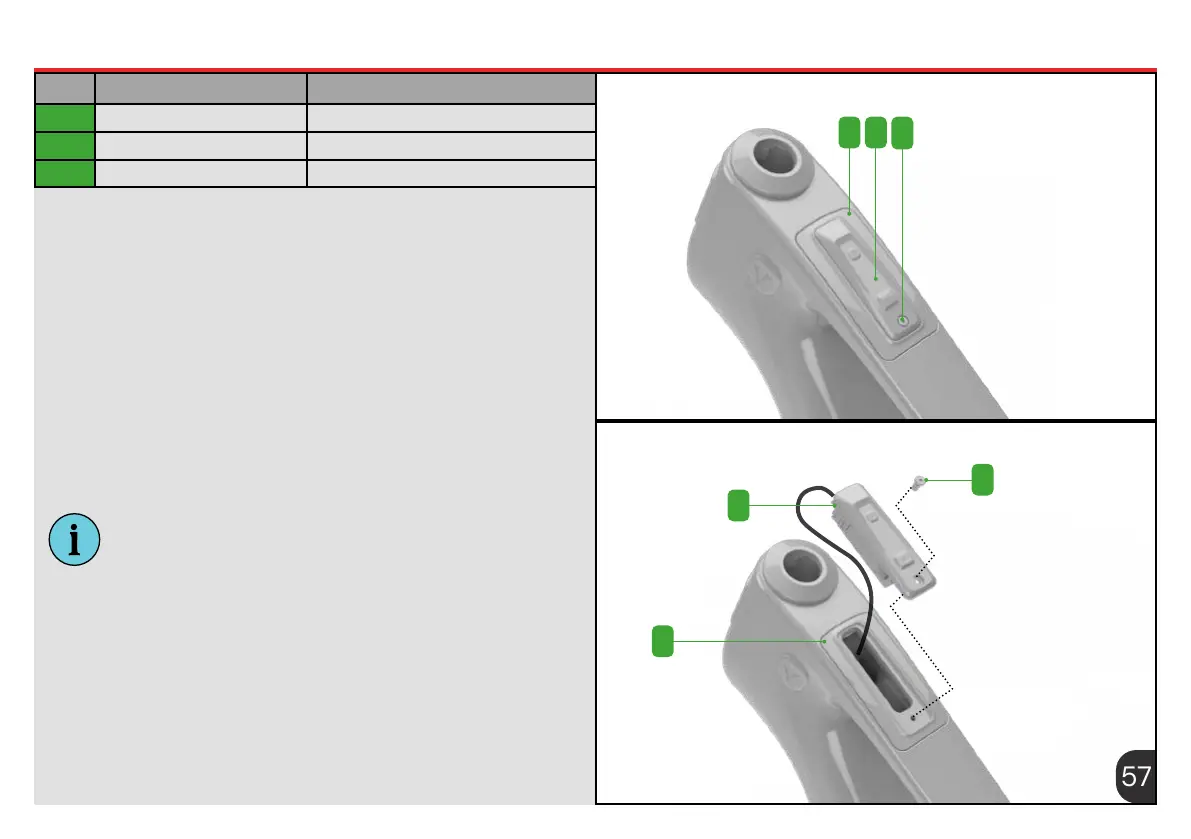
To remove the Top-Tube Controller (B) use a T10 Torx screwdriver
to undo the securing screw (C). Once the screw has been removed,
the Top-Tube Controller (B) is free to be lifted out of the Top-Tube
Adapter (A). The Top-Tube Controller (B) will be connected to the HMI
cable which can be disconnected if required. To install the Top-Tube
Controller (B), reverse the process.
The Top-Tube Adapter (A) can be removed after the Top-Tube
Controller (B) has been freed. The adapter can be changed to suit
future versions of Top-Tube Controllers (B).
11 Electrical Components 11.2 Top Tube Controller
ITEM Part/Location Description Part Code
A Top-Tube Adapter WHYE-31
B Top-Tube Controller EB13100000
C M4 x 30 Screw WHYE-31






 To Next Page