10
DISASSEMBLY PROCEDURE
Figure 8. Woofer Cable Harnesses Removal
Figure 9. Guiding Columns & Waveguide
Mounting Holes
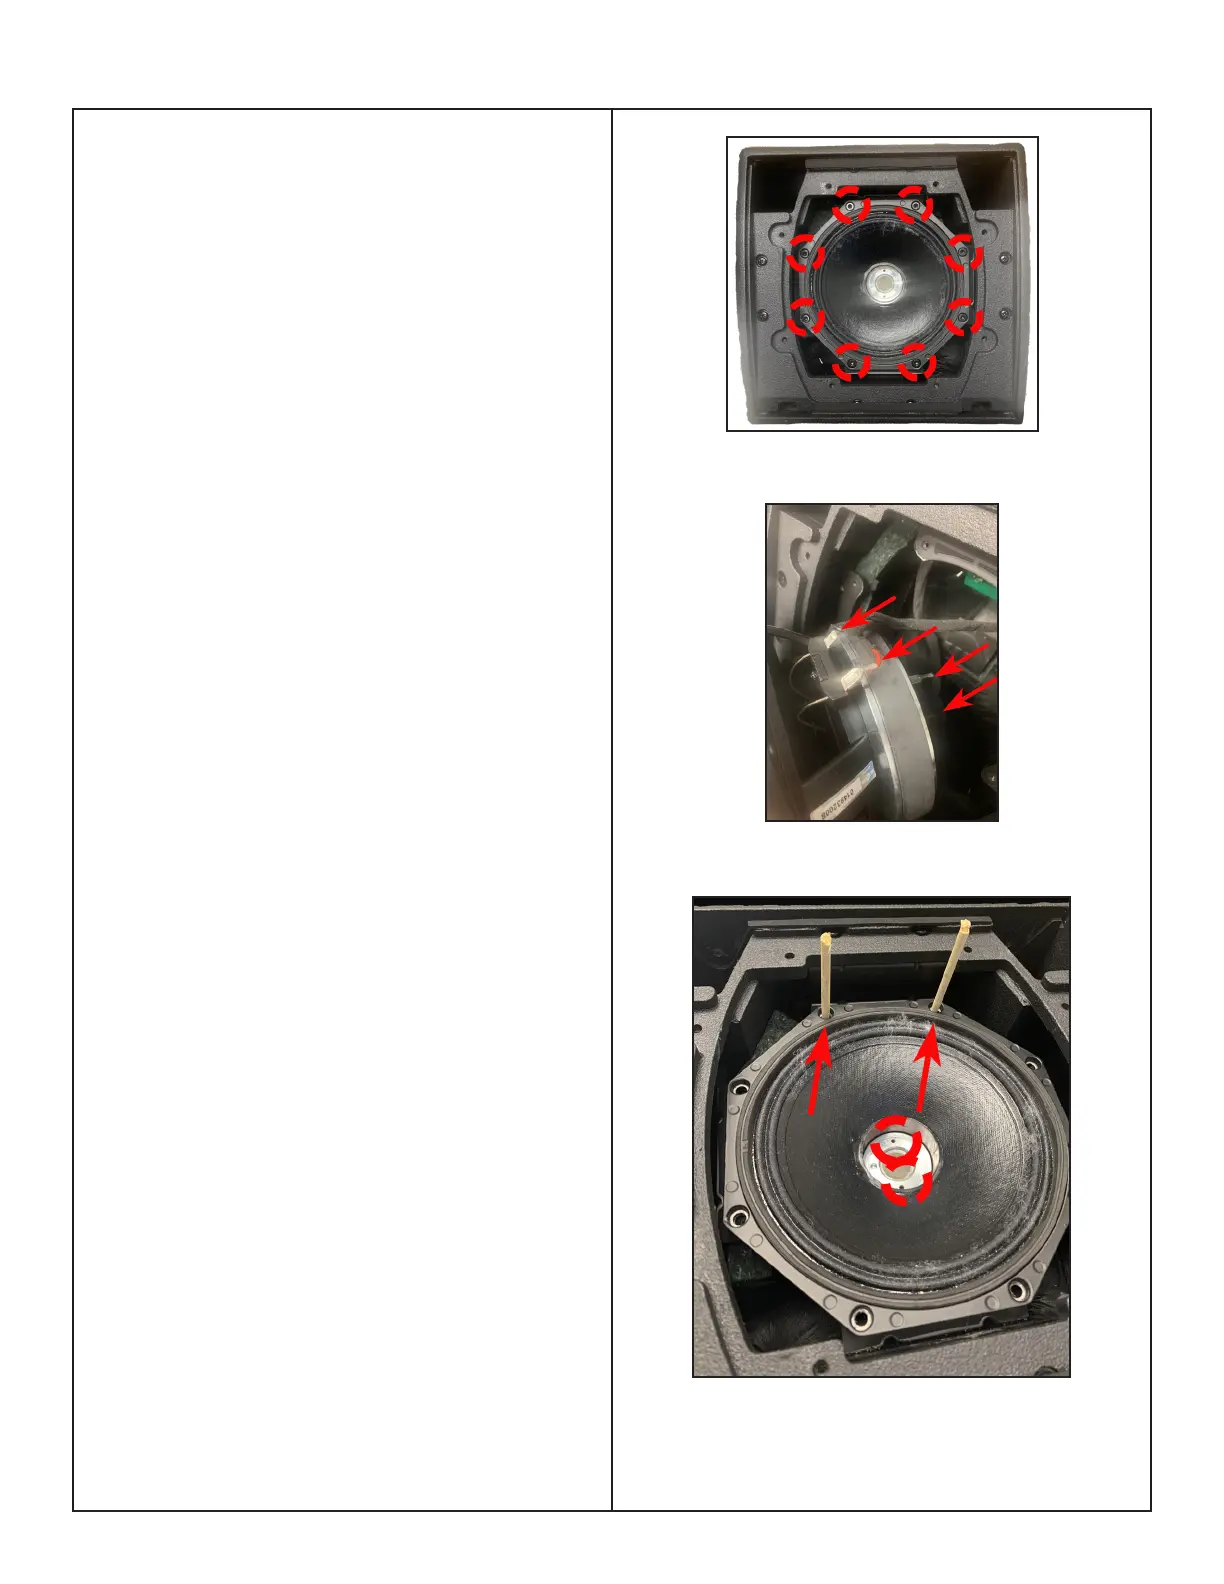
2.6 Remove the 8 screws securing the Woofer
Figure 7.
Re-assembly Note: The install torques of
Woofer is around 20 +/-1 kgf*cm.
2.7 Detach the 4 Cable harnesses from the
Woofer by pressing the white fastener as
indicated in Figure 8.
Note: Be careful When removing the Woofer
because it is very heavy for magnetism.
Re-assembly Woofer:
3.1 Insert the 2 guiding columns (less than
10cm) into the Woofer’s screws holes to en-
sure the Woofer moving downward straightly
as the red arrow indicated in Figure 9.
3.2 The waveguide mounting holes should
be top/bottom as the red circles indicated in
Figure 9.
Note: You can use chopsticks or similar as
guiding columns.
3.3 First install the 6 Screws and then remove
the 2 guiding columns, screw the remaining 2.
Note: Screw the Woofer on the at surface.
Figure 7 Woofer Screws Removal
 Loading...