9
DISASSEMBLY PROCEDURE
Figure 5. Waveguide Screws Removal
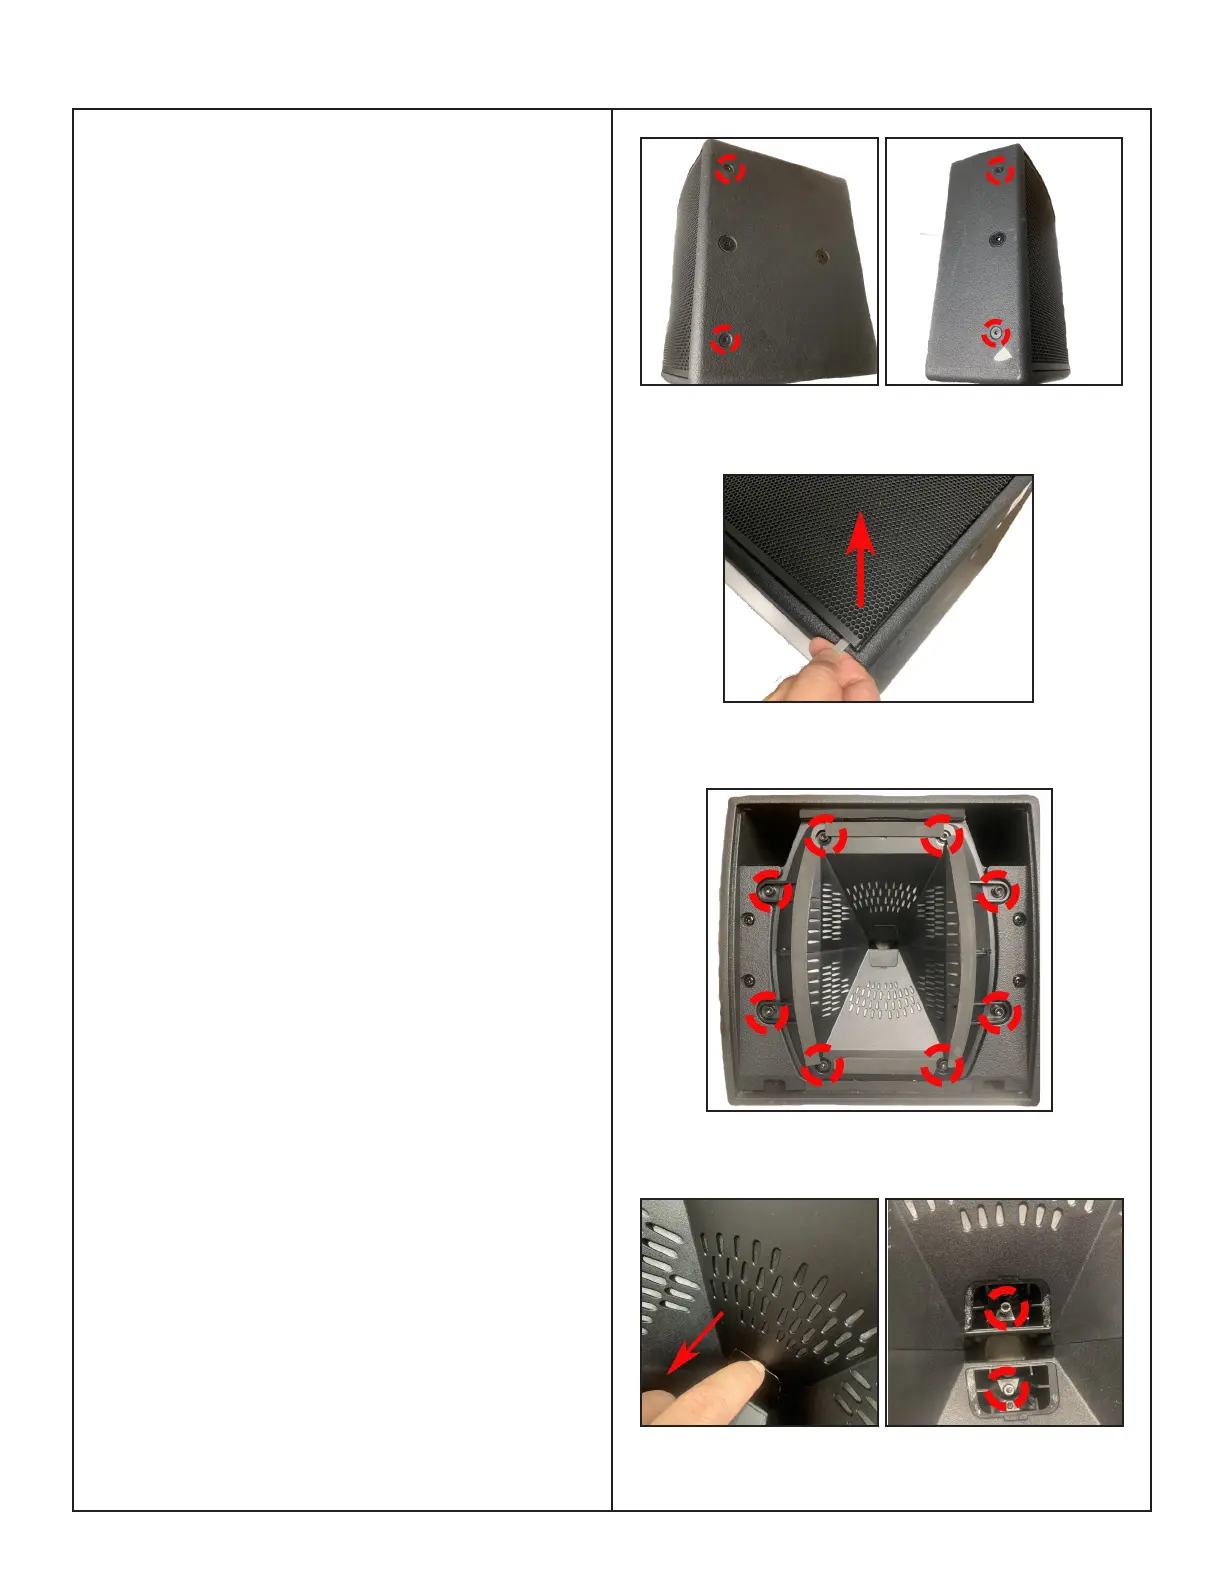
1. Grille Removal
1.1 On the Enclosure of the unit, remove the 4
M6 screws securing the Grille as indicated in
Figure 3.
1.2 Using a spudger, lift up the Grille at the
edge to release the Grille edge from the
snaps. Figure 4.
Re-assembly Note: When installing the Grille,
make sure the grille inserted in the grille
guides.
The install torques of the Grille is around 20
+/-1 kgf*cm.
2. Woofer Removal
2.1 Perform step 1.
2.2. Remove the 8 screws securing the Wave-
guide as indicated in Figure 5.
2.3 Use your nger to peel o the 2 Lexan
Labels. Figure 6 (left).
Re-assembly Note: Both 2 Lexan Labels
need to be reused.
2.4 Remove the 2 screws securing the Wave-
guide as indicated in Figure 6 (right).
2.5 Lift out the Wave-guide from the enclo-
sure.
Figure 4. Grille Removal With Spudger
Figure 3. Grille Screws Removal
Figure 6. 2 Lexan Labels Removal