Equipment Required:
Audio signal generator
Audio amplifi er
Test Connection Information
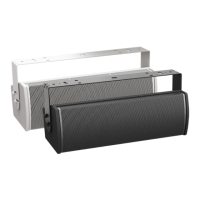
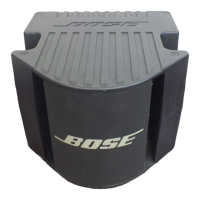
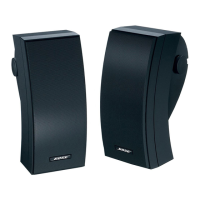
Ensure the Panel has all jumpers (green) in
place as shown. Test connections should be to
the 8 Ohm input terminals as indicated by the
red and white arrows shown in fi gure 10.
1. Phase Test
Note: All acoustic testing from 1.1 through
3.2 should be performed without the grille
attached.
1.1 Refer to disassembly procedure 1, Grille
Removal, Figures 4-5.
1.2 Place one hand on the woofer and gently
touch the dust cap or cone with fi ngers.
Momentarily apply a voltage of 8 VDC + 1
VDC, to the input terminals.
Pass: The woofer where the cone moves
outward.
Fail: The woofer where the cone does not
move outward.
2. Air Leak Test
Note: You can measure the AC input voltage
levels for the following tests at the loudspeaker
barrier strip terminals.
2.1 Apply a signal of 30 Vrms,
+ 2 Vrms, @ 40
Hz and 55 Hz to the speaker input.
2.2 Sweep the input frequency from 20 Hz to
200 Hz. 4 seconds up and 4 seconds down.
2.3 Listen carefully for air leaks at gaskets and
joints. Replace any driver that has a rubbing or
a ticking noise.
3. Rub and Tick Test
3.1 Apply a 25 Vrms, + 1 Vrms, 10Hz signal to
the speaker input.
3.2 Listen carefully for buzzes, rattles, or other
extraneous noises from the drivers or from the
enclosure.
PASS: any speaker that has no rubbing or
ticking noise.
FAIL: any speaker that has a rub, tick,
rattle, buzz, thump or any other extraneous
noise.
4. Low Frequency Sweep with Grille attached
4.1 Reattach Grille.
4.1 Slowly apply 1 Vrms, 20 Hz to 2K Hz, into
the speaker. Listen carefully for any buzzing or
rattles from the grille assembly.
4.2 Replace any speaker that has a buzzing
noise or is defective. There must not be any
buzzes, ticks, rubs, bottoming sounds, air leaks
or other unwanted acoustic noises.
Test Procedures
12
Figure 10
 Loading...