146
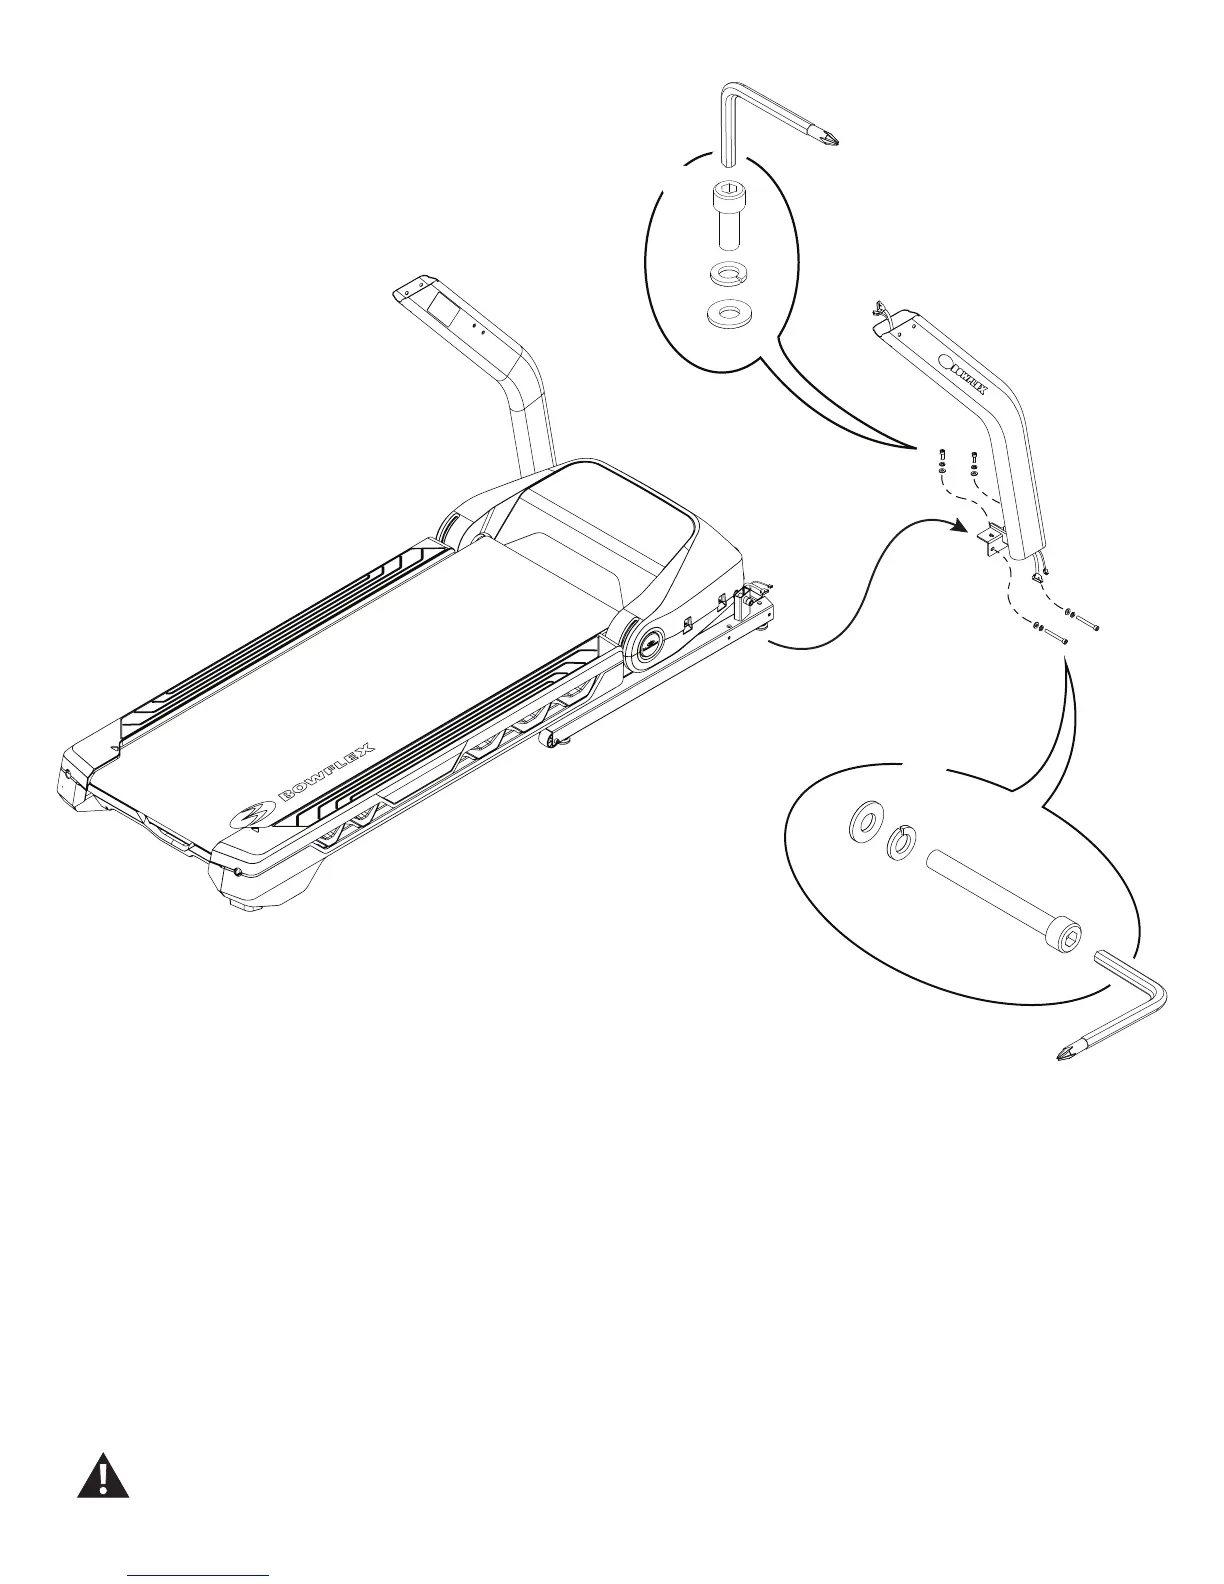
14. Connect the Input/Output (I/O) and Grounding Cables and attach the
new Right Upright to Frame Assembly
Note: This step may take two people to safely hold the Right Upright while
the Cables are connected. Do not crimp the Cables. Do not fully tighten
the Hardware until the Console and Handlebar Assembly has been at-
tached.
15. Re-install all remaining parts that were removed in reverse order.
16. Final Inspection
Inspect your machine to ensure that all hardware is tight and components
are properly assembled.
Do not use until the machine has been fully assembled and
inspected for correct performance in accordance with the
Owner’s Manual.
X2
X2
6mm
6mm
13.Usinga6mmhexwrench,removethehardwarefromtheRightUp-
right.SlightlyremovetheRightUprightfromtheBaseAssemblyexposing
the Input/Output (I/O) and Grounding Cables. Disconnect the Cables and
remove the Right Upright.
Note: Do not crimp cables.