170
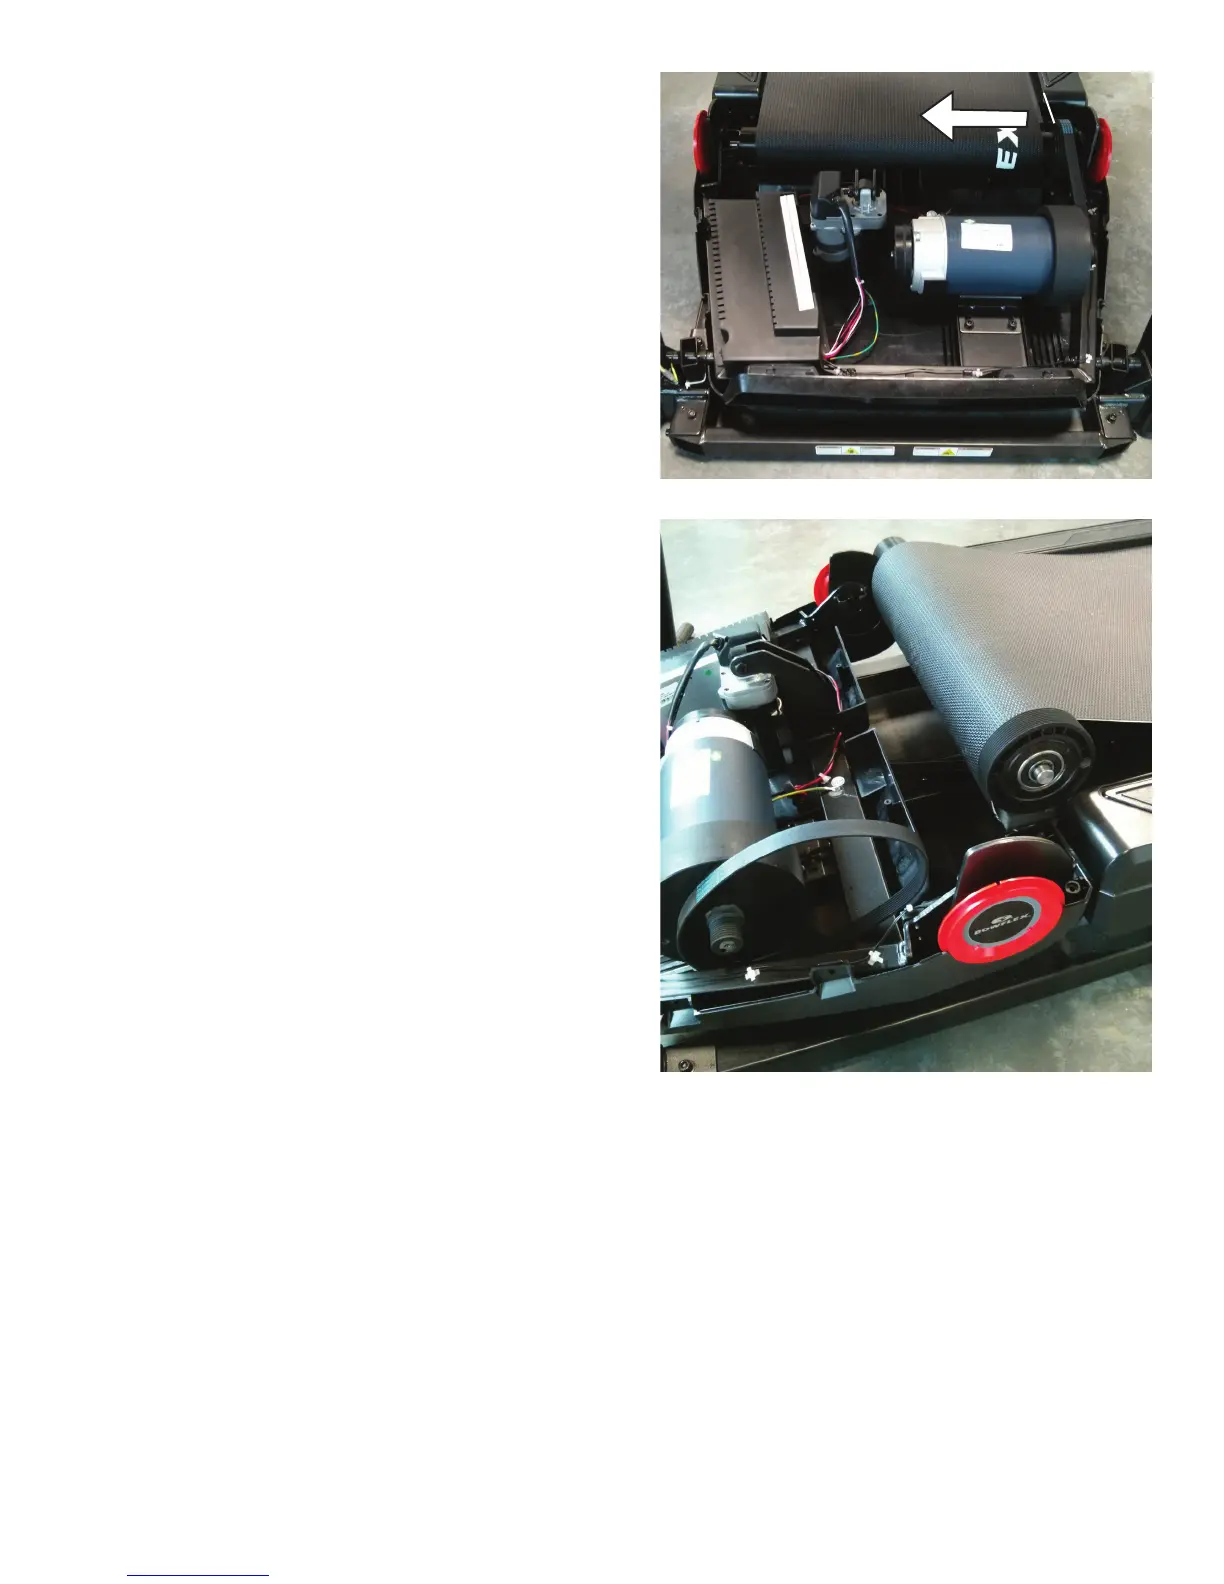
26. From the right side of the machine, grasp onto the Drive Pulley and
pull it along with the Front Roller toward you. The Front Roller will “pop”
out of the channel.
27. Lift and pivot the Front Roller out of the Frame, and slide it out of the
Walking Belt. This will free the Drive Belt from the Front Roller.
28. Slide the Rear Roller out of the Walking Belt.
29. Slide the old Walking Belt off of the Deck, and replace with the new
Walking Belt.
30. Slide the Rear Roller into the new Walking Belt.
31.Usinga6mmhexwrench,re-attachtheAdjustmentBoltstotheRear
Roller.
Note: Be sure to tighten the Adjustment Bolt the same number of turns it
took to loosen the Walking Belt.
32.Usinga6mmhexwrench,re-installthe3screwstotheDeck.
33. Slide the Front Roller into the new Walking Belt in the same orienta-
tion.
34. Loop the Drive Belt around the Front Roller. Insert the end of the Front
Roller with the Drive Pulley into the Frame and pivot the other end into the
Bracket.
35.Usinga6mmhexwrench,attachtheFrontRollertotheBracket.
Note: Tighten the hardware until the Front Roller is centered in the
Bracket.
Drive Pulley