49
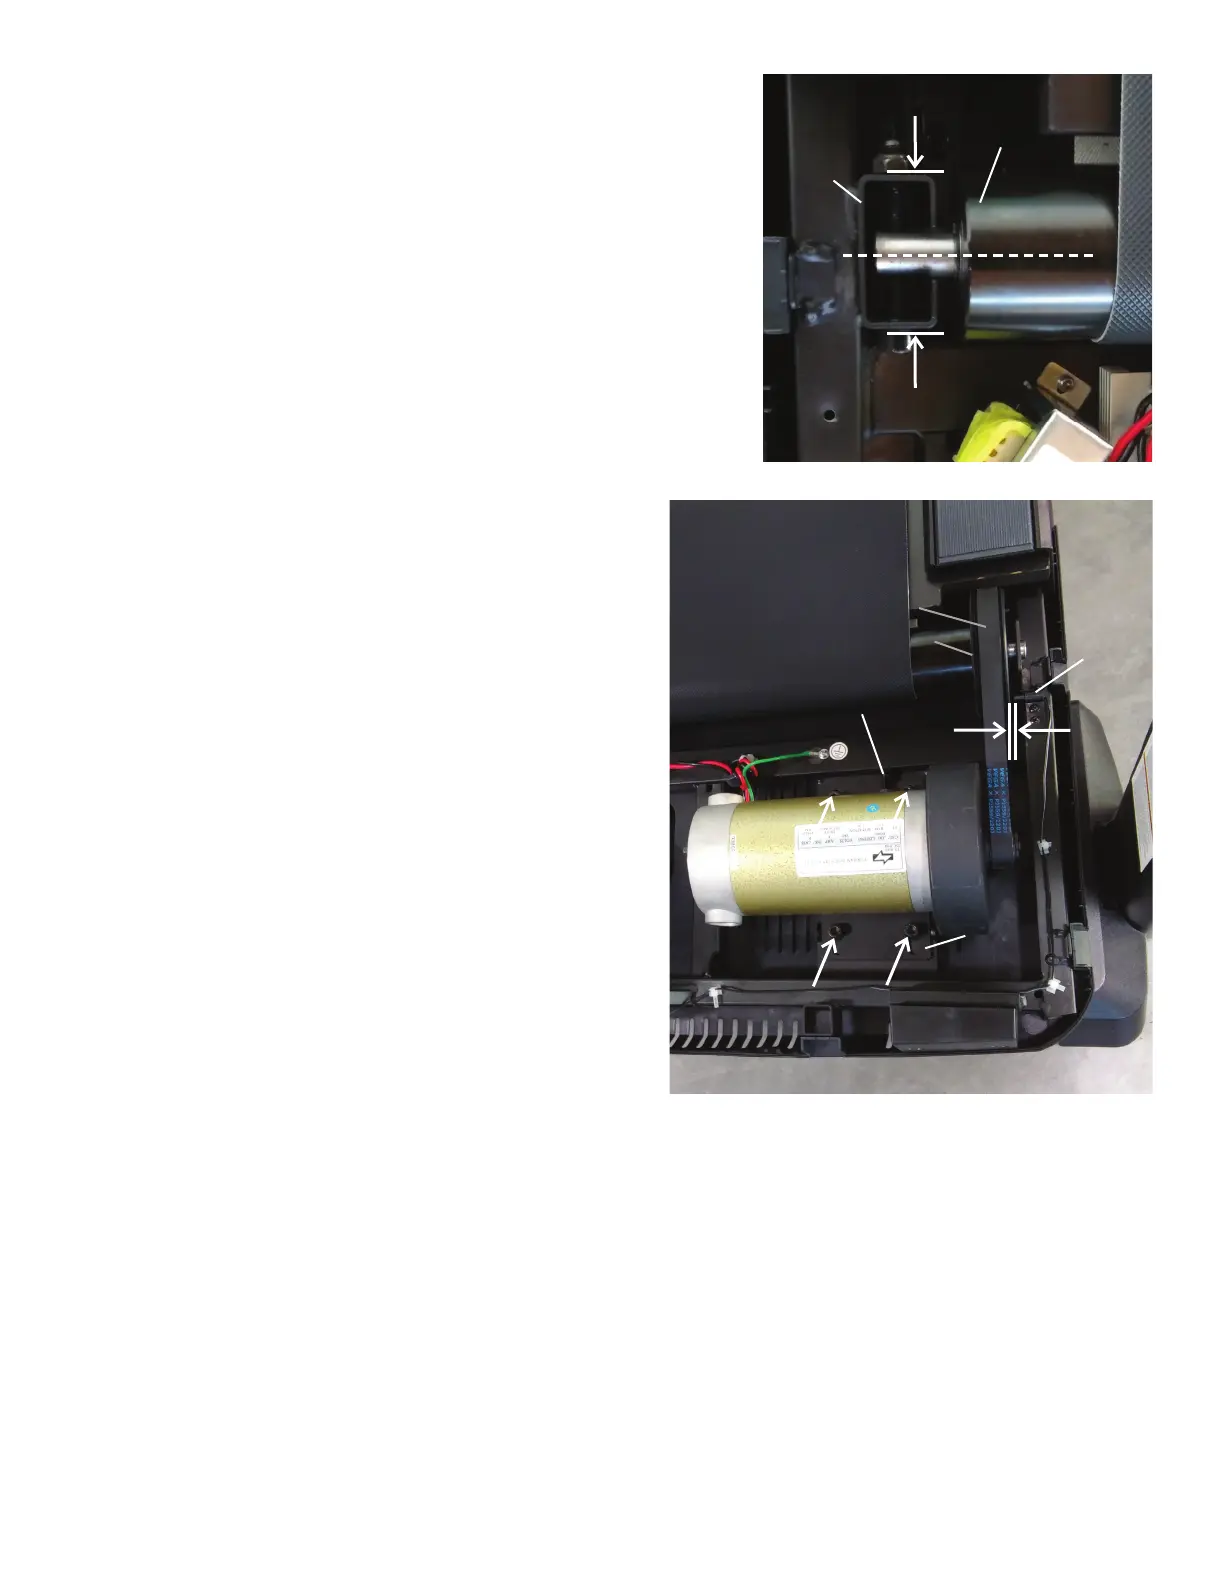
10. Using a 6mm hex wrench, attach the Front Roller to the Bracket.
Note: Tighten the hardware until the Front Roller is centered in the
Bracket.
11. Roll the Drive Pulley clockwise until the Drive Belt is fully installed.
Continue to roll the Belt forward while adding side pressure with ngers to
align as necessary.
12. With the Motor Assembly loosely attached to the Frame, turn the Belt
Tensioner Screw to the previous level. This will tighten the Drive Belt to
the previous tension level.
13. Using a 6mm hex wrench, fully tighten the screws that attach the Mo-
tor Mount to the Frame.
14. Inspect the Speed Sensor to see if it has been moved during the
procedure. If necessary, adjust it to be the appropriate distance from the
Drive Pulley.
15. Re-install all remaining parts that were removed in reverse order.
16. Attach the power cord and turn on the Treadmill by ipping the power
switch to ON.
17. Attach the power cord and turn on the Treadmill by ipping the power
switch to ON.
18. From the Power Up (or Welcome) screen, push and hold down the
PAUSE/STOP button and Down arrow button for about 5 seconds to go
into the Machine Setting Mode. The Console display will show the TOTAL
HOURS screen.
19. Push and hold down the PAUSE/STOP button and Down arrow button
for about 5 seconds to go into the Engineering Mode.
Belt Tensioner Screw
Drive Belt
Motor
Mount
Speed
Sensor
Drive Pulley
Bracket
Front Roller