4
Tools
Included Not included
Assembly
Before Assembly
6HOHFWWKHDUHDZKHUH\RXDUHJRLQJWRVHWXSDQGRSHUDWH\RXUPDFKLQH)RUVDIHRSHUDWLRQWKHORFDWLRQPXVWEHRQDKDUGOHYHOVXUIDFH$OORZDZRUNRXWDUHD
RIDPLQLPXPP[P´[´
Hardware
The hardware is pre-installed on the machine
Note:6HOHFWHGSLHFHVRI+DUGZDUHKDYHEHHQSURYLGHGDVVSDUHVLQWKHWRROEDJ%HDZDUHWKDWWKHUHPD\EHUHPDLQLQJ+DUGZDUHDIWHUWKHSURSHUDVVHPEO\RI\RXU
machine.
PPPP
PPPP
4 mm
6 mm
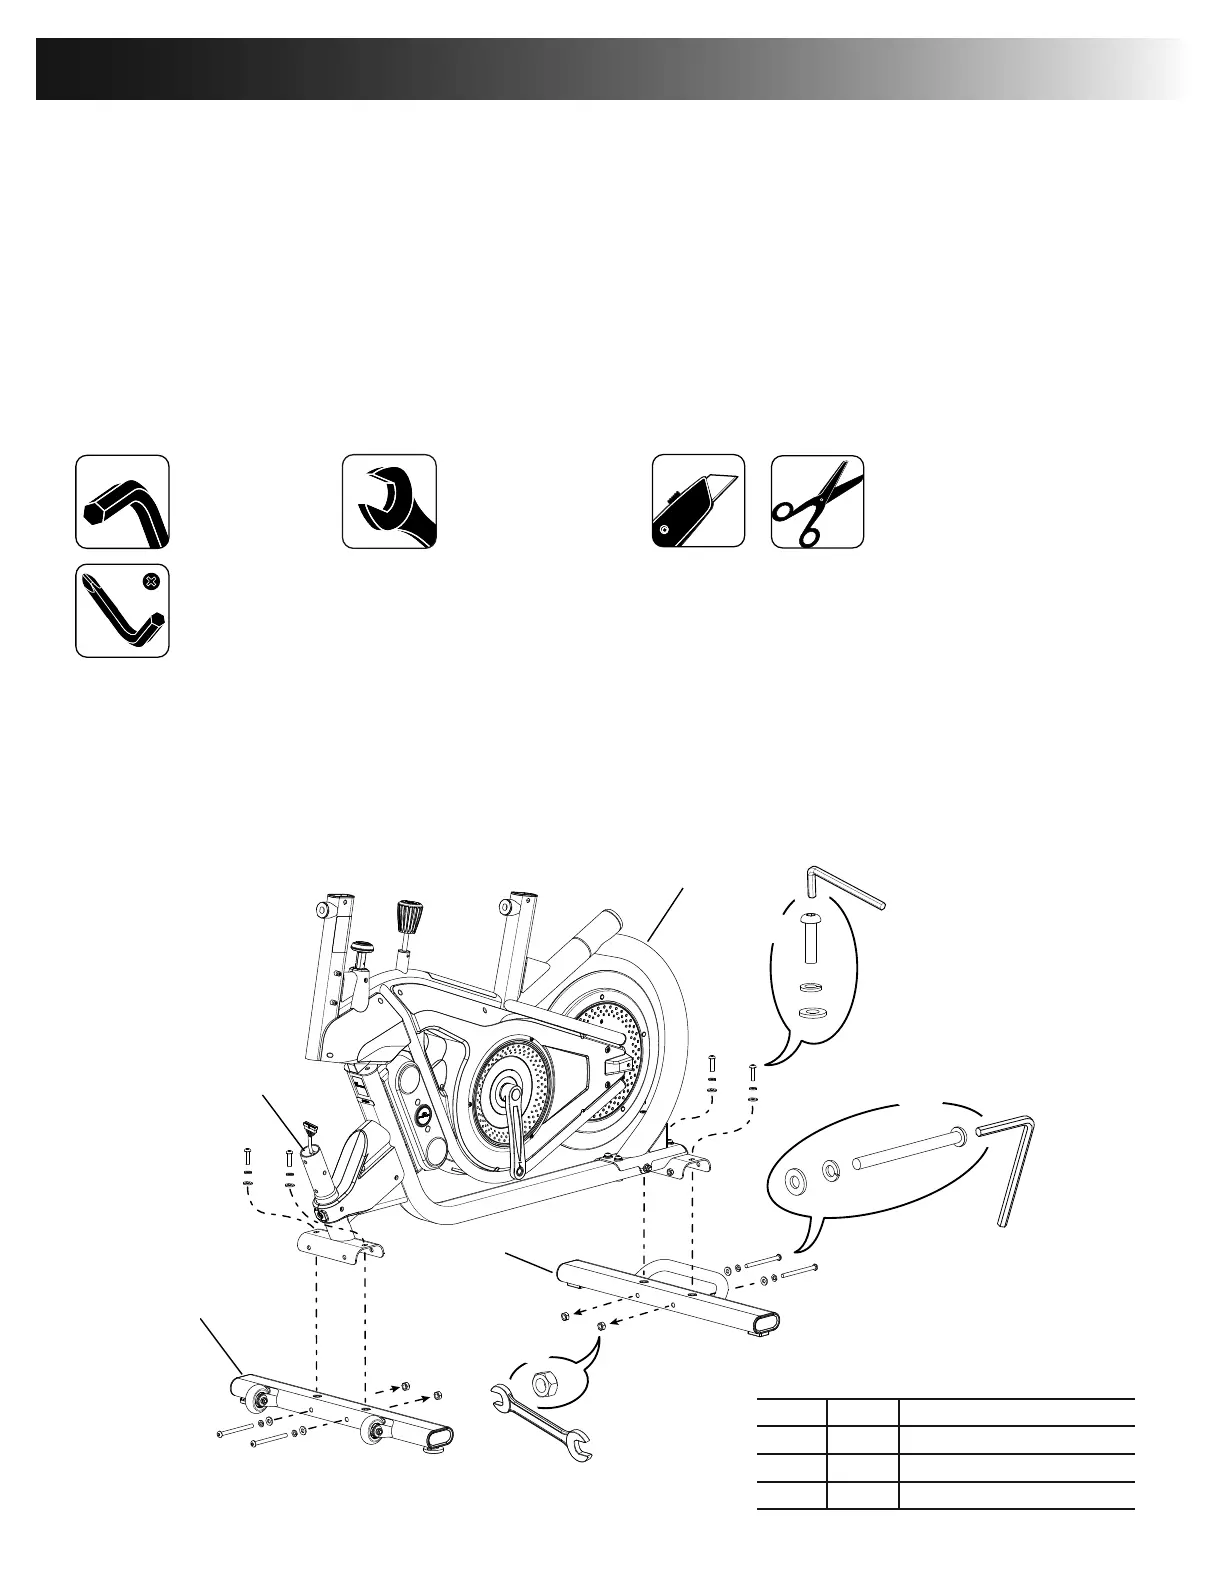
Step 1.
Step 1a.
Note: The hardware (*) is pre-installed on the Stabilizers. Remove the hardware and discard the nut (a) from the end of the long screws. If a tube is pre-installed in the stabilizer bracket,
remove and discard safely.
NOTICE: Leave the plastic cap (b) in place to prevent the Frame cable connector from falling down into the machine.
Make sure the hardware is fully tightened.
(recommended)
*
*
*
*
*
*
X4
X4
6mm
6mm
3
2
1
a
X4
13mm
b
Item Qty Description
Frame
Stabilizer, Front
3 Stabilizer, Rear