6
Item Qty Description Item Qty Description Item Qty Description
Seat 8 (QG&DS6HDW3RVW 9 $GMXVWPHQW+DQGOH
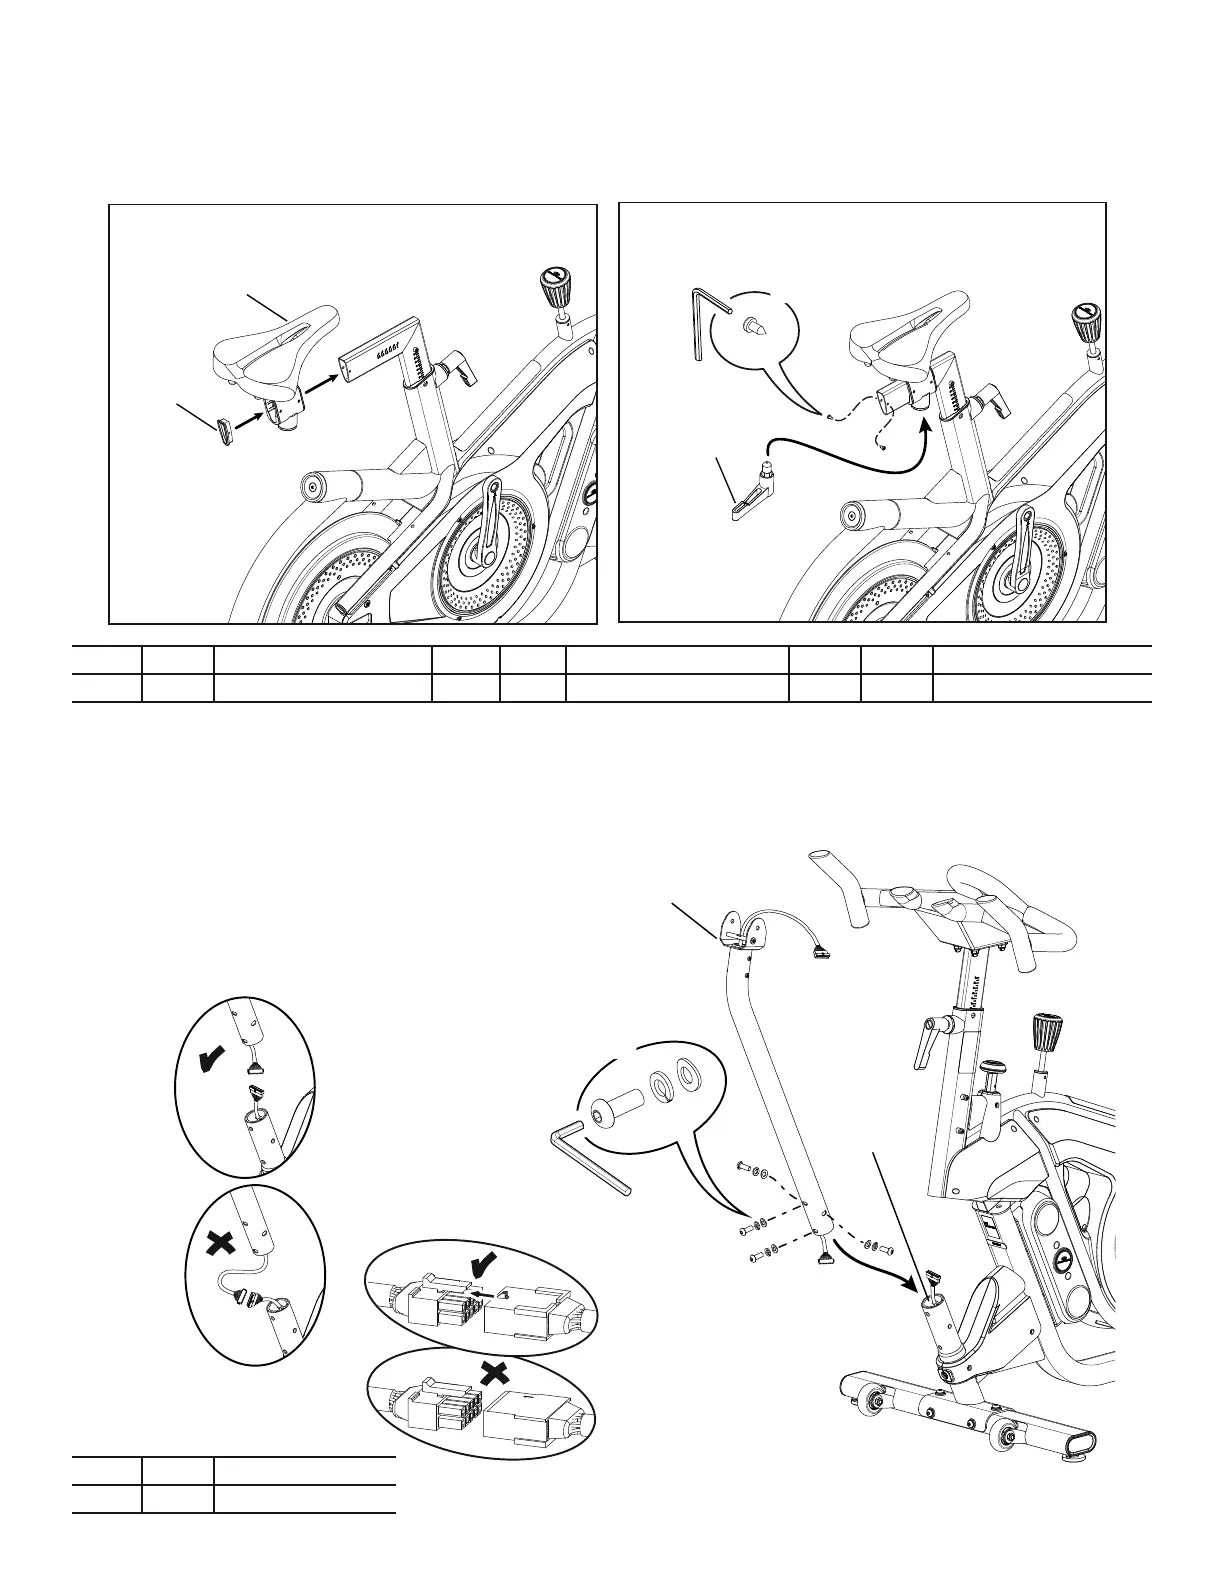
Step 2.
NOTICE:5HPRYHWKHSUHLQVWDOOHGVFUHZVIURPWKH6HDW6WHP6OLGHWKH6HDW$VVHPEO\LQWRSRVLWLRQ$WWDFKWKH6HDW6WHP(QG&DSZLWKWKHKDUGZDUH0DNHVXUHWKH6HDW$GMXVW-
PHQW+DQGOHLVIXOO\WLJKWHQHGWRVHFXUHWKH6HDW$VVHPEO\RQWKH6HDW6WHP:KHQIXOO\WLJKWHQHGWKH$GMXVWPHQW+DQGOHPXVWSRLQWUHDUZDUG
Note: To adjust theseat after the handle is tightened, loosen the handle. Move the seat to the desired position and tighten the handle. Pull the handle out to disengage and turn so that it
points rearward, then release.
Step 3.
NOTICE: Leave the plastic cap (b) in place to prevent the Frame cable connector from falling down into the machine. &RQQHFWWKH)UDPHFDEOHWRWKH&RQVROH0DVWFDEOH5HPRYHWKH
ZLUHIURPWKH&RQVROH0DVWFDEOHDQGSXOOWKHFRQQHFWRURXWRIWKH&RQVROH0DVWWXEH*HQWO\SXOOWKHFDEOHIURPWKHWRSRIWKH&RQVROH0DVWWRUHPRYHDOOVODFN'RQRWFULPSWKHFDEOHV
5HPRYHWKHSUHLQVWDOOHGKDUGZDUHIURPWKH)UDPH&DUHIXOO\VOLGHWKH&RQVROH0DVWLQWRSRVLWLRQ+DQGWLJKWHQWKHVFUHZVDWWKHEDVHRIWKH&RQVROH0DVW
7
8
9
*
X2
4mm
Item Qty Description
&RQVROH0DVW
10
*
*
*
6mm
X4
b