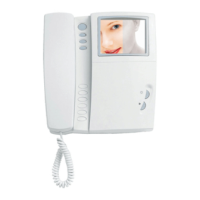
LYNEABASIC
IT
-
INSTALLAZIONE
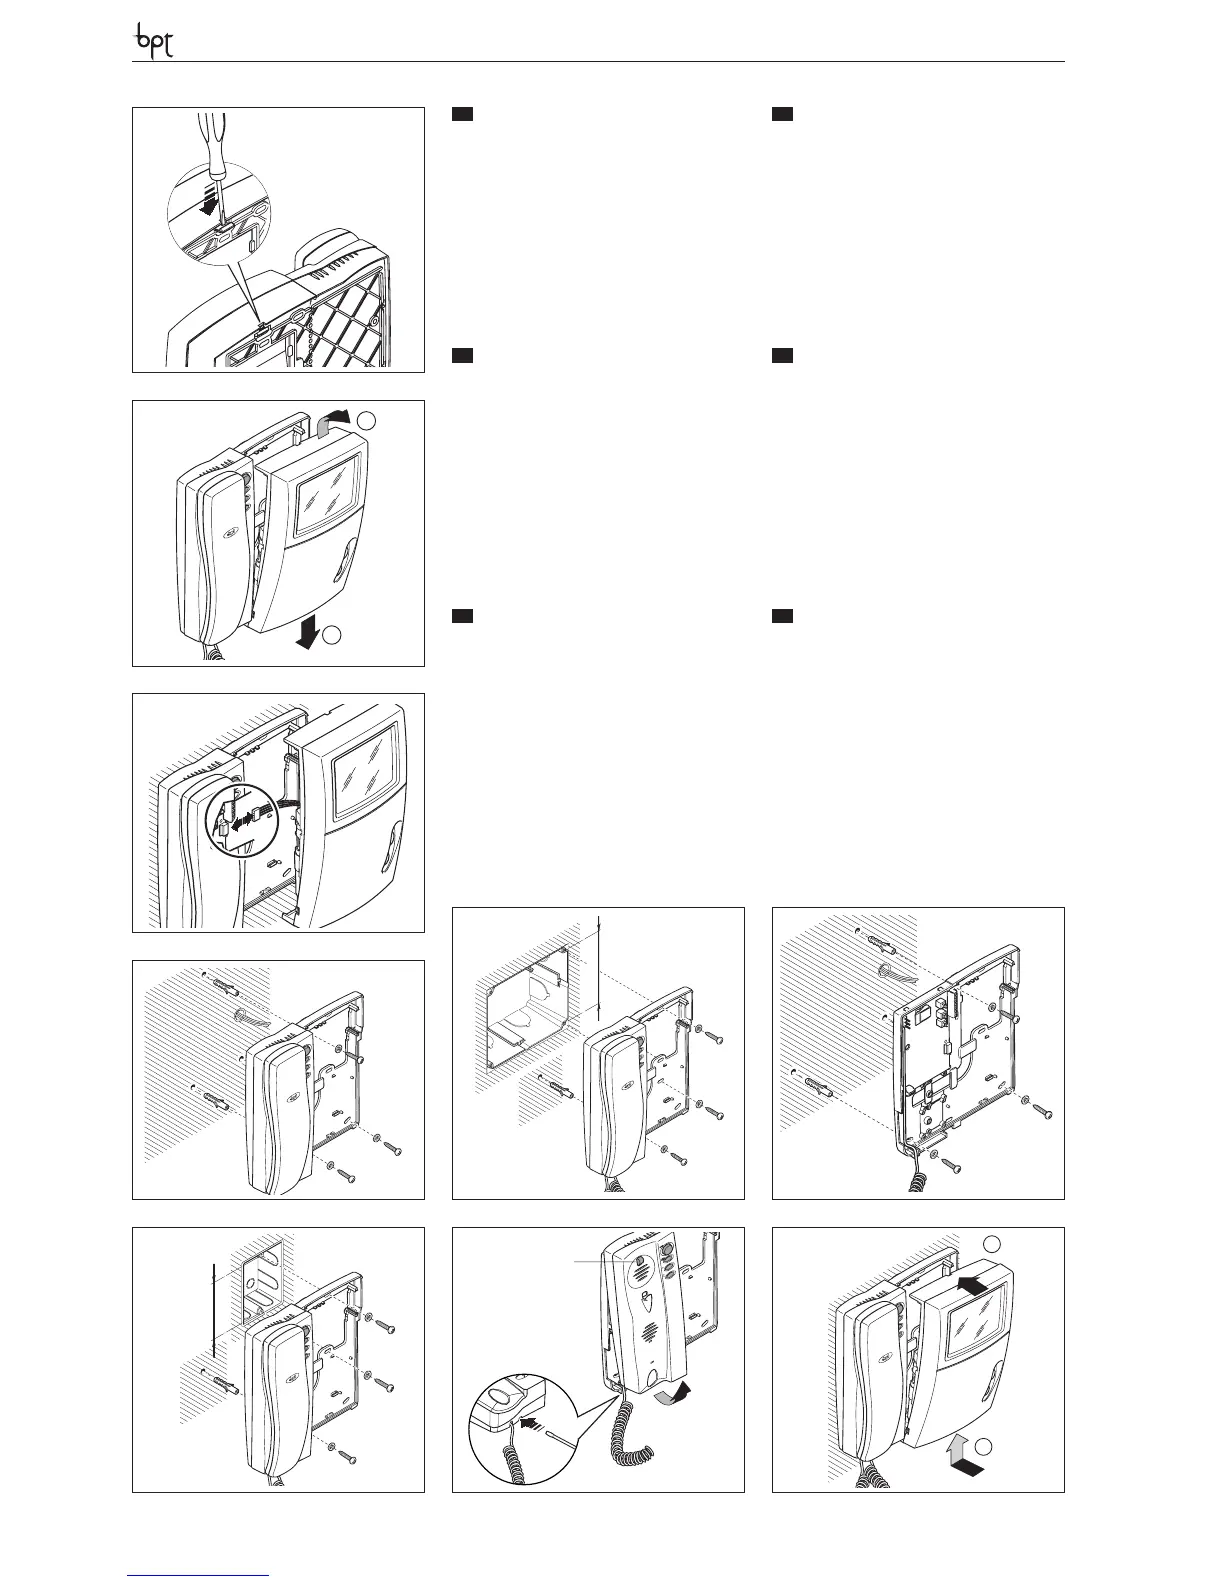
ATTENZIONE. Si raccomanda di installare il
monitor in ambiente asciutto.
Aprire il videocitofono come indicato in figura 1 e
2. Togliere il connettore (fig. 3) e installare il video-
citofono come indicato in figura 4, 5 e 6.
Per un fissaggio ancora più stabile rimuovere il
supporto cornetta con un cacciavite attraverso
l’apposita feritoia (fig. 7) e fissare il videocitofono
come indicato in figura 8.
Collegare (fig. 3) e rimontare il videocitofono
come indicato in figura 9.
EN
-
INSTALLATION
WARNING. It is recommended to install the
monitor in a dry place.
Open the video entry control as shown in figures
1 and 2. Remove the connector (fig. 3) and install
the video entry control as shown in figures 4, 5
and 6.
For even more secure fastening, remove the re-
ceiver support with a screwdriver through the
slot (fig. 7) and fasten the video entry control as
shown in figure 8.
Connect (fig. 3) an re-install the video entry con-
trol as shown in figure 9.
DE
-
INSTALLATION
ACHTUNG. Es wird empfohlen den Monitor an
einer geschützten Stelle zu installieren.
Die Videosprechanlage wie in den Abbildungen 1
und 2 gezeigt, öffnen. Den Steckverbinder (Abb. 3)
entfernen und die Videosprechanlage wie in den
Abbildungen 4, 5 und 6 gezeigt, installieren.
Für eine stabilere Befestigung die Hörerhalterung
mit einem Schraubenzieher über den entspre-
chenden Schlitz (Abb. 7) abnehmen und die Vi-
deosprechanlage wie in der Abbildung 8 gezeigt,
befestigen.
Die Videosprechanlage wie in der Abbildung 9 ge-
zeigt, anschließen (Abb. 3) und wieder montieren.
FR
-
INSTALLATION
ATTENTION. Le moniteur doit être installé
dans une pièce séche.
Ouvrir le portier vidéo comme indiqué aux figures
1 et 2. Enlever le connecteur (fig. 3) et installer le
portier vidéo comme indiqué aux figures 4, 5 et 6.
Pour fixer de manière encore plus stable, enlever
le support du combiné à l’aide d’un tournevis à
travers la fente prévue à cet effet (fig. 7) et fixer le
portier vidéo comme indiqué à la figure 8.
Raccorder (fig. 3) et remonter le portier vidéo
comme indiqué à la figure 9.
ES
-
INSTALACIÓN
ATENCION. Se recomienda instalar el monitor
en un ambiente seco.
Abra el videoportero electrónico como se indica
en las figuras 1 y 2. Extraiga el conector (fig. 3) e
instale el videoportero electrónico como se indi-
ca en las figuras 4, 5 y 6.
Para una fijación aún más estable, retire el sopor-
te del auricular introduciendo un destornillador
a través de la ranura (fig. 7) y fije el videoportero
electrónico como se indica en la figura 8.
Conecte (fig. 3) y vuelva a montar el videoportero
electrónico como se indica en la figura 9.
PT
-
INSTALAÇÃO
ATENÇÃO. Se aconselha de instalar o monitor
em ambiente enxuto.
Abra o vídeo porteiro como indicado na figura 1
e 2. Remova o conector (fig. 3) e instale o vídeo
porteiro como indicado na figura 4, 5 e 6.
Para uma fixação ainda mais estável remova o su-
porte do fone com uma chave de fenda através
da fenda específica (fig. 7) e fixe o vídeo porteiro
conforme indicado na figura 8.
Ligue (fig. 3) e monte de novo o vídeo porteiro
como indicado na figura 9.
1
2
2
1
83,5 mm
5
4
3
503
95 mm
6
PHI
1
2
9
A
7
8
3