Do you have a question about the Bradford White BW200-R and is the answer not in the manual?
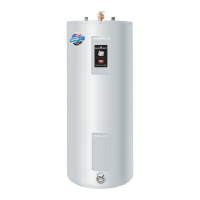
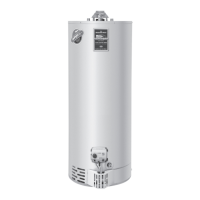
This document provides installation and operating instructions for an electric water heater, emphasizing proper setup and maintenance to ensure safety, efficiency, and warranty validity. It is crucial to read these instructions thoroughly before beginning installation or operation. The manufacturer stresses that the warranty is only valid if the water heater is installed and operated in accordance with local codes and these instructions. Failure to comply can void the warranty and absolve the manufacturer of liability for any resulting damage. For optimal comfort, safety, and convenience, it is recommended that a plumbing professional install and service this water heater. The manual advises keeping these instructions alongside the heater for future reference.
The water heater is designed exclusively for heating potable water. Using it for any other purpose may damage the unit, create hazardous conditions, and nullify the warranty. Incorrect operation can also pose risks to life and property. If any part of the appliance has been submerged in water, it should not be used. A plumbing professional should inspect the appliance and replace any submerged control system components, including the thermostat. It is essential to verify that the correct voltage is being supplied to the water heater by checking the rating plate.
Safety warnings highlight the danger of storing or using flammable, combustible, or corrosive vapors and liquids near the water heater or any other appliance. A sacrificial anode is included to prolong tank life. Removing this anode for any reason will void the warranty. In areas with unusually active water, an odor may occur at the hot water faucet due to a reaction between the anode and water impurities. In such cases, an alternative anode can be purchased from the supplier to minimize odor while still protecting the tank. Additionally, the water heater should be flushed with appropriate dissolvers to eliminate bacteria.
Before installation, inspect the water heater and its components for any damage. Do not install damaged components; contact the supplier or manufacturer for replacements if damage is evident. The product incorporates environmentally safe and health-harmless components designed for easy disassembly and recycling at the end of their life. Recycling helps reduce waste, conserve natural resources, and minimize harmful substance release. Information on waste disposal can be found at local waste collection centers or stores where the product was purchased.
The water heater must be installed indoors, protected from wind and weather. It should not be placed in locations where gasoline or flammable vapors are likely to be present, unless the installation prevents probable ignition. The location should be accessible to water supply lines and the power supply, ideally near the center of greatest hot water usage to minimize heat loss through pipes. Avoid locations where water lines could freeze, and ensure access panels and drain valves are easily reachable. The water heater must be installed vertically with water fittings pointing upward and positioned on an appropriate surface, considering its filled weight.
Corrosion and component failure can result from airborne chemical vapors, such as spray can propellants, cleaning solvents, refrigerants, swimming pool chemicals, calcium or sodium chloride, waxes, and process chemicals. These materials are corrosive even at low concentrations without a noticeable odor. Damage caused by exposure to corrosive vapors is not covered by the warranty. Do not operate the water heater if exposure occurs, and do not store any potentially corrosive compounds nearby.
The water heater must be located in an area where leaks from the tank, water line connections, or the temperature and pressure relief valve will not damage adjacent areas or lower floors. If such locations cannot be avoided, a suitable drain pan, at least 4 inches (10.2 cm) larger than the water heater, must be installed underneath and piped to an adequate drain with proper pitch.
Before making water connections, close the main water supply valve and open a faucet to relieve line pressure. After pressure is relieved, close the faucet. The cold-water inlet (blue ring) and hot water outlet (red ring) are identified on the heater, with 3/4" NPT tapered male threads. Install a shut-off valve in the cold-water supply line. If sweat fittings are used, do not apply heat directly to the nipples on the water heater, especially those with plastic liners; sweat the tubing to the adapter first.
It is critical to install and maintain a new, listed 3/4” x 3/4” temperature-pressure relief valve. Failure to do so will release the manufacturer from claims related to excessive temperature and pressure. If the water heater is installed in a closed water supply system (e.g., with a back-flow preventer), provisions must be made to control thermal expansion. Do not operate the heater in a closed system without such provisions.
After water lines are installed, open the main water supply valve and fill the water heater. Open several hot water faucets to allow air to escape until a steady stream of water flows, then close them and check for leaks. Never operate the water heater without ensuring it is filled with water. The water heater must be permanently connected to the water mains, not by a hose-set.
For protection against excessive temperatures and pressure, install temperature and pressure protective equipment as required by local codes, including a combination temperature and pressure relief valve certified by a nationally recognized testing laboratory. The valve must meet ANSI Z21.22 and CAN1-4.4 standards, have a maximum set pressure not exceeding the water heater's maximum working pressure, and an hourly rated temperature steam BTU discharge capacity not less than the heater's hourly input rating. Install the valve in the designated opening. If the supplied valve does not comply with local codes, replace it. A discharge line must be installed to exit within six inches (15.3 cm) above or any distance below the structural floor, avoiding contact with live electrical parts. The line must allow complete drainage, not be subjected to blockage or freezing, and must not be threaded, plugged, or capped. A minimum of four inches (10.2 cm) clearance should be provided on the side for servicing the valve. Do not place a valve between the combination temperature and pressure relief valve and the tank.
Hydrogen gas can accumulate in a hot water system that has not been used for an extended period (typically two weeks or more). Hydrogen gas is highly flammable. To reduce injury risk, open the hot water faucet at the kitchen sink for several minutes before using any electrical appliance connected to the hot water system. If hydrogen is present, an unusual sound like escaping air may be heard. Avoid smoking or open flames near the faucet when it is open.
Increasing the thermostat setting above the preset temperature can cause severe burns and consume excessive energy. Hotter water increases the risk of scald injury. The water heater can deliver scalding temperatures. Exercise caution when using hot water. For appliances requiring higher temperatures (e.g., dishwashers, automatic clothes washers), installing an ASSE-approved mixing valve in the water system is recommended. This valve reduces discharge temperature by mixing cold and hot water in branch supply lines. Consult a plumbing professional for installation. Water temperatures over 125°F can cause severe burns or death from scalds, with children, the disabled, and the elderly being at highest risk. Review the manual before setting the temperature and feel water before bathing or showering. Temperature limiting valves are available.
Before making electrical connections, ensure the water heater is full of water and the cold-water supply line's manual shut-off valve is open. Check the rating plate and wiring diagram. This electric water heater is built and wired according to IEC testing approvals. It includes a manual reset, trip-free temperature limiting device to interrupt ungrounded power supply conductors if the thermostat fails. Thermostats are factory set and wired as per the diagram inside the top access panel. Local utility codes may require different circuitry; consult your local power company for correct electrical hook-up and economical rates. Check if a permit is required. The manual includes a chart for recommended fuse sizes based on maximum water heater wattage (found on the data plate). The water heater must be well-grounded and have a disconnect means compliant with local codes. A 3/4-inch electrical fitting opening is provided for field wiring. Ensure protection is adequate for the heater's electrical demand.
The manual provides wiring diagrams for 1-phase non-simultaneous and 3-phase simultaneous connections, detailing the connection box, upper and lower thermostats (with bipolar safety thermostats), upper and lower heating elements, upper and lower light indicators, and live/neutral conductors. A warning emphasizes that the water heater is equipped for a limited voltage range (208/240 VAC or 415 VAC). Using an incorrect voltage can cause serious safety problems and damage the device.
Water heaters have a bipolar safety thermostat that activates in cases of abnormal water heating, automatically opening the circuit to the electrical heating element. Resetting is manual and should only be done after the cause of the anomaly is eliminated. If this occurs, contact an authorized service center.
Before closing the switch to allow electric current, ensure the water heater is full of water and the cold-water inlet valve is open. Heating elements will fail if not fully immersed in water, and dry-firing is not covered by the warranty. Once the switch is closed, the water heater operates automatically. Scalding can occur within five seconds at 140°F (60°C).
To fill the water heater:
To drain the water heater:
The thermostat is factory-set at approximately 52°C to reduce scald risk and ensure safe, economic operation, minimizing calcium/lime buildup and heat loss. An authorized person can change the setting by removing the protective cover and turning the adjustment screw to the desired temperature. A light indicator shows when the heating element is operating, staying on until the set temperature is reached or the heater is switched off.
For antifreeze protection, if the water heater is unused for long periods, set the temperature to the minimum possible position without disconnecting power. If power is disconnected, thoroughly drain the heater before freezing conditions. For cleaning, use a soft cloth and mild washing liquid on the outer cover; avoid abrasive or solvent cleaning fluids.
Maintenance is crucial. The water heater should be inspected annually by a qualified service technician for damaged components. Do not operate if any part is damaged. Shut off electric power and water supply, and drain the heater completely to prevent freezing if the building is unoccupied during cold months. To ensure efficient operation and long tank life, drain the water heater at least once a month through the drain valve until the water runs clear. Failure to do so can cause noisy operation and lime/sediment buildup. Check the temperature-pressure relief valve for encrustation by lifting the lever several times until it seats properly without leaking.
When lifting the relief valve lever, hot water will be released under pressure; ensure it does not cause injury or property damage. The magnesium anode rod should be inspected periodically (every 2 years) and replaced as needed to prolong tank life, as water conditions influence its consumption rate. More frequent inspection is needed with softened or phosphate-treated water.
Recommended maintenance by a qualified service technician:
To drain the water heater: unplug it, open the hot tap until cold water flows, turn off the cold water supply, close the hot water faucet, connect a hose to the draining valve, and open the draining valve. For replacement parts, contact your local plumbing supplier or the company listed on the rating plate, providing the part name, model, and serial number(s). The manual concludes by advising to read the warranty for full details on part and water heater coverage and provides space to record model, serial, service phone, days, nights, address, supplier, and supplier phone number for future reference.
| Category | Water Heater |
|---|---|
| Brand | Bradford White |
| Model | BW200-R |
| Energy Source | Electric |
| Voltage | 240 V |
| Wattage | 4500 W |
| Warranty | 6 years |
| Type | Residential |