The service book IV / ALFA 13 03-9940.186
PROCEDURE FOR REPAIRS AND REPLACEMENT PARTS
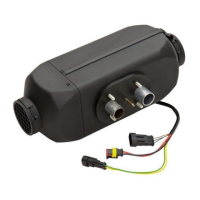
Breeze IV a Wind IV
A. Replacement plug
1. Turn and tighten the sleeves. Use a screwdriver to gradually push four tabs in the cover, separate the
upper cover.
2. Disconnect the spark plug connector from the control unit.
3. Replace the plug
4. Connect the spark plug connector to the control unit.
5. Place the upper cover on the heater and a harness grommet placed into a circular hole between the
two covers. Push the covers together so that all four tabs engage. Fit the sleeve.
B. Removing the heater from the vehicle
6. Release and eject the exhaust pipe, the intake silencer and fuel pipe.
7. Unscrew the four nuts.
8. Remove fuse, disconnect the harnesses and possibly heating air pipes.
9. Remove the heater from the vehicle.
C. Complete disassembly of the heater
1. Dismount the heat exchanger seal
2. Turn the sleeves and remove them
3. Use a screwdriver to gradually push four tabs in the cover and separate the upper cover.
4. Remove the heater from covers (the heater can be placed on the bottom cover which is turned upside
down).
5. Remove insulation and heat reflective coat.
6. Disconnect the individual electrical harnesses from the control unit (sensor flame glow plug and
electric) and disconnect the connector of overheating fuse
7. Unscrew the self-tapping screw securing the control unit and ejected UC from the engine bracket.
8. Take off the locking washer and remove the overheating fuse.
9. Unscrew the glow plug.
10. Unscrew the flame sensor.
11. Unscrew the four nuts to separate the fan from the exchanger and remove the flange seal.
12. Eject the fuel pipe from the fan assembly and removed the O-ring from it
13. Remove the locking washer on the motor shaft, using the tool to download a fan wheel, hit pin from
the motor.
14. Unscrew 2 screws M3, remove the motor support.
15. From exchanger assembly unscrew two screws, eject the combustion chamber from the exchanger
and remove the O-ring from the throat plug.
D. Reassembling the heater
16. Insert a new O-ring into the neck of plugs, combustion chamber inserted into the exchanger and screw
two screws.
17. Bump pin into the motor shaft.
18. Fit the bracket to the electric motor and screw the 2 screws.
19. Fan wheel pushed onto the motor shaft and fasten it with the locking washer.
20. Fuel pipe pushed into the fan housing and put on it new O-ring
21. Paint contact area between the fan and the exchanger with sealant, insert a flange seal with the 4 nuts
screwed both assemblies - observe the correct position of the O-ring and the flange seal.
22. Insert the control unit into the slots of the motor support and screw self-tapping screw into the console.
23. Screw the flame sensor together with a copper washer.
24. Fit the overheating fuse and fix it with new locking washers. Check adequate fixation against rotation.
25. Screw the glow plug.
26. Connect all harnesses to the control unit and connect overheating fuse.
27. Refit the insulation and the heat reflective coat.
28. Refit the rubber cap and insert the heater into the top cover while the harness grommet is placed into
the notch in the cover. Press down the bottom cover to the upper cover so that all four tabs engage.
29. Fit sleeve.
30. Refit the exchanger seal.
E. Refitting the heater in a vehicle
1. Place the heater into the vehicle to the designated place.
2. Screw 4 nuts.
3. Connect the exhaust tube, intake silencer and fuel supply.