This document describes a mechanical home sewing machine designed for simpler sewing projects. It offers a variety of features for ease of use and maintenance.
Function Description
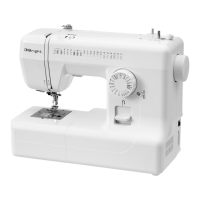
The sewing machine is an easy-to-use mechanical device for home sewing. It offers 17 different stitch types, including a 4-step buttonhole stitch. Integrated LED work lighting illuminates the sewing area. The machine features a top-fed underthread system and a detachable storage compartment for the 10 included accessories. A foot pedal controls the start/stop function and adjusts the sewing speed. The product comes with a power cord and an AC adapter.
Important Technical Specifications
- Voltage: 220-240 V, 50 Hz
- Motor: 70 W
- Safety Class: II
Usage Features
Parts and Accessories
The machine includes several parts:
- Top thread holder
- Stop for bobbin arrangement
- Thread guide for bobbin arrangement
- Axle for bobbin arrangement
- Thread guide
- Front cover
- Thread guide arm
- Button to adjust buttonhole stitch
- Face plate
- Stitch selection dial
- Thread cutter
- Stitch plate
- Reversing control
- Knob for top thread tension
- Bobbin case cover
- Extension table with accessory storage
- Needle thread arm
- Thread guide
- Back thread guide
- Handle
- Hand wheel
- Free arm
- Needle screw
- Presser foot lever
- Power switch
- Connection for power cord
- Back cover
Standard accessories include:
- Needle
- Bobbin
- Extra top thread holder
- Felt pads for top thread holder
- Screwdriver for stitch plate
- Cover plate for feeder
- Buttonhole blade/ripper with brush
- Presser foot for zip
- Presser foot for buttonhole
- Needle ballpoint
Mains Connection
Before use, ensure the mains voltage matches the rated voltage on the type plate. Connect the power cord to the product and plug it into a suitable power point. The power cord connector is not reversible. The sewing speed is controlled by the foot pedal; pressing it further increases the speed. The LED lighting turns on automatically when the product starts.
Extension Table and Free Arm
The extension table provides a larger workspace and can be easily removed for free-arm sewing. To use the free arm, pull the extension table away from the product. To fit it back, align the guide pins and press the extension table onto the product.
To remove a presser foot:
- Turn the hand wheel towards the front of the product until the needle is in its highest position.
- Lift the presser foot lever.
- Press the arm on the back of the presser foot holder, and the presser foot will detach.
To fit a presser foot:
Place the presser foot with its axle directly under the slot in the presser foot holder. Lower the presser foot holder to lock it in place.
Replacing Needles
- Lift the needle by turning the hand wheel towards the front of the product and lower the presser foot.
- Switch off the product and unplug it.
- Turn the needle screw anticlockwise to loosen it just enough for the needle to come free.
- Remove the needle from the holder.
- Insert a new needle with the flat side facing the back of the product.
- Push the needle up as far as it goes and firmly tighten the needle screw with a screwdriver. Do not overtighten to avoid breaking the needle bar. Thread the needle.
Regularly check that needle tips are smooth and sharp. Damaged needles can cause permanent damage to knitted and delicate silky fabrics, such as pulled threads or ladders.
Table of Threads and Needles
Generally, thin threads and needles are used for thin fabrics, while thicker threads and needles are for heavier fabrics. Always test the thread and needle on a small piece of the actual fabric. Use the same quality of thread for both top and underthread. For stretch, synthetic, and very thin fabrics, use ballpoint needles (blue tips) to prevent skipped stitches. When sewing very thin fabric, place tissue paper under the fabric to prevent deformation.
| Fabric |
Thread |
Needle Size |
| Thin |
Thin silk, cotton, synthetic, cotton-wrapped polyester |
9 or 11 |
| Medium strong |
Silk 50, Cotton 50-80, Synthetic 50-60, Cotton-wrapped polyester |
11 or 14 |
| Strong |
Silk 50, Cotton 40-50, Synthetic 40-50, Cotton-wrapped polyester |
14 or 16 |
| Denim |
Jeans needle (16) |
16 |
Winding of Underthread
- Pull thread from the thread bobbin, guide it under the thread guide, through the slot, and under the pad.
- Thread the bobbin from the inside out through its hole.
- Place the bobbin on the bobbin arrangement axle and push it to the right.
- Hold the free end of the thread and press the pedal.
- After about 10 seconds, switch off the product and cut the thread near the bobbin hole.
- Press the pedal again. The product automatically switches off when the bobbin is full.
- Move the bobbin arrangement axle to the left, back to its original position, and cut the thread.
It is crucial that the bobbin rotates anticlockwise when the thread is pulled out.
Threading Underthread
- Turn the hand wheel anticlockwise until the needle is in its highest position.
- Remove the bobbin cover plate by sliding the lock button to the right. The bobbin sleeve will spring up for easy removal.
- Insert the bobbin and ensure it rotates anticlockwise when the thread is pulled out.
- Pull the thread through slit (A) and then to the left.
- Hold a finger lightly over the bobbin and pull the thread to slit (B).
- Replace the transparent cover plate over the bobbin on the stitch plate.
Threading Top Thread
- Raise the presser foot lever to its highest position. This is essential for correct top thread tension.
- Turn the hand wheel anticlockwise until the needle is in its highest position.
- Hold the thread firmly with your right hand and thread as shown in the figures.
- Pull the thread through the thread guide with both hands.
- Hold the thread near the thread bobbin and pull it down past the tensioner and around the spring.
- Pull the thread firmly up and thread it through the carrier arm from right to left.
- Pull the thread down and thread it into the needle bar guide.
- Thread the needle eye from the front.
It can be easier to thread the needle if the thread end is cut with sharp scissors. Once both underthread and top thread are threaded, the product is ready for use.
Automatic Needle Threading
This feature is available only if the product has an automatic needle threader.
- Lower the presser foot and raise the needle.
- Slowly lower the needle threader arm. Place the thread around hook (A).
- Lower the arm to its lowest position. The thread hook passes through the needle eye.
- Pull the thread to the right under hook (A).
The needle threader works with needle sizes 11, 14, and 16.
- Hold the thread lightly and release the arm. A thread loop will pass through the needle eye.
- Pull the thread loop through the needle eye. Pull 10 cm of thread under the presser foot.
Pulling Up Underthread
- Lift the presser foot and hold the top thread lightly with your left hand.
- Slowly turn the hand wheel with your right hand towards the front of the product so that the needle moves down. Continue until the thread guide arm reaches its highest position. Carefully pull up the top thread, which will bring up a loop of the underthread.
- Pull both threads 15 cm back under the presser foot.
Adjusting Top Thread Tension
Most sewing is done with the top thread tension knob set to position 4. Slight adjustments (higher or lower) can improve stitch appearance.
- Correct tension: Top and bottom threads are evenly balanced.
- Top thread too tight: Reduce tension.
- Top thread too loose: Increase tension.
Always make adjustments with the presser foot in the lowered position. Equal tension for top and bottom threads is usually only desired for straight stitches. For zigzag and decorative stitches, lower tension is preferred.
Stitch Selection Dial
The stitch selection dial controls both the type of stitch and its width and length. Ensure the needle is lifted from the fabric before changing settings to prevent damage to the needle or fabric.
Cover Plate for Feeder
Use the cover plate for the feeder when automatic fabric feeding is not desired (e.g., for button sewing, freehand darning). Raise the needle and presser foot, then place the cover plate on the stitch plate, aligning the two rear pins with the holes.
Reversing Control
Pressing and holding the reversing control makes the machine sew backward.
Left Needle Positioning
Use the left needle position for better control when stitching edges or hemming difficult fabrics. Always use a zigzag foot when sewing with the needle in the left position.
Basic Sewing
Before starting, ensure the thread guide arm is in its top position.
Straight Stitch
- Stitch type: Straight stitch
- Stitch selection dial: Straight stitch
- Top thread tension: 2 to 6
- Presser foot: Zigzag foot
- Raise the presser foot and place the fabric underneath.
- Lower the presser foot and stretch the threads backward. Press the pedal.
- Gently guide the fabric as it feeds automatically.
- To secure the seam end, press the reversing control and sew a few stitches backward.
- Raise the presser foot and remove the fabric, pulling the threads backward. If the fabric cannot be removed, turn the hand wheel towards the front of the product to complete the stitch. Gently pull out the fabric.
- Cut the threads to an appropriate length for the next seam.
Changing Direction
- Stop sewing and turn the hand wheel towards the front of the product so that the needle is inserted into the fabric.
- Raise the presser foot.
- Change the sewing direction by rotating the fabric around the needle to the desired direction.
- Lower the presser foot and continue sewing.
Zigzag Stitch
- Stitch type: Zigzag stitch
- Stitch selection dial: Zigzag stitch
- Top thread tension: 2 to 5
- Presser foot: Zigzag foot
Simple zigzag stitches are often used for edge finishing, button sewing, etc.
Zip
- Stitch type: Zip stitch
- Stitch selection dial: Zip stitch
- Top thread tension: 2 to 6
- Presser foot: Zip foot
- Pin or baste the zip to the fabric and place it under the presser foot.
- Stretch the threads backward and lower the presser foot.
- Guide the edge of the presser foot along the zip's fabric edge to sew the left side of the zip.
- Turn the fabric and sew the other side of the zip in the same way.
Rolled Hem
- Stitch type: Rolled hem
- Stitch selection dial: Rolled hem
- Top thread tension: 2 to 6
- Presser foot: Hem folder (optional)
- Fold the edge twice, about 0.25 mm, for about 8 cm.
- Lower the needle at the starting point of the seam, then lower the hem foot.
- Hold the top and underthread and sew 3 or 4 stitches.
- Insert the folded fabric into the hem foot's eye.
- Lower the hem foot and sew. Lift the fabric edge to ensure smooth feeding.
- Trim about 7 mm in the corners to reduce thickness.
Sewing Tricot
- Stitch type: Tricot stitch
- Stitch selection dial: Tricot stitch
- Top thread tension: 1 to 4
- Presser foot: Zigzag foot
- Place the fabric under the presser foot, with its edge just inside the right edge of the presser foot.
- Guide the fabric so that the right edge of the seam aligns with the fabric edge.
- Stitch type: Button stitch
- Stitch selection dial: Button stitch
- Top thread tension: 1 to 4
- Presser foot: Zigzag foot
- Cover plate for feeder: Used
- Place the fabric and button under the presser foot.
- Lower the presser foot.
- Turn the wheel and check that the needle can pass freely through both buttonholes. Adjust if necessary.
- Sew 10 stitches.
- If the button requires a shank, place a thick needle over the button and sew over it.
- To strengthen the shank, cut threads 20 cm from the seam.
- Lower the top thread through the buttonhole and wind it around the shank.
- Pull the thread to the wrong side and fasten.
Blind Stitch
- Stitch type: Blind stitch
- Stitch selection dial: Blind stitch
- Top thread tension: 3 to 9
- Presser foot: Blind stitch foot (optional)
For medium to thick fabric:
- Sew the raw edge with matching thread.
- On medium to thick fabric, whipstitch the fabric edge.
- Fold the fabric as shown in the figure, with the wrong side up.
For thin fabric:
- Sew the raw edge with matching thread.
- On thin fabric, fold in and press a small hem of up to 12 mm.
- Fold the fabric as shown in the figure, with the wrong side up.
- Place the fabric under the presser foot. Turn the hand wheel anticlockwise by hand so that the needle moves as far to the left as possible. The needle should just pass through the fabric fold. If not, adjust guide (B) on blind stitch foot (A) so the needle passes through the fold and the guide is in contact with it.
- Sew slowly and carefully move the fabric along the guide's edge.
- The finished seam is almost invisible on the right side of the fabric.
The stitch length setting can also be used for adjustment, controlling needle movement and seam width. Blind stitching requires practice; always practice first.
- Stitch type: Buttonhole stitch
- Stitch selection dial: Buttonhole stitch
- Top thread tension: 1 to 5
- Presser foot: Buttonhole foot
Practice making a buttonhole on a scrap piece of fabric. Place the button on the fabric and mark the edges to determine buttonhole length.
- Set the stitch selection dial to 'd' and pull both threads to the left.
- Lower the needle into the fabric where the buttonhole is to begin, then lower the presser foot.
- Sew along the right side of the buttonhole and stop at the bottom mark.
- Stop sewing when the needle is at the right edge of a stitch and lift it from the fabric.
- Set the stitch selection dial to 'c a' and sew a loop of 5 or 6 stitches.
- Stop sewing when the needle is at the left edge of a stitch and lift it from the fabric.
- Set the stitch selection dial to 'b' and sew along the left edge of the buttonhole to the end of the right seam.
- Stop sewing when the needle is at the left edge of a stitch and lift it from the fabric.
- Set the stitch selection dial to 'c a' and sew a loop of 5 or 6 stitches, stop sewing, and lift the needle from the fabric.
- Remove the fabric from the product and cut the threads.
- Insert a needle through the loop.
- Cut open the buttonhole with a buttonhole blade.
- Ensure not to damage the stitches.
Maintenance Features
Cleaning the Gripper and Feeder
WARNING! Unplug the product before cleaning and/or maintenance.
Keep the product clean for optimal functionality and lifespan.
- Raise the needle to its highest position.
- Remove the 2 screws holding the stitch plate (1) and pull the stitch plate towards the front of the product.
- Remove the bobbin capsule (2).
- Clean the area around the feeder and gripper with a brush. Apply a drop of sewing machine oil to the gripper at points A and B.
- Replace the bobbin capsule with the extruding part (3) facing the spring (4).
- Ensure the needle is in the top position and replace the stitch plate.
NOTE: Use sewing machine oil, not universal lubricating oil, as it is unsuitable for sewing machines.
Cleaning the Product and Pedal
Clean the product and pedal after each use. Remove dust with a dry cloth.
NOTE: Do not use damp or wet cloths – risk of electric shock.
Troubleshooting
The manual includes a comprehensive troubleshooting guide for common issues:
| Problem | Cause
The following is a description of a sewing machine, based on the provided manual.
Function Description
This is an easy-to-use mechanical home sewing machine, ideal for simpler sewing projects. It offers a selection of 17 different stitch types, including a 4-step buttonhole stitch. The machine is equipped with integrated LED work lighting to illuminate the sewing area. It features a top-fed underthread system for convenience. For accessory storage, a detachable compartment is included, housing 10 standard accessories. The machine's operation (start/stop) and sewing speed are controlled via a foot pedal. A power cord with an AC adapter is supplied with the product.
Important Technical Specifications
- Voltage: 220-240 V, 50 Hz
- Motor: 70 W
- Safety Class: II
- Compliance: Approved in accordance with relevant directives/regulations.
Usage Features
Parts and Accessories
The sewing machine comprises several key components:
- Top thread holder: Holds the spool of upper thread.
- Stop for bobbin arrangement: A mechanism to halt bobbin winding.
- Thread guide for bobbin arrangement: Guides the thread during bobbin winding.
- Axle for bobbin arrangement: The spindle on which the bobbin is placed for winding.
- Thread guide: Guides the upper thread through the machine.
- Front cover: The removable cover at the front of the machine.
- Thread guide arm: An arm that helps guide the upper thread.
- Button to adjust buttonhole stitch: Used for fine-tuning buttonhole stitches.
- Face plate: A protective plate on the machine's front.
- Stitch selection dial: Used to choose the desired stitch type, width, and length.
- Thread cutter: A built-in blade for cutting threads.
- Stitch plate: The metal plate under the needle where the fabric rests.
- Reversing control: A button or lever to sew in reverse.
- Knob for top thread tension: Adjusts the tension of the upper thread.
- Bobbin case cover: Covers the bobbin and bobbin case.
- Extension table with accessory storage: A removable table that expands the work surface and stores accessories.
- Needle thread arm: Part of the automatic needle threading mechanism (if present).
- Thread guide: Additional thread guides for proper threading.
- Back thread guide: Guides the thread from the spool to the tension mechanism.
- Handle: For carrying the machine.
- Hand wheel: Manually controls the needle's movement.
- Free arm: A narrow part of the machine for sewing tubular items.
- Needle screw: Secures the needle in the needle holder.
- Presser foot lever: Raises and lowers the presser foot.
- Power switch: Turns the machine on and off.
- Connection for power cord: Where the power cord plugs into the machine.
- Back cover: The removable cover at the back of the machine.
Standard accessories included with the machine are:
- Needle: Standard sewing needles.
- Bobbin: Spools for the lower thread.
- Extra top thread holder: For using a twin needle.
- Felt pads for top thread holder: Placed under thread spools to ensure smooth unwinding.
- Screwdriver for stitch plate: Used to remove the stitch plate.
- Cover plate for feeder: Covers the feed dogs for certain sewing techniques.
- Buttonhole blade/ripper with brush: For opening buttonholes and cleaning.
- Presser foot for zip: Used for sewing zippers.
- Presser foot for buttonhole: Specifically designed for creating buttonholes.
- Needle ballpoint: A needle type suitable for knit fabrics.
Mains Connection
Before operating the machine, verify that the mains voltage matches the rated voltage specified on the product's type plate. Connect the power cord to the machine and then plug it into a suitable power outlet. Note that the power cord connector is not reversible. The sewing speed is regulated by the foot pedal; pressing the pedal further increases the speed. The integrated LED work light automatically illuminates when the machine is turned on.
Extension Table and Free Arm
The extension table provides an enlarged work surface and can be easily detached for free-arm sewing, which is useful for sewing cuffs, sleeves, and other tubular items. To engage the free arm, simply pull the extension table away from the machine. To reattach the extension table, align its guide pins with the corresponding slots on the machine and press it firmly into place.
To remove a presser foot:
- Turn the hand wheel towards the front of the machine until the needle is in its highest position.
- Raise the presser foot lever.
- Press the small arm located at the back of the presser foot holder. The presser foot will then detach.
To fit a presser foot:
Position the presser foot so its axle is directly beneath the slot in the presser foot holder. Lower the presser foot holder to securely lock the presser foot into place.
Replacing Needles
- To raise the needle, turn the hand wheel towards the front of the machine and then lower the presser foot.
- Switch off the machine and unplug it from the power outlet.
- Turn the needle screw anticlockwise to loosen it. Only loosen it enough to allow the needle to be removed.
- Carefully remove the old needle from the needle holder.
- Insert a new needle into the needle holder with its flat side facing the back of the machine.
- Push the needle upwards as far as it can go and firmly tighten the needle screw with a screwdriver. Avoid overtightening, as this can cause the needle bar to break. Finally, thread the needle.
It is important to regularly inspect needle tips for smoothness and sharpness. Pulled threads, ladders, or similar damage in knitted and delicate silky fabrics are often caused by a faulty needle.
Table of Threads and Needles
As a general rule, thinner threads and needles are used for delicate fabrics, while thicker threads and needles are suitable for heavier fabrics. Always perform a test on a small scrap of the actual fabric to ensure compatibility. For consistent results, use the same quality of thread for both the upper and lower threads. When sewing stretch fabrics, synthetic materials, or very thin fabrics, use ballpoint needles (distinguished by their blue tips) to prevent skipped stitches. For extremely thin fabrics, placing tissue paper underneath the fabric can help prevent deformation during sewing.
| Fabric |
Thread |
Needle Size |
| Thin |
Thin silk thread, Thin cotton thread, Thin synthetic thread, Thin cotton-wrapped polyester |
9 or 11 |
| Medium strong |
Silk 50, Cotton 50-80, Synthetic 50-60, Cotton-wrapped polyester |
11 or 14 |
| Strong |
Silk 50, Cotton 40-50, Synthetic 40-50, Cotton-wrapped polyester |
14 or 16 |
| Denim |
Jeans needle (16) |
16 |
Winding of Underthread
- Pull thread from the thread spool. Guide the thread under the thread guide, through the slot, and then under the pad.
- Thread the bobbin from the inside out through the small hole in the bobbin.
- Place the bobbin onto the bobbin arrangement axle.
- Push the bobbin to the right.
- Hold the free end of the thread and press the foot pedal.
- After approximately 10 seconds, switch off the machine and cut the thread close to the hole in the bobbin.
- Press the foot pedal again. The machine will automatically switch off once the bobbin is fully wound.
- Move the bobbin arrangement axle to the left, returning it to its original position, and cut the thread.
NOTE: It is crucial that the bobbin rotates anticlockwise when the thread is pulled out for proper operation.
Threading Underthread
- Turn the hand wheel anticlockwise until the needle reaches its highest position.
- Remove the bobbin cover plate by sliding the lock button to the right. The bobbin sleeve will spring up, allowing it to be lifted out.
- Insert the bobbin and ensure it rotates anticlockwise when the thread is pulled out.
- Pull the thread through slit (A) and then to the left.
- Hold a finger lightly over the bobbin and pull the thread to slit (B).
- Replace the transparent cover plate over the bobbin on the stitch plate.
Threading Top Thread
- Raise the presser foot lever to its highest position. This is critical for ensuring the top thread has the correct tension during threading.
- Turn the hand wheel anticlockwise until the needle is in its highest position.
- Hold the thread firmly with your right hand and thread it as illustrated in the figures.
- Using both hands, pull the thread through the thread guide.
- Hold the thread near the thread spool and pull it downwards past the tensioner and around the spring.
- Pull the thread firmly upwards and thread it through the carrier arm from right to left.
- Pull the thread downwards and thread it into the needle bar guide.
- Thread the needle eye from the front.
NOTE: It can be easier to thread the needle if the thread end is cut with sharp scissors. Once both the underthread and top thread are correctly threaded, the machine is ready for use.
Automatic Needle Threading
This function is only available on machines equipped with an automatic needle threader.
- Lower the presser foot.
- Raise the needle to its highest position.
- Slowly lower the needle threader arm. Place the thread around hook (A).
- Lower the arm to its lowest position. The thread hook will pass through the needle eye.
- Pull the thread to the right, under hook (A).
NOTE: The needle threader is compatible with needle sizes 11, 14, and 16.
- Hold the thread lightly and release the arm. A thread loop will pass through the needle eye.
- Pull the thread loop through the needle eye. Pull 10 cm of thread under the presser foot.
Pulling Up Underthread
- Raise the presser foot and hold the top thread lightly with your left hand.
- Slowly turn the hand wheel with your right hand towards the front of the machine so that the needle moves downwards. Continue turning until the thread guide arm reaches its highest position. Carefully pull up the top thread, which will bring up a loop of the underthread.
- Pull both threads 15 cm back under the presser foot.
Adjusting Top Thread Tension
Most sewing operations are performed with the top thread tension knob set to position 4 on the machine. Slight adjustments, either higher or lower, can improve the appearance of the seam.
- Correct tension: The top and bottom threads are evenly balanced, forming neat stitches on both sides of the fabric.
- Top thread too tight: Reduce the tension using the knob.
- Top thread too loose: Increase the tension using the knob.
NOTE: Always make tension adjustments with the presser foot in the lowered position. Equal tension for both top and bottom threads (resulting in identical stitches on both sides) is typically only desired for straight stitching.
Stitch Selection Dial
The stitch selection dial not only determines the type of stitch but also its width and length.
NOTE: Always ensure the needle is lifted clear of the fabric before changing any settings on the stitch selection dial. Failure to do so can result in damage to the needle and/or the fabric.
Cover Plate for Feeder
Use the cover plate for the feeder when the fabric is not to be fed automatically, such as during button sewing, freehand darning, or freehand embroidery. To install, raise the needle and presser foot, then place the cover plate on the stitch plate, aligning its two rear pins with the holes in the stitch plate.
Reversing Control
When the reversing control is pressed, the machine sews backward, allowing for backstitching to secure seams.
Left Needle Positioning
Using the left needle position provides better control for edge stitching or hemming on difficult fabrics.
NOTE: Always use a zigzag foot when sewing with the needle positioned to the left.
Basic Sewing
Before beginning any sewing, ensure that the thread guide arm is in its uppermost position.
Straight Stitch
- Stitch type: Straight stitch
- Stitch selection dial: Straight stitch
- Top thread tension: 2 to 6
- Presser foot: Zigzag foot
- Raise the presser foot and place the fabric underneath it.
- Lower the presser foot and stretch the threads backward. Press the foot pedal to begin sewing.
- Gently guide the fabric as it feeds automatically through the machine.
- To secure the end of the seam, press the reversing control and sew a few stitches backward.
- Raise the presser foot and remove the fabric, pulling the threads backward. If the fabric cannot be easily removed, turn the hand wheel towards the front of the machine to complete the current stitch, then gently pull out the fabric.
- Cut the threads to an appropriate length for the next seam.
Changing Direction
- Stop sewing and turn the hand wheel towards the front of the machine so that the needle is inserted into the fabric.
- Raise the presser foot.
- Change the sewing direction by rotating the fabric around the needle to the desired angle.
- Lower the presser foot and continue sewing.
Zigzag Stitch
- Stitch type: Zigzag stitch
- Stitch selection dial: Zigzag stitch
- Top thread tension: 2 to 5
- Presser foot: Zigzag foot
Simple zigzag stitches are commonly used for finishing raw edges, sewing buttons, and decorative purposes.
Zip
- Stitch type: Zip stitch
- Stitch selection dial: Zip stitch
- Top thread tension: 2 to 6
- Presser foot: Zip foot
- Pin or baste the zipper to the fabric and place it under the presser foot.
- Stretch the threads backward and lower the presser foot.
- Guide the edge of the presser foot along the fabric edge of the zipper to sew the left side of the zipper.
- Turn the fabric around and sew the other side of the zipper in the same manner.
Rolled Hem
- Stitch type: Rolled hem
- Stitch selection dial: Rolled hem
- Top thread tension: 2 to 6
- Presser foot: Hem folder (optional)
- Fold the fabric edge twice, approximately 0.25 mm, for a length of about 8 cm.
- Lower the needle at the point where the seam is to begin, then lower the hem foot.
- Hold both the top and underthreads and sew 3 or 4 stitches.
- Insert the folded part of the fabric into the eye of the hem foot.
- Lower the hem foot and begin sewing. Lift the fabric edge slightly to ensure smooth feeding.
- Trim approximately 7 mm in the corners, as illustrated, to reduce bulk.
Sewing Tricot
- Stitch type: Tricot stitch
- Stitch selection dial: Tricot stitch
- Top thread tension: 1 to 4
- Presser foot: Zigzag foot
- Place the fabric under the presser foot, aligning its edge just inside the right edge of the presser foot.
- Guide the fabric so that the right edge of the seam aligns with the fabric's edge.
- Stitch type: Button stitch
- Stitch selection dial: Button stitch
- Top thread tension: 1 to 4
- Presser foot: Zigzag foot
- Cover plate for feeder: Used
- Place the fabric and the button under the presser foot.
- Lower the presser foot.
- Turn the hand wheel and check that the needle can freely pass through both holes in the button. Adjust if necessary.
- Sew 10 stitches.
- If the button requires a shank, place a thick needle over the button and sew over it as illustrated.
- To reinforce the shank, cut the threads 20 cm from the seam.
- Lower the top thread through the buttonhole and wind it around the shank.
- Pull the thread to the wrong side and fasten it.
Blind Stitch
- Stitch type: Blind stitch
- Stitch selection dial: Blind stitch
- Top thread tension: 3 to 9
- Presser foot: Blind stitch foot (optional)
For medium to thick fabric:
- Sew the raw edge with matching thread.
- On medium to thick fabric, whipstitch the fabric edge.
- Fold the fabric as shown in the figure, with the wrong side facing up.
For thin fabric:
- Sew the raw edge with matching thread.
- On thin fabric, fold in and press a narrow hem of up to 12 mm.
- Fold the fabric as shown in the figure, with the wrong side facing up.
- Place the fabric under the presser foot. Turn the hand wheel anticlockwise by hand so that the needle moves as far to the left as possible. The needle should just pass through the fabric fold. If not, adjust the guide (B) on the blind stitch foot (A) so that the needle passes precisely through the fold and the guide is in contact with it.
- Sew slowly and carefully move the fabric along the edge of the guide.
- The finished seam will be almost invisible on the right side of the fabric.
NOTE: The stitch length setting can also be used for adjustment, controlling how far the needle moves and thus the seam width. Blind stitching requires practice; always practice sewing first on scrap fabric.
- Stitch type: Buttonhole stitch
- Stitch selection dial: Buttonhole stitch
- Top thread tension: 1 to 5
- Presser foot: Buttonhole foot
Before sewing on a garment, practice making a buttonhole on a scrap piece of the same fabric. Place the button on the fabric and mark its edges to determine the desired buttonhole length.
- Set the stitch selection dial to 'd' and pull both threads to the left.
- Lower the needle into the fabric where the buttonhole is to begin, then lower the presser foot.
- Sew along the right side of the buttonhole and stop at the bottom marking.
- Stop sewing when the needle is at the right edge of a stitch and lift it from the fabric.
- Set the stitch selection dial to 'c a' and sew a loop of 5 or 6 stitches.
- Stop sewing when the needle is at the left edge of a stitch and lift it from the fabric.
- Set the stitch selection dial to 'b' and sew along the left edge of the buttonhole to the end of the right seam.
- Stop sewing when the needle is at the left edge of a stitch and lift it from the fabric.
- Set the stitch selection dial to 'c a' and sew a loop of 5 or 6 stitches, stop sewing, and lift the needle from the fabric.
- Remove the fabric from the machine and cut the threads.
- Insert a needle through the loop.
- Cut open the buttonhole with a buttonhole blade.
- Be careful not to damage the stitches.
Maintenance Features
Cleaning the Gripper and Feeder
WARNING! Always unplug the product before performing any cleaning or maintenance.
To ensure optimal performance and extend the lifespan of your machine, keep it clean.
- Raise the needle to its highest position.
- Remove the two screws securing the stitch plate (1) and pull the stitch plate towards the front of the machine.
- Remove the bobbin capsule (2).
- Clean the area around the feeder and gripper using a brush. Apply a drop of sewing machine oil to the gripper at points A and B as indicated in the figure.
- Replace the bobbin capsule, ensuring the extruding part (3) faces the spring (4).
- Verify that the needle is in its highest position and then replace the stitch plate as shown in the figure.
NOTE: Use only sewing machine oil. Universal lubricating oils are not suitable for sewing machines.
Cleaning the Product and Pedal
Clean the product and its foot pedal after each use. Remove dust with a dry cloth.
NOTE: Do not use damp or wet cloths, as this poses a risk of electric shock.
Troubleshooting
The manual provides a detailed troubleshooting guide to address common issues:
| Problem | Cause