3. Operation
The BlueEye™ Ex-D has no external or internal switches. By connecting wire 1 to +24 VDC and wire 2 to -24
VDC (as shown in the table under heading 2.9 “Electrical connection”), the BlueEye™ Ex-D will
automatically start operating. After approximately 3 minutes data communication via RS485 Modbus RTU is
activated and the 4-20 mA current loop will provide a signal.
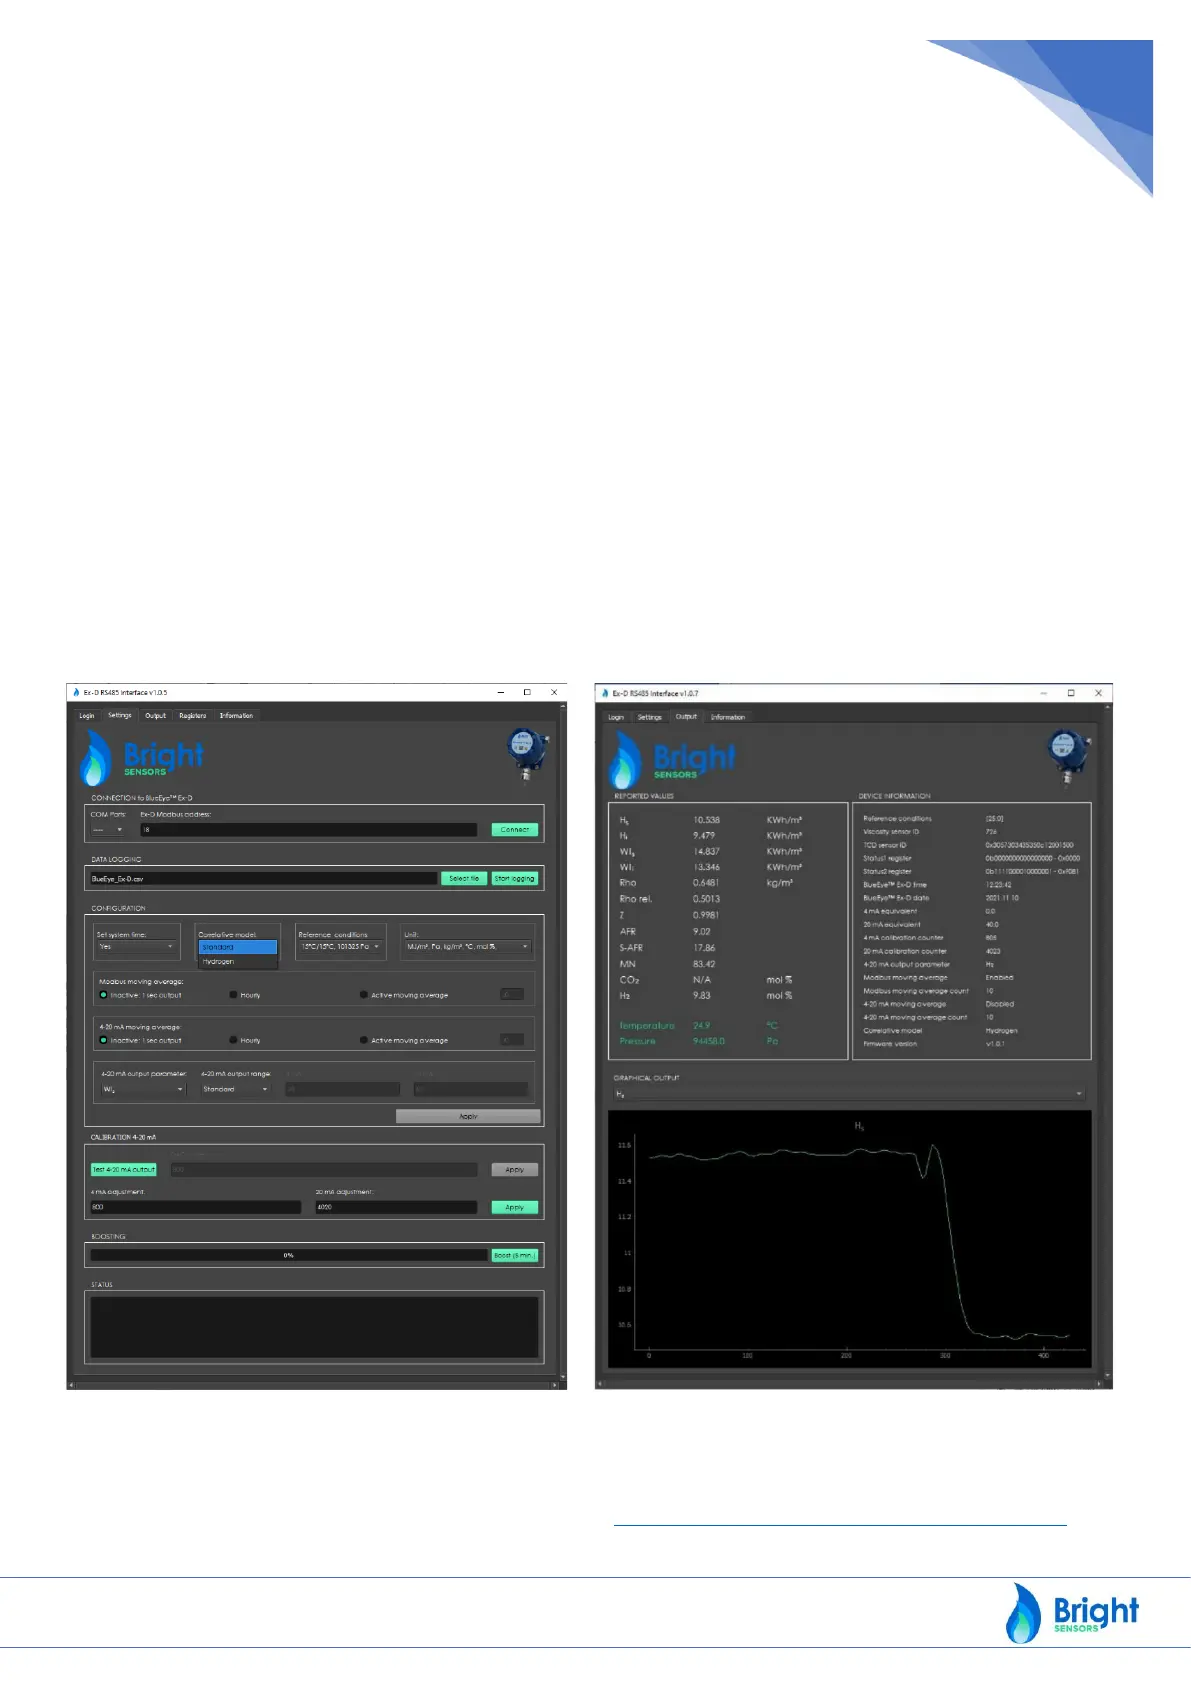
3.1 Communication with the BlueEye™ Ex-D
There are two ways to communicate with the BlueEye™ Ex-D:
1. Over RS485 Modbus RTU
2. By using Bright Sensors` Modbus USB Windows Interface Package
Communication over RS485 Modbus RTU requires the user to connect the BlueEye™ Ex-D to its own Modbus
system. Communication over Bright Sensors` Modbus USB Windows Interface Package allows the user to
operate the BlueEye™ Ex-D in a Plug and Play way. It has additional functionality such as charting, storing
the output parameters in CSV format, and switching reference condition and units, applying moving
averages, etc.
Figure 8: BlueEye™ Ex-D Modbus USB Windows Interface Package
For more specific information on the Modbus USB Windows Interface Package please read the Modbus USB
Windows Interface Package manual, to be found here: https://www.bright-sensors.com/blueeye-ex-d/
 Loading...