==================================================================================================
USE AND CARE
8. The rest of the furrows will be made with the
tractor tires in the previously cut furrows; therefore:
The Pitch (depth) of the plow must now be
readjusted to a 5"-6" plowing depth.
9. Position your tractor with the inside of the right
side wheels against the side of the previously
plowed furrow.
10. Start plowing for a short distance and check the
depth of the furrow.
or counter-clockwise ONE turn at a time and retry until
the 5"-6" depth is obtained.
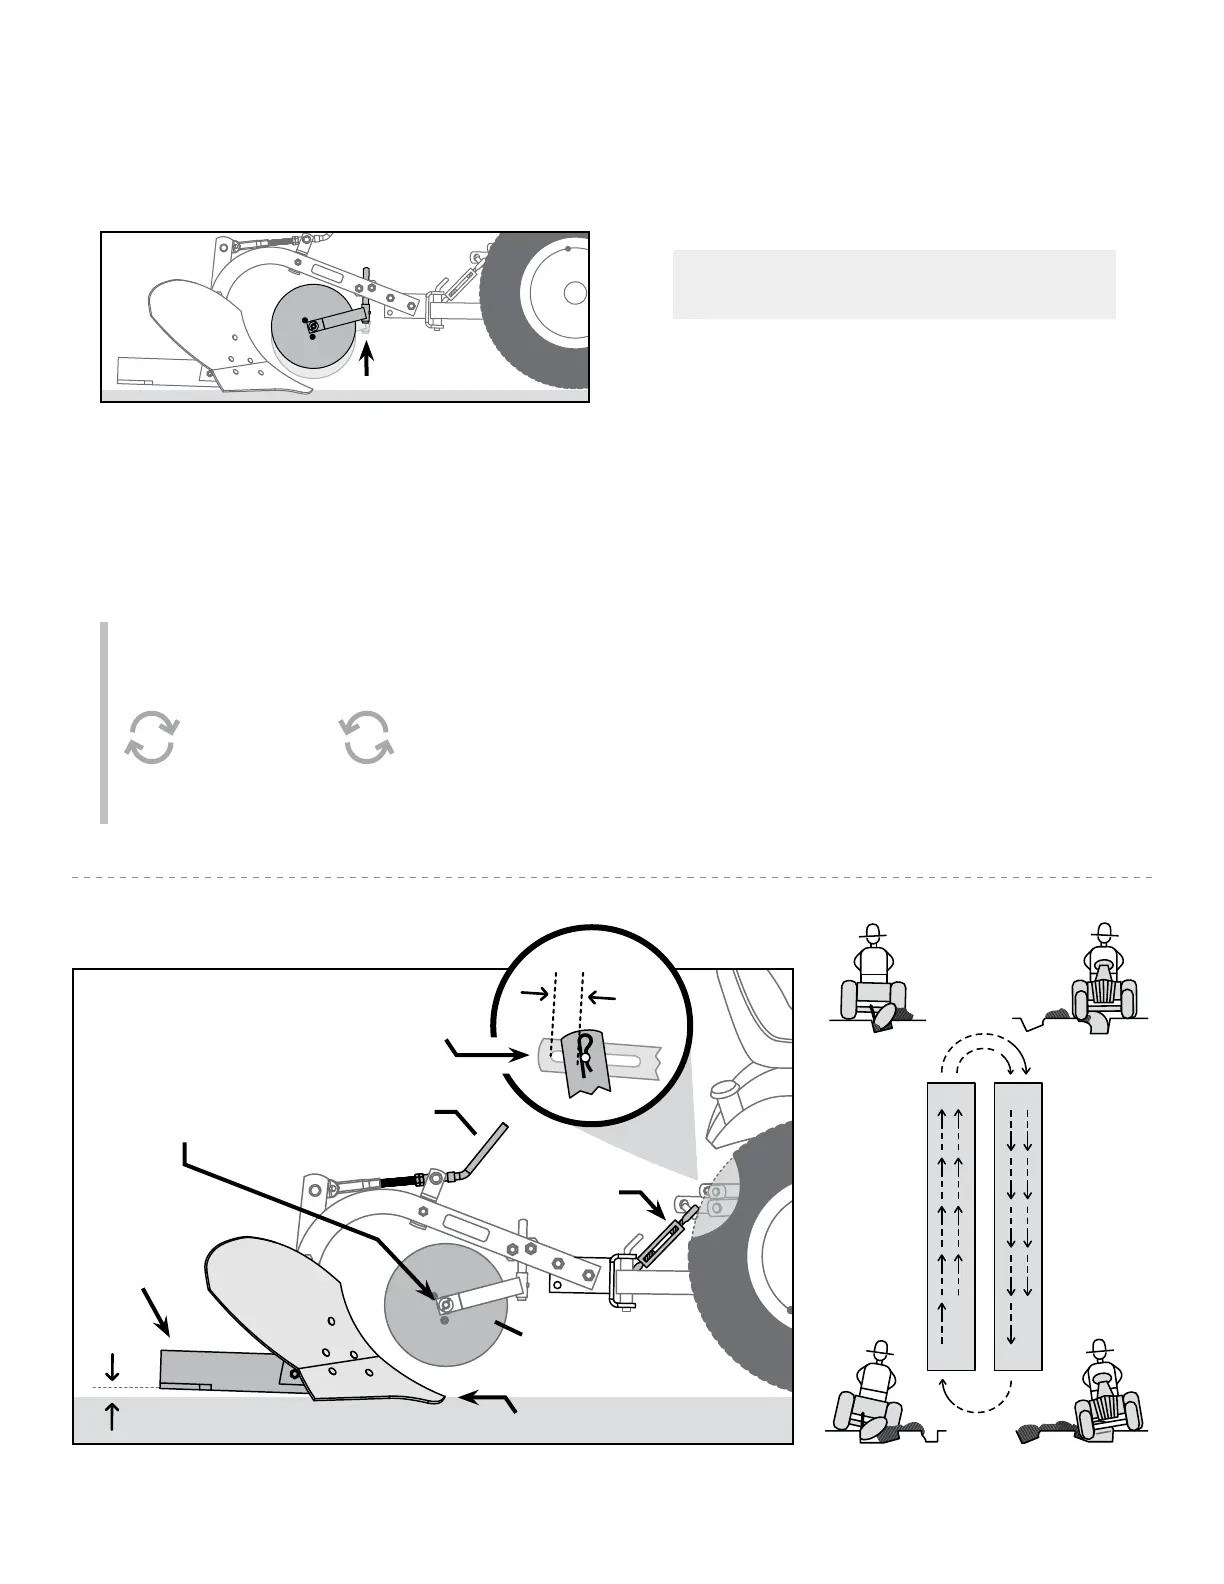
11. After plowing depth is set with plow in furrow:
Stop the tractor and measure the distance from the
centerline of the plow coulter axle bolt - it should be
about 2" above the ground. If it is not, raise the plow
this time. (See coulter adjustment on page 16).
Centerline of
Axle Bolt
Hitch Drawstrap
Depth
Crank
Turnbuckle
Landslide
Fig.1
Coulter
1"
1"
1-2 3-4
5-6 7-8
6 2 3 7
5 1
START
FINISH
4 8
Fig.2
7. Makeyourrsttwofurrowsasdescribedinthe
diagrambelow"gure2"(1-2andturn3-4).
Make sure the Tractor lift handle is lowered and
near full throttle. Raise the plow to the transport
position while turning.
NOTE: If your plow is NOT plowing at 4"-5" deep
on your initial two passes, readjust the plow depth
crank. See adjustment section on pg 15.
Make this adjustment ONE turn at a time until
desired depth is obtained.
clockwise
to go deeper
counter-clockwise
to elevate the plow
6. Adjust the Plow Coulter to the highest position.
14 L-1043-3-BEnglish Manual