2-100
Confidential
■ All one color
<User Check>
- Clean the corona wire of all four colors on the drum unit.
- Replace the drum unit with a new one.
Step Cause Remedy
1 Dirt on the electrodes of the
main body and the drum unit
Clean the electrodes of the main body and
the drum unit.
(Refer to Fig. 2-5 (P2-57), Fig. 2-6 (P2-57).)
2 Dirt on the electrodes of the
main body and the toner
cartridge
Clean the electrodes of the main body and
the toner cartridge.
(Refer to Fig. 2-5 (P2-57), Fig. 2-8 (P2-96).)
3 Dirt on the electrodes of the
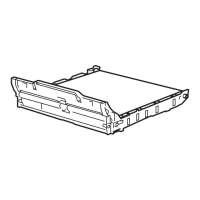
main body and the belt unit
Clean the electrodes of the main body and
the belt unit.
(Refer to Fig. 2-5 (P2-57), Fig. 2-9 (P2-97).)
4 Laser unit flat cable failure Replace the laser unit flat cable.
5 Dirt on the electrodes of the
high-voltage power supply
PCB
Clean the electrodes of the high-voltage
power supply PCB.
6 High-voltage power supply
PCB failure
Replace the high-voltage power supply PCB
ASSY.
7 Laser unit failure Replace the laser unit.
8 Main PCB failure Replace the main PCB ASSY.

 Loading...


