Care and Maintenance 127
4
— — — — — — — — — — — — — — — — —
— — — — — — — — — — — — — — — — — — — — — — — — — — — — — — — — — —
h
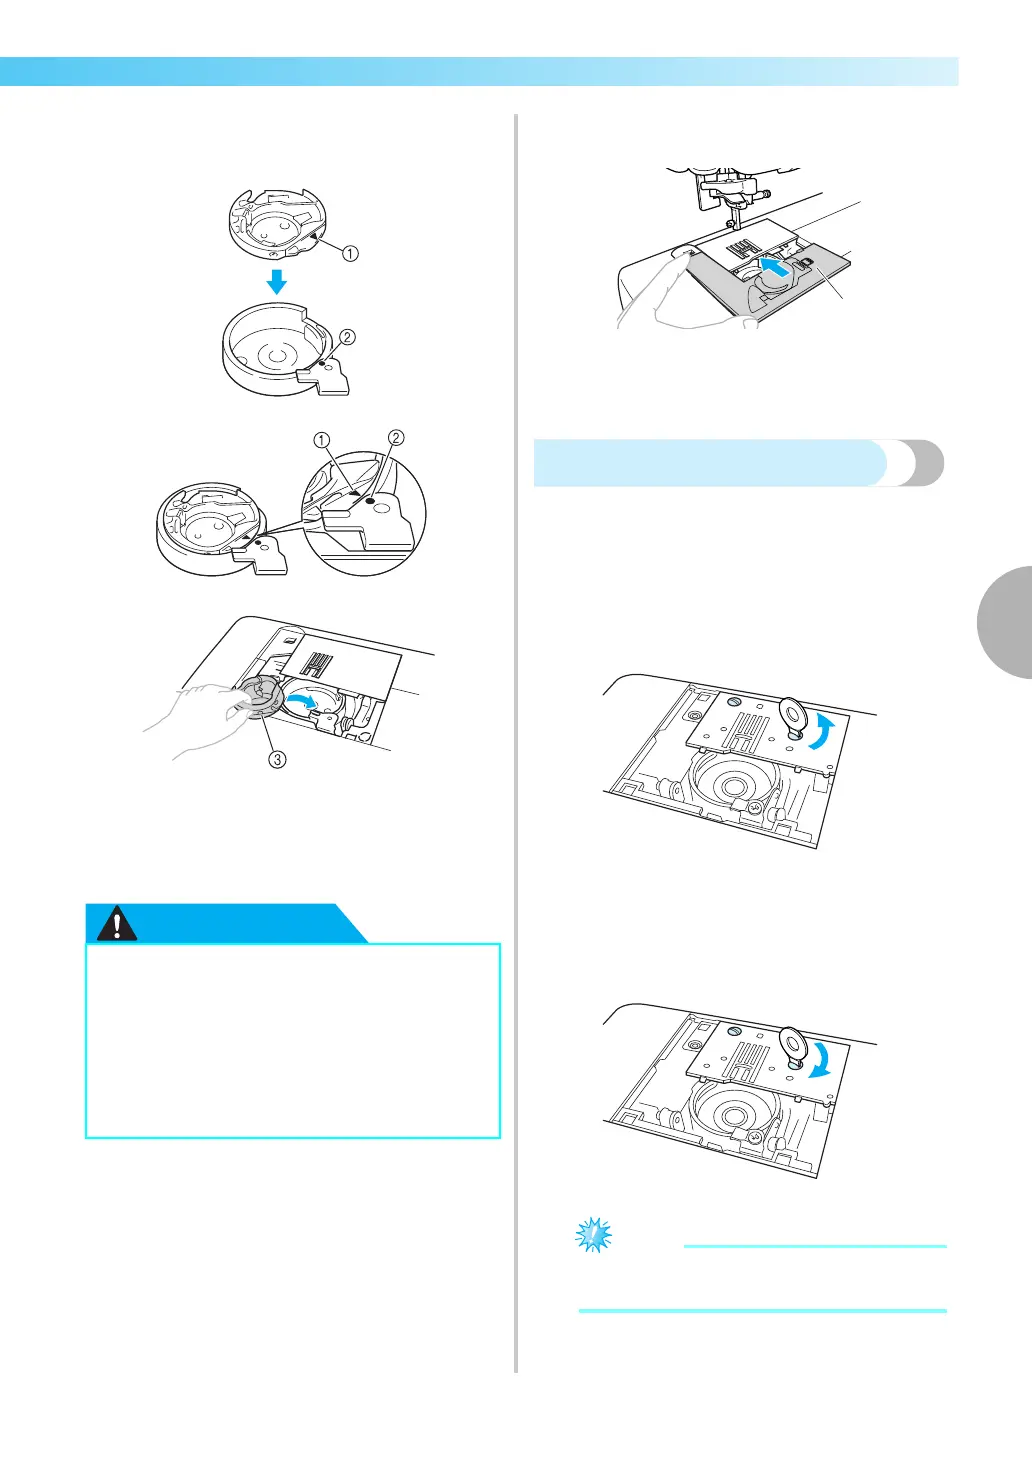
Insert the bobbin case so that the S mark on
the bobbin case aligns with the z mark on
machine as shown below.
• Align the S and z marks.
a
Smark
b
zmark
c Bobbin case
• Make sure that the indicated points are
aligned before installing the bobbin case.
i
Insert the tabs on the needle plate cover into the
needle plate, and then slide the cover back on.
a Needle plate cover
j
Install the flat bed attachment in its original
position.
Removing the needle plate
When the thread is tangled and cannot be removed
by cleaning the race, remove the needle plate.
a
Follow steps a through f on page 126.
b
Remove the needle plate by removing the
screws with the included screwdriver.
c
Remove the tangled thread from the needle
plate.
d
Return the needle plate to its original position, and
then tighten the screws with the included screwdriver.
z Align the two screw holes on the needle
plate with the two holes on the machine.
e
Follow steps g through j (page 126-127).
●
Never use a bobbin case that is scratched,
otherwise the upper thread may become
tangled, the needle may break or sewing
performance may suffer. For a new bobbin
case (part code: XE7560-001), contact your
nearest authorized service center
.
● Be sure that the bobbin case is correctly
installed, otherwise the needle may break.
 Loading...