Do you have a question about the Brother MFC-J3930DW and is the answer not in the manual?
This document provides a comprehensive quick setup guide for the Brother MFC-J3930DW, MFC-J6930DW, and MFC-J6935DW multifunction devices, detailing the initial unboxing, setup, and connection procedures. The guide is designed to assist users in getting their new Brother machine operational efficiently, covering everything from physical setup to software installation and mobile device connectivity.
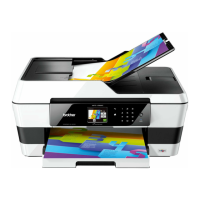
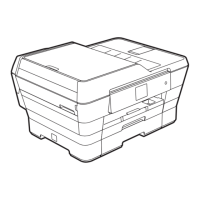
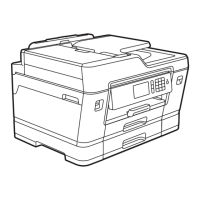
The Brother MFC-J3930DW, MFC-J6930DW, and MFC-J6935DW are versatile multifunction devices designed for printing, scanning, and faxing. They are equipped to handle various tasks in a home or office environment, offering robust performance and connectivity options. The devices support both wired and wireless network connections, allowing for flexible placement and access from multiple computers and mobile devices. They are designed to be user-friendly, with a touchscreen interface for easy navigation and control. The machines are capable of producing high-quality prints and scans, making them suitable for a wide range of document management needs. The fax functionality further enhances their utility, providing a complete communication solution.
The setup process begins with unpacking the machine and verifying all included components, which typically consist of inbox ink cartridges (Black, Yellow, Cyan, Magenta), a Quick Setup Guide, Reference Guide, Product Safety Guide, Brother Installation Disc, Telephone Line Cord, Maintenance Sheet, and Power Cord. Users are advised to save all packing materials and the box for potential future shipping. The guide emphasizes the importance of purchasing the correct interface cable for the desired connection type, recommending a USB 2.0 cable (Type A/B) no longer than 2 meters for USB connections, and a straight-through Category 5 (or greater) twisted-pair cable for 10BASE-T or 100BASE-TX Fast Ethernet Network for Ethernet connections.
Loading plain A4 paper is the next step, with clear instructions to pull out the paper tray completely, fan the paper well, adjust the paper guides, load the paper without exceeding the indicated mark, and then slowly push the tray back into the machine. The paper support should then be pulled out until it locks into place. For other paper sizes, users are directed to the Reference Guide.
Connecting the power cord is straightforward; the machine powers on automatically once connected. The guide notes that the control panel angle can be adjusted for easier reading of the touchscreen. Initial setup also involves selecting the country or language and setting the date and time via the touchscreen instructions.
Installing the inbox ink cartridges is a critical step. Users must open the ink cartridge cover, remove the orange protective part (which should be stored inside the machine for future transport), and then quickly shake the black ink cartridge horizontally 15 times before inserting it. The instructions guide users through unpacking and installing all ink cartridges, after which the machine prepares the ink tube system for printing.
Following the initial cleaning process, the machine prompts users to configure various settings via the touchscreen, including checking print quality, configuring tray settings, viewing operation tips, setting Brother LCD Message defaults, and printing an installation sheet. If needed, users can select their language by navigating through the touchscreen menu: Settings > All Settings > Initial Setup > Local Language.
For fax functionality, connecting the telephone line cord is required. Users lift the scanner cover, connect the cord to the socket marked LINE, and guide it out the back of the machine. An illustration shows how to connect an external telephone if sharing one telephone line.
Connecting the machine to a computer or mobile device is detailed in subsequent steps. For computer connection, users are instructed to insert the installation disc or download the Full Driver & Software Package from the Brother Solutions Center website (solutions.brother.com/windows for Windows, solutions.brother.com/mac for Macintosh). The guide provides instructions for both Windows (running start.exe from the CD/DVD-ROM icon) and Macintosh (recommending the CUPS driver). Troubleshooting steps for connectivity issues include restarting the wireless access point/router, disconnecting the cable for wired networks, and restarting the machine and computer. If issues persist, users are directed to support.brother.com for FAQs.
For mobile device connection, users are directed to step 12, which covers alternative wireless setup. This involves finding the SSID (Network Name) and Network Key (Password) on the wireless access point/router. Users then navigate to WIFI > Setup Wizard on the machine's touchscreen, select their SSID, and enter the Network Key. Upon successful connection, the touchscreen displays "Connected." The guide also mentions that even without a wireless access point/router, direct device-to-machine connection is possible, with additional support available at solutions.brother.com/wireless-support. After successful wireless setup, users are directed to step 11 for computer software installation or step 13 for mobile app installation.
Printing or scanning using a mobile device is facilitated by the "Brother iPrint&Scan" application, available on various mobile application stores. The guide emphasizes that the mobile device and machine must be connected to the same wireless network. The "Brother SupportCenter" mobile app is also recommended for accessing the latest support information. Optional apps for printing and scanning from mobile devices are mentioned, with instructions available in the Online User's Guide.
The guide implicitly covers initial maintenance by detailing the correct installation of ink cartridges and the machine's automatic preparation of the ink tube system for printing. The instruction to store the orange protective part removed from the ink cartridges inside the machine for future transport suggests a design consideration for protecting the ink system during relocation. The machine's ability to perform print quality checks as part of the initial setup also serves as a maintenance feature, allowing users to ensure optimal performance from the start. Regularly updating firmware, as mentioned, is a key maintenance practice to ensure the device benefits from the latest features and bug fixes, accessible via solutions.brother.com/up2. The availability of FAQs and troubleshooting resources on support.brother.com and solutions.brother.com/wireless-support further supports ongoing maintenance and problem resolution.
| Card reader integrated | No |
|---|---|
| Sound power level (printing) | 63.8 dB |
| Sound pressure level (printing) | 50 dB |
| Scan to | E-mail, E-mail Server, FTP, File, Image, OCR, USB |
| Scan drivers | ICA, SANE, TWAIN, WIA |
| Scanner type | ADF scanner |
| Duplex scanning | Yes |
| Grayscale levels | 256 |
| Input color depth | 48 bit |
| Maximum scan area | 297 x 431.8 mm |
| Output color depth | 24 bit |
| Duplex scanning mode | Auto |
| Input grayscale depth | 16 bit |
| Output grayscale depth | 8 bit |
| Image formats supported | JPEG, TIFF |
| Maximum scan resolution | 19200 x 19200 DPI |
| Document formats supported | PDF, XPS |
| Optical scanning resolution | 1200 x 2400 DPI |
| N-up printing | 2, 4, 6, 9, 16, 25 |
| Print technology | Inkjet |
| Maximum resolution | 4800 x 1200 DPI |
| Duplex printing mode | Auto/Manual |
| Print speed (ISO/IEC 24734) mono | 22 ipm |
| Print speed (ISO/IEC 24734) color | 20 ipm |
| Time to first page (color, normal) | 6 s |
| Print speed (black, normal quality, A4/US Letter) | 35 ppm |
| Print speed (color, normal quality, A4/US Letter) | 27 ppm |
| Display | LCD |
| Control type | Buttons, Touch |
| Product color | Gray |
| Display diagonal | 3.7 \ |
| Market positioning | Home & office |
| Wi-Fi standards | 802.11a, 802.11b, 802.11g, Wi-Fi 4 (802.11n) |
| Cabling technology | 10/100Base-T(X) |
| Security algorithms | 802.1x RADIUS, APOP, SMTP-AUTH, SNMPv3, SSL/TLS |
| Ethernet LAN data rates | 10, 100 Mbit/s |
| Mobile printing technologies | Apple AirPrint, Brother iPrint & Scan, Google Cloud Print, Mopria Print Service |
| Supported network protocols (IPv4) | ARP, RARP, BOOTP, DHCP, APIPA(Auto IP), WINS/NetBIOS name resolution, DNS Resolver, mDNS, LLMNR responder, LPR/LPD, Custom Raw Port/Port9100, IPP, FTP/FTPs Client FTP Server, SNMPv1/v2c/v3, TFTP server, SMTP Client, ICMP, Web Services (Print/Scan), CIFS Client, SNTP Client, POP3, LDAP, IMAP4, HTTP Server |
| Supported network protocols (IPv6) | NDP, RA, mDNS, LLMNR Responder, DNS Resolver, LPR/LPD, Custom Raw Port/Port9100, IPP, FTP/FTPs Client FTP , SNMPv1/v2c/v3 , TFTP server, Web Services (Print/Scan), SMTP Client, POP3*, CIFS Client, SNTP Client, LDAP, IMAP4*, ICMPv6, HTTP Server |
| Printing colors | Black, Cyan, Magenta, Yellow |
| Duplex functions | Copy, Fax, Print, Scan |
| Maximum duty cycle | 2000 pages per month |
| Recommended duty cycle | 0 - 30000 pages per month |
| Number of print cartridges | 4 |
| Copier resize | 25 - 400 % |
| Maximum copy resolution | 600 x 600 DPI |
| Maximum number of copies | 99 copies |
| N-in-1 copy function (N=) | 2, 4 |
| Package depth | 568 mm |
| Package width | 681 mm |
| Package height | 500 mm |
| Package weight | 28300 g |
| Quantity per pack | 1 pc(s) |
| Paper input type | Paper tray |
| Total input capacity | 650 sheets |
| Paper tray 1 input capacity | 250 sheets |
| Multi-Purpose tray input capacity | 100 sheets |
| Auto document feeder (ADF) input capacity | 50 sheets |
| Faxing | Color faxing |
| Fax memory | 200 pages |
| Modem speed | 33.6 Kbit/s |
| Fax forwarding to | E-mail, Fax, PC |
| AC input voltage | 220 - 240 V |
| Power consumption (off) | 0.04 W |
| Power consumption (ready) | 6.5 W |
| Power consumption (sleep) | 1.7 W |
| Power consumption (copying) | 29 W |
| Envelopes sizes | Com-10, DL, Monarch |
| Photo paper sizes | 9x13, 10x15, 13x18 cm |
| Custom media width | 105 - 297 mm |
| Custom media length | 148 - 431.8 mm |
| Paper tray media types | Coated paper, Envelopes, Glossy paper, Photo paper, Plain paper, Recycled paper |
| Paper tray media weight | 64 - 220 g/m² |
| ISO A-series sizes (A0...A9) | A3, A4, A5, A6 |
| Maximum ISO A-series paper size | A3 |
| Multi-Purpose Tray media weight | 64 - 260 g/m² |
| Auto Document Feeder (ADF) media weight | 60 - 120 g/m² |
| Mac operating systems supported | Mac OS X 10.10 Yosemite, Mac OS X 10.11 El Capitan, Mac OS X 10.9 Mavericks |
| Other operating systems supported | ChromeOS |
| Server operating systems supported | Windows Server 2008, Windows Server 2008 R2, Windows Server 2012, Windows Server 2012 R2 |
| Windows operating systems supported | Windows 10, Windows 7, Windows 8, Windows 8.1 |
| Depth | 477 mm |
|---|---|
| Width | 575 mm |
| Height | 374 mm |