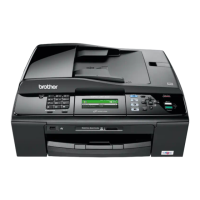
Do you have a question about the Brother MFC-J615 and is the answer not in the manual?
Remove protective tape, film, green part, and plastic bag. Ensure all components are present.
Pull out tray, lift cover, adjust guides, insert paper, and close tray.
Connect the power cord to the machine and outlet. Connect telephone line to LINE socket.
Turn on, open cover, remove protective parts, unpack cartridges, and insert them.
Check print quality of colour blocks, press 1 for Yes or 2 for No to adjust.
Configure how the machine answers incoming calls based on desired features.
Enter the current date and time for accurate fax transmission and logging.
Enter your name and fax number to be printed on outgoing faxes.
Select Tone or Pulse dialling based on your phone line service.
Set the line type for compatibility with PBX or ISDN connections.
Adjust compatibility settings for connecting to a VoIP service.
Choose how to connect the machine: USB, wired, or wireless network.
Ensure computer is on, logged in as admin, and close running programs.
Insert CD-ROM, run Start Here, follow on-screen prompts to install MFL-Pro Suite.
Lift scanner cover, guide cable through trench, and connect to machine and PC.
Click Finish to restart. Check firmware updates and register online.
Ensure Macintosh is on, logged in as admin, and check for updates.
Lift scanner cover, guide cable through trench, and connect to machine and Mac.
Insert CD-ROM, run Start Here OSX, choose connection, and follow prompts.
Download and install Presto! PageManager to add OCR capability.
Ensure computer is on, logged in as admin, and connect network cable.
Lift scanner cover, guide cable through trench, and connect to machine and network.
Insert CD-ROM, run Start Here, choose Wired Network, and follow prompts.
Click Finish to restart. Check firmware updates.
Install MFL-Pro Suite on additional PCs on the network as needed.
Ensure Macintosh is on, logged in as admin, and connect network cable.
Lift scanner cover, guide cable through trench, and connect to machine and network.
Insert CD-ROM, run Start Here OSX, choose Wired Network, and follow prompts.
Download and install Presto! PageManager to add OCR capability.
Install MFL-Pro Suite on additional Macs on the network as needed.
Configure wireless settings to communicate with access point/router.
Write down SSID/ESSID and Password (Network Key) for setup.
Select SSID, enter password if required, and connect to the wireless network.
Use Wi-Fi Protected Setup or AOSS button on access point for automatic setup.
Guide to locating network name (SSID) and password (Network Key).
Check wireless LAN report for error codes and recommended solutions.
Ensure computer is on, logged in as admin, and close running programs.
Insert CD-ROM, run Start Here, follow on-screen prompts to install MFL-Pro Suite.
Click Finish to restart. Check firmware updates.
Install MFL-Pro Suite on additional PCs on the network as needed.
Ensure Macintosh is on, logged in as admin, and check for updates.
Insert CD-ROM, run Start Here OSX, choose Wireless Network, and follow prompts.
Download and install Presto! PageManager to add OCR capability.
Install MFL-Pro Suite on additional Macs on the network as needed.
Install photo editing and scanning enhancement software.
Download and install help files for FaceFilter Studio.
Follow steps to reset all network settings to their original factory state.
Guide to entering characters, spaces, and making corrections using the dial pad.
Information on ink cartridges and when they need replacement.
Explanation of Brother's genuine consumables brand.
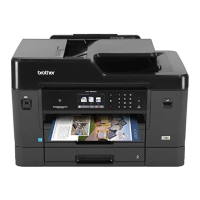
| Printing Technology | Inkjet |
|---|---|
| Print Resolution | Up to 6000 x 1200 dpi |
| Connectivity | USB, Ethernet, Wi-Fi |
| Type | All-in-One |
| Functions | Print, Copy, Scan, Fax |
| Print Speed (Black) | Up to 35 ppm |
| Print Speed (Color) | Up to 27 ppm |
| Scan Resolution | Up to 1200 x 2400 dpi |
| Scanner Type | Flatbed, ADF |
| Ink Cartridge | Black, Cyan, Magenta, Yellow |
| Dimensions | 16.1" x 14.7" x 7.1" |