4 - 8
Adjustment (Main Unit)
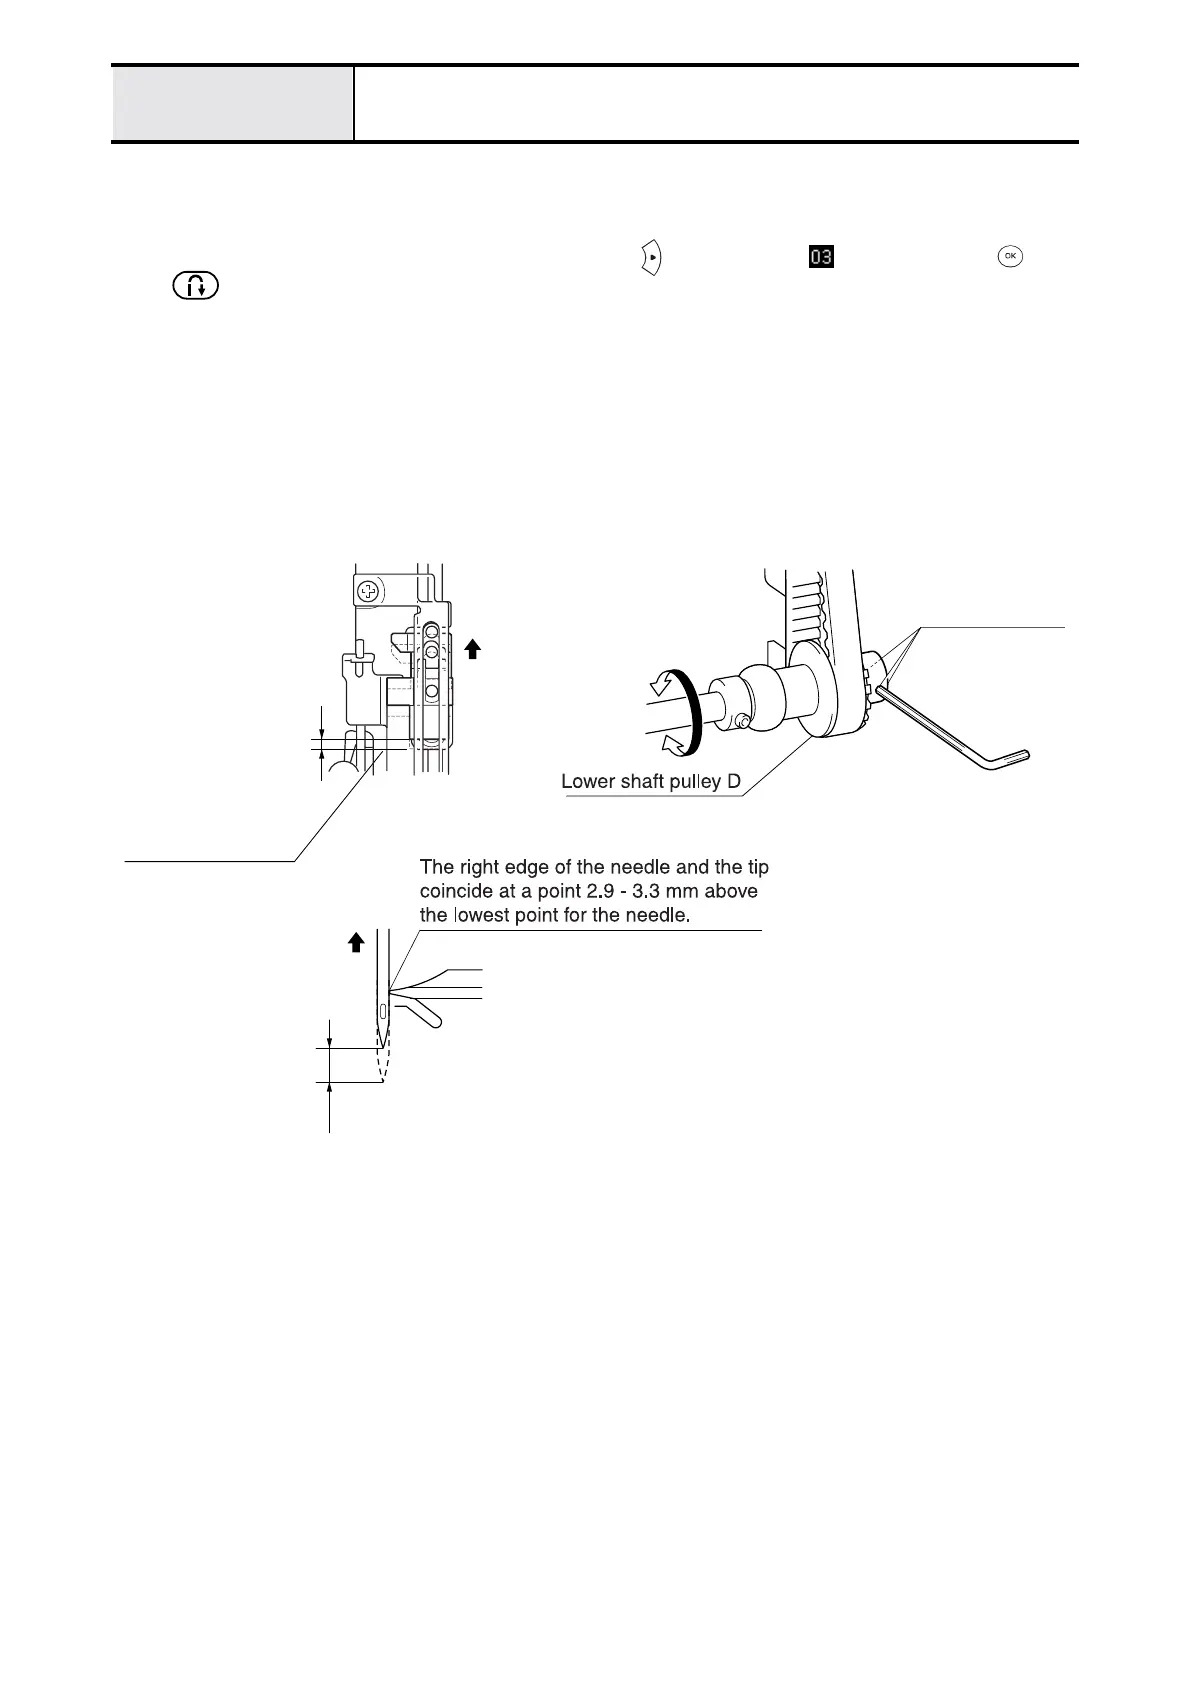
Needle bar rise adjustment
1. Remove the front cover, and turn on the power while pushing SW1 and SW3 on the main PCB assy. (the buzzer
sounds four times and test mode starts).
*See (4 - 5 "Test Mode") for starting test mode with the front cover in place.
2. Press SW5 six times (with the front cover in place, press twice and select , and after pressing , press
once.), and move the needle bar to the left base line position.
3. Turn the pulley by hand, and set the needle bar at its lowest point.
4. Draw a needle bar low point reference line on the needle bar supporter assy.
5. Loosen the set screws (socket (FT) M5X5) (three) on lower shaft pulley D.
6. With the needle bar raised 2.9 - 3.3 mm from the needle bar low point reference line, adjust by moving the lower
shaft pulley D and lower shaft A assembly so that the right edge of the needle and the outer rotary hook tip come
together.
7. Secure the set screws (socket (FT) M5X5) (three) on lower shaft pulley D.
2.9 - 3.3 mm
Draw baseline aligned
with the lowest needle
bar point.
2.9 - 3.3 mm
Set screw, socket
(FT) M5X5 (three)
 Loading...