3 - 14
Bobbin winder mechanism
Main unit
4
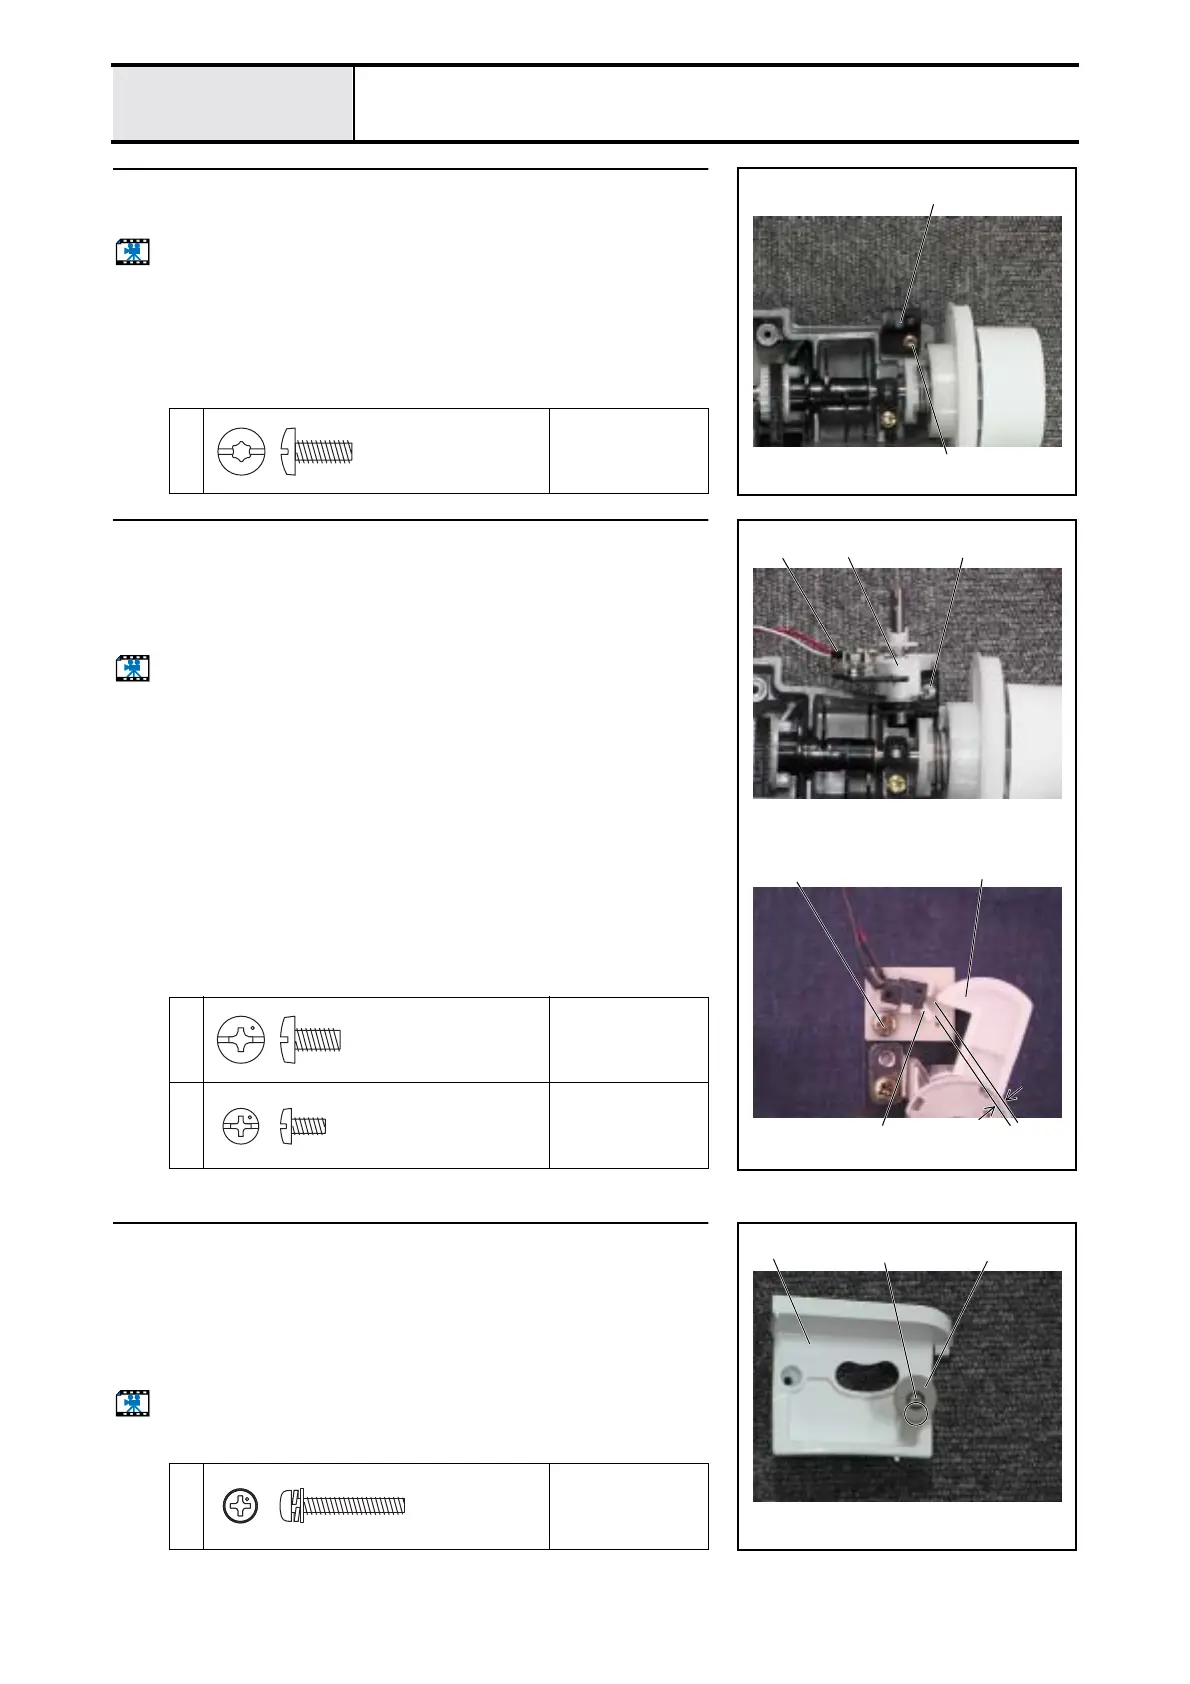
BW holder supporter attachment
1. Attach the BW holder supporter 1 using the screw 1.
Start movie clip (CD-ROM version only)
1
Torque
1.18 – 1.57 N·m
1
1
Taptite, Bind S
M4X10
Color; Gold
5
Bobbin winder holder assembly attachment
1. Attach the bobbin winder assembly 1 using the screw 1.
2. With the bobbin winder OFF, adjust the SW adjust plate left or right so that
the gap between the BW shaft holder assembly 1 and the BW-F SW assy.
2 is 2.5
±
0.3 mm, and fully tighten the screw 2.
Start movie clip (CD-ROM version only)
1
Torque
1.18 – 1.57 N·m
2
Torque
0.78 – 1.18 N·m
1
1
2
2
1
2.5
±
0.3mm
2
Screw, Bind
M4X8
Color; Silver
Screw, Bind
M3X6
Color; Silver
6
Bobbin presser assembly
1. Attach the bobbin presser 1 to the bobbin winder cover 2 using the screw
1 and a type 1 M3 nut.
*Key point
• Set the side of the bobbin presser 1 with the least eccentricity
to the near side (see figure to the right).
Start movie clip (CD-ROM version only)
1
Torque
1.18 – 1.57 N·m
2
1
1
Screw, Pan (S/P washer)
M3X20DA
Color; Silver
 Loading...