14
B. THE HELMET
REMOVING THE CHEEK PADS
1.
1.1.
1. First remove the protective collar.
(See instruction page 6)
2
22
2.
..
. Unfasten the 3 snaps to remove the
first part of the pad. Next, pull the upper
part of the cheek pad, to detach the
Velcro.
3
33
3.
..
. Repeat these steps for the other side
INSTALLING THE CHEEK PADS
1.
1.1.
1. Before installing the cheek pads,
identify the right and the left sides.
2.
2.2.
2. Fasten the 3 snaps and attach the
Velcro upper part in position. Make sure
the strap is in position inside the cheek
pad notch.
3.
3.3.
3. Repeat these steps for the other side
REMOVING THE HEAD LINER
1.
1.1.
1. First, remove the protective collar.
(See instruction page 6)
2.
2.2.
2. Second, remove the cheek pads.
3
33
3.
..
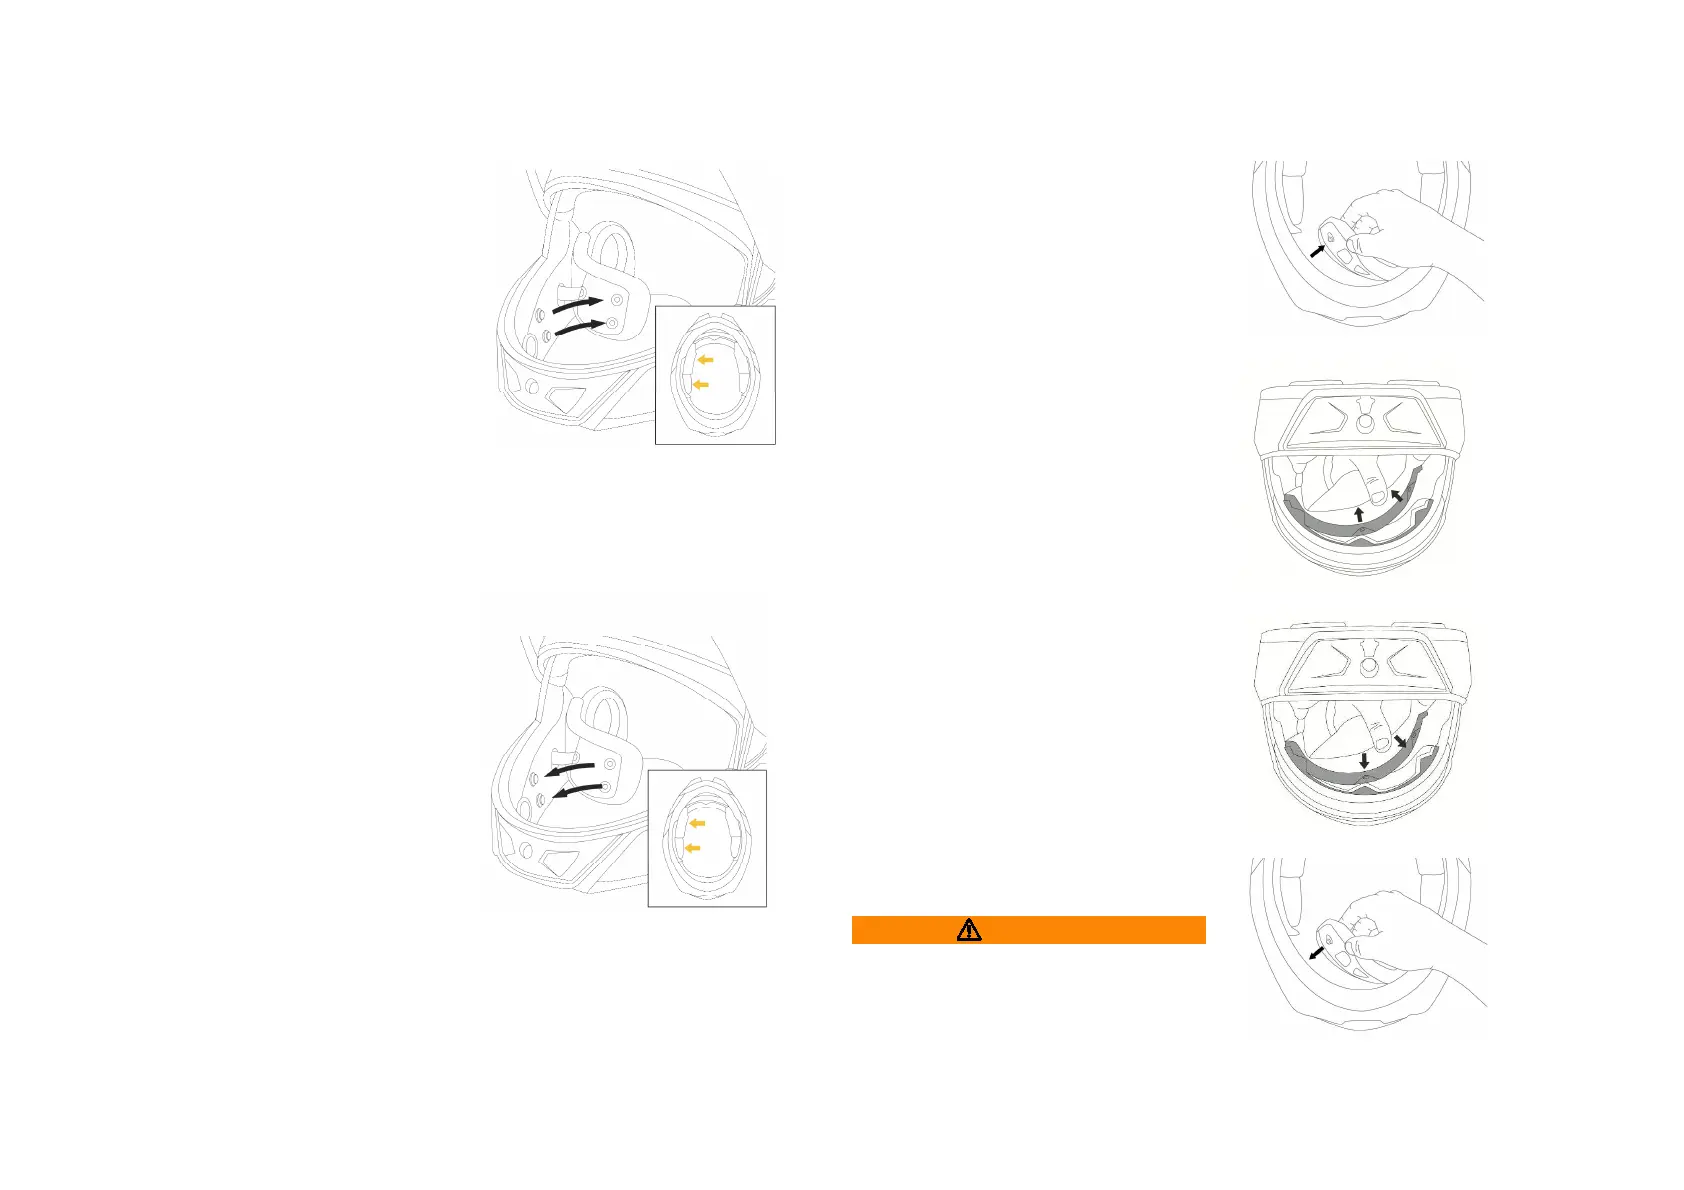
. The head liner is attached to the inner
shell with 2 snaps (on each side of the
neck) and a frontal portion, with 3 snaps.
They can be removed by pulling them out
carefully.
For the frontal portion, start to pull from
one side of the plastic strip.
INSTALLING THE HEAD LINER
1.
1.1.
1. Insert the frontal plastic strip under the
notches of the other plastic strip attached
to the inner shell.
2.
2.2.
2. Next, position the head liner inside the
helmet.
3.
3.3.
3. Then, fasten the 2 snaps on the neck
portion.
WARNING
WARNINGWARNING
WARNING
Never ride when parts of the inner lining
have been removed.
To avoid damage to the inner lining and inner shell, do not hang the helmet
over the mirrors or handlebar grips.


 To Next Page