Do you have a question about the BT REFLEX RR B and is the answer not in the manual?
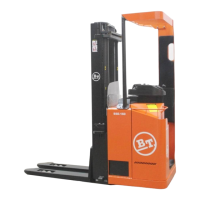
General overview of reach trucks, their intended use, operator position, and key specifications like lifting capacity and height.
Technical data for various truck models including lifting capacity, travel and lift speeds, weight, battery specifications, and noise levels.
External dimensions for RR B1-8 and E1-E8 models, presented in a table with detailed measurements.
Details and illustration of the truck's identification plate, showing items like TYPE, SERIAL NO., RATED CAPACITY, and WEIGHT WITHOUT BATTERY.
Detailed list and illustration of the main components of the RR B/E 1-8 truck model.
Detailed list and illustration of the main components of the RR B/E 2-8 CC truck model.
Shows the position and significance of various plates and symbols located on the RR B/E 1-8 truck.
Illustrates the location and meaning of plates and symbols found on the RR B/E 2-8 CC truck.
Specifies tightening torques for galvanized, non-oiled bolts and untreated, oiled bolts in Newton metres (NM).
Outlines essential safety rules for personnel performing maintenance, including training, clean workspace, and electrical safety.
Provides instructions for cleaning and washing the truck to ensure reliability, including specific warnings for battery and welding operations.
Details safe procedures for lifting the truck, emphasizing flat surfaces, parking brake activation, and proper lifting points.
Instructions for opening the motor compartment, including safety warnings about working under a lifted truck and proper jack usage.
Provides step-by-step instructions and safety warnings for tilting the cab for maintenance access on RR E 1-8 and RR E 2-8 CC models.
Details the scheduled maintenance tasks for RR B/E 1-8 trucks, including intervals in hours and days/weeks/months.
Outlines the scheduled maintenance tasks for RR B/E 2-8 CC trucks, specifying intervals and required actions for various components.
Specifies lubrication types, specifications, and applications for various truck components based on temperature.
Details tools for Super Seal connectors, including fitting, loosening, and removing pins/sleeves.
Lists tools for AMP connectors, including those for removing and fitting pins/sleeves for various timer types.
Describes tools for fitting and removing pins/sleeves for AMP microtimer connectors.
Lists various tools including service instruments for CAN, TruckCom program, and cab tilt tool.
Details the air conditioning unit, including ventilation speeds, main and auxiliary heater functions, and temperature control.
Explains the use of four air vents for directing airflow, controlling fan speed, and adjusting cabin air mix.
Lists the fuses in the heater: one 5A for fan/electronics and four 30A for the heating element.
Instructions for removing the cover plate, replacing the air filter, and reinstalling the cover plate.
Procedures for emergency cab evacuation through the roof hatch, with safety warnings about the control panel and roof surface.
Information on the two 24-volt tubes in the light fitting and how to switch on the roof light.
Details on inspection, adjustment, and removal of tilt stops, including critical warnings about stability and removal procedures.
Describes the pump motor as a three-phase AC motor with integrated temperature and speed sensors, available in two sizes.
Step-by-step instructions for dismantling the pump motor, including lowering forks, disconnecting battery, and removing components.
Instructions for dismantling and assembling bearings for motors without pumps, including specific steps for replacing the pulse sensor bearing.
Details the installation of an external temperature sensor, including resistance values and mounting procedures.
Describes the steering motor's location, function, and components like gear and carbon brushes.
Instructions for dismantling and assembling the steering motor, including removing screws, gear wheel, and connecting components.
Guidance on removing plastic plugs, examining carbon brushes for wear, and replacing them if necessary.
Describes the drive motor as a three-phase AC motor with temperature sensor and bearing sensor, available in two sizes.
Step-by-step instructions for dismantling the drive motor, including removing power, contacts, cables, and mounting bolts.
Instructions for dismantling and assembling bearings for the drive motor, covering both N-side and D-side procedures.
Details on installing an external temperature sensor, including resistance values, mounting location, and applying metallic lacquer.
Describes the drive gear unit mounted on the chassis, its integrated components, and the two-stage angle transmission.
Lists main components and data for the drive assembly/transmission, including diagrams and a component placement table.
Provides technical data for the drive assembly/transmission, including transmission type, gear ratio, oil volume, and viscosity.
Instructions for dismantling the transmission, showing a detailed breakdown of components.
Guidance on replacing the drive motor and drive transmission, including dismantling the drive motor, gear wheel, and brakes.
Instructions for checking, refilling, and changing the oil in the transmission, including recommended oil types and volumes.
Details on how to replace the drive shaft sealing ring, addressing potential oil leaks and providing dismantling/assembly steps.
Describes the travel brake system's subsystems: regenerative motor braking and an electromechanical disc brake.
Explains the primary braking function (regenerative motor brake) and how braking is actuated through accelerator release, direction selector, or brake pedal.
Details the electromechanical spring force brake, its function as parking/emergency brake, and assembly/dismantling procedures.
Covers brake maintenance, including play adjustment, wear checks on the friction disc, and braking force checks.
Describes the travel brake system with support arm brakes, comprising regenerative motor braking and multiple disc brakes in support arm wheels.
Explains how braking is actuated via accelerator release, travel direction selector, or brake pedal, detailing brake performance graphs.
Details the electromechanical disc brake, its assembly, dismantling, inspection, and maintenance procedures.
Covers brake maintenance, including play adjustment, wear checks on the friction disc, and braking force checks.
Describes the drive wheel construction and the importance of correct torque when changing wheels.
Instructions for dismantling the drive wheel, including lifting the truck, removing the guard plate, and unscrewing nuts.
Steps for assembling the drive wheel, including applying grease, positioning washers, and tightening nuts.
Describes the five types of support arm wheels used on Reflex trucks and their fitting method.
Instructions for dismantling wheels, differentiating between wheels with and without brakes.
Steps for assembling wheels, including fitting brake units, spacers, and securing the wheel axle.
Detailed procedures for dismantling and assembling wheel bearings for 265 mm and 300 mm wheels without brakes.
Instructions for dismantling and assembling wheel bearings for 300 mm wheels with brakes and 350 mm wheels.
Explains the steering generator's location and function in sending voltage to the steering motor via the electronic card.
Instructions for dismantling and assembling the steering generator, including removing panels, connectors, and bolts.
Describes the steering angle sensor's function and mounting on the driving gear.
Explains how the sensor detects steering changes and uses the gear wheel to calculate the steering angle displayed on the compass rose.
Instructions for adjusting the sensor to a 1 mm detection range, including screw adjustment and LED verification.
Overview of the electrical system, including the electronic card's functions and error code display.
Provides a comprehensive list of symbols used in wiring diagrams and their corresponding descriptions for various electrical components.
A detailed list of electrical components, their symbols, designation/function, and corresponding picture numbers.
Describes the electronic card's microprocessor functions, LEDs, inputs/outputs, and operational modes.
Provides dimensions (depth, width, height) and minimum weight for various battery models (B/E1, B/E2-5, B/E6-7, B/E8).
Recommendations for setting parameter 21 for Hawker Evolution gel batteries, including general guidelines and specific usage recommendations.
Note regarding parameter 21 needing to be checked and adapted to the installed battery type, machine type, and size.
Advises reducing parameter 21 value by six for wet-type batteries and provides warnings about setting it too high.
Step-by-step instructions to verify parameter settings by charging and measuring battery voltage, with notes on Uend values.
Describes the frequency converter with a green LED for OK status, controlled by basic software for motor control.
Details terminal connections and pole bolts for the frequency converter, specifying Term., Cable, Description, Active (V), and Input/Output.
Provides technical data for frequency converters ACS 4808 and ACS 4811, covering operating voltage, frequency, temperature, and current limits.
Information on installing new frequency converters, differentiating between ready programmed and non-programmed units.
Instructions for downloading new programs to the electronics card using the TruckCom service program.
Describes the A5 electronic card with LEDs for inputs/outputs, a potentiometer for hydraulic control, and its monitoring functions.
Details terminal connections and voltages for the A5 electronic card, categorizing them into 10X, 20X, 30X, 40X, and 50X groups.
Instructions for adjusting the lowering speed using potentiometer RV1 and referring to C-code 6000.
Explains how to look up and program driver-specific parameters and set the clock using the keypad.
Details on accessing and modifying truck parameters via the 'Parameter' function, including warnings about altering settings.
Lists warning and error codes, their descriptions, error modes, causes, and remarks, along with troubleshooting steps.
Explains the keypad's function for designating and changing PIN-codes, driver profiles, and logging in/out.
Describes the keypad's front and back views, terminal numbers, connections, and functions.
Details five different log-in functions for the keypad, including connection details and PIN-code usage.
Provides information on programming routines, LED status indicators during login and programming, and keypad functions.
Shows standard driver PIN-codes that can be activated or changed, detailing programming modes and procedures.
Describes the truck's hydraulic system, including the pump, main valve, and oil distribution to cylinders and mast.
Explains symbols used in hydraulics diagrams, covering cylinders, directional valves, proportional valves, and other components.
Presents the hydraulics diagram 1 (4) for RR B1-8 and RR B1-8C models.
Provides the hydraulics diagram 2 (4) for RR B1-8, RR B1-8C, and Integrated side shift models.
Details the hydraulics diagram 3 (4) for RR E1-8 and RR E1-8C models.
Presents the hydraulics diagram 4 (4) for RR E1-8, RR E1-8C, and Integrated side shift models.
Lists hydraulic symbols with their designation, function, and comments.
Illustrates component placement 1 (3) for hydraulic systems.
Shows component placement 2 (3) for hydraulic systems, including torque specifications.
Details component placement 3 (3) for hydraulic systems, specifically for RR E1-8 models.
Instructions for adjusting fork lowering speed, including warm-up, potentiometer adjustment, and error code handling.
Procedure for adjusting maximum lift capacity, including extending reach carriage, loading forks, and using adjuster screw.
Describes the hydraulic pump's size, flow rate, and motor sizes used on trucks.
Provides instructions for replacing the hydraulic pump, including dismantling and assembling procedures.
Emphasizes the importance of correctly tightened hydraulic connections for a sealed and durable connection.
Details tightening torques and angles for conical connections with O-rings and screwed connections into aluminum.
Provides tightening torque specifications for nuts/connections with Tredo seals based on dimension.
Instructions for tightening pipe couplings by hand followed by a half turn for correct torque.
Specifies designation, dimension, and torque for connections screwed into aluminium.
Details tightening torques for connections screwed into steel, including those with EOLASTIC sealing rings.
Provides information for installation and operation of the mast mounted hose reel, including inspection and maintenance.
Instructions for assembling the hose reel or spring, including preloading the hose drum and checking the spring-loaded eye.
Guidance on checking the hose reel's function after assembly, including counting turns and ensuring the hose is not fully unwound.
Describes the main lift cylinders in the Newton mast, their location, and the function of the hose rupture valve.
Lists necessary tools for working with lift cylinders on the mast and valves in the fork yoke.
Step-by-step instructions for dismantling lift cylinders from the mast, including loosening chains, blocking runners, and removing the cylinder.
Procedure for dismantling the cylinder itself, including placing it in a vice, knocking off sleeves, and pulling out the rod.
Instructions for removing clamping ring, rod seal, guide ring holder, guide ring, and retainer rings from the lift cylinder.
Steps for fitting the locking ring, rod seal, guide ring, and guide ring holder onto the rod using assembly tools.
Details the disassembly and assembly of the hose rupture valve using specific tools for different mast types.
Instructions for assembling the cylinder, including fitting the rod, top sleeve, flange sealant, and mounting bolts.
Steps for assembling the cylinder in the mast, including lifting, bolting, and adjusting the chain.
Describes the free lift cylinder's location in the mast and the function of its hose rupture valve.
Lists tools required for free lift cylinders on the mast with valves in the fork yoke.
Instructions for dismantling the free lift cylinder, including removing pipes, plugs, hoses, and securing the mast.
Procedure for dismantling the cylinder, including placing it in a vice, knocking off sleeves, and pulling out the rod.
Instructions for dismantling the rod seal and support ring, with notes on piston care to prevent leakage.
Steps for assembling the support ring and rod seal onto the piston using specific assembly tools.
Procedure for removing the rod seal, support ring, and piston from the cylinder.
Instructions for fitting the piston into the free lift cylinder, including applying sealant and using assembly tools.
Details the dismantling and assembly of the hose rupture valve using tool 08-15417.
Steps for assembling the cylinder, including inserting the rod, fitting the top sleeve, applying sealant, and tightening bolts.
Procedure for final assembly of the free lift cylinder, including fitting chains, hoses, and the mast.
Describes the reach cylinder's location, function as a double-acting cylinder, and control by the main valve.
General instructions for opening and closing the motor compartment for reach cylinder work.
Steps for dismantling the reach cylinder, including swinging out the door and loosening various components.
Procedure for dismantling the cylinder, including removing hoses, bolts, plates, and the cylinder itself.
Instructions for dismantling the rod seal and support ring, with notes on preventing damage to the ram.
Steps for assembling the rod seal and support ring onto the piston.
Procedure for removing the rod seal, support ring, and ram from the cylinder.
Instructions for assembling the ram, including applying sealant and screwing it in using a hook spanner.
Steps for assembling the cylinder, including inserting the rod, fitting the top sleeve, applying sealant, and tightening bolts.
Final assembly steps for the reach cylinder, including fitting the yoke, pins, bolts, and hoses.
Describes the fork tilt cylinder's location and function as a double-acting cylinder powered by oil pressure.
Instructions for dismantling the fork carriage, including removing forks, clamping rings, bolts, and the tilt cylinder.
Instructions for dismantling the fork carriage without a valve, including removing bolts, axles, and the tilt cylinder.
Procedure for dismantling the cylinder, including unscrewing bolts and carefully pulling out the rod.
Instructions for dismantling the rod seal, with notes on preventing damage to the ram and careful removal.
Procedure for removing the rod seal, support ring, and ram from the cylinder.
Instructions for assembling the ram, including applying sealant and screwing it in using a hook spanner.
Steps for carefully pressing the rod seal onto the rod.
Instructions for assembling the cylinder, including inserting the rod and tightening bolts.
Steps for assembling the fork carriage, including fitting the tilt cylinder, yoke, axles, and forks.
Describes the cab tilt cylinder's location and function in trucks with tilting driver cabs.
Instructions for dismantling the cab tilt cylinder, including loosening the door lock, unscrewing hoses, and supporting the cab.
Procedure for dismantling and assembling the cylinder, including rod seal and support ring.
Instructions for dismantling the cylinder, including placing it in a vice and carefully removing the top sleeve.
Instructions for dismantling the rod seal, with notes on preventing damage to the ram and careful removal.
Procedure for removing the rod seal, support ring, and ram from the cylinder.
Instructions for assembling the ram, including applying sealant and screwing it in using a hook spanner.
Steps for carefully pressing the rod seal onto the rod.
Instructions for assembling the cylinder, including inserting the rod and tightening bolts.
Steps for assembling the fork carriage, including fitting the tilt cylinder, yoke, axles, and forks.
Provides general information about mast assembly, dismantling, and play rectification.
Lists essential tools for mast assembly, dismantling, and transport, including cranes, wrenches, and measuring tools.
Describes two methods for transporting the truck without the battery installed, using a forklift or an extension cable.
Step-by-step instructions for assembling the mast, including connecting power, extending carriage, and securing components.
Detailed instructions for dismantling the mast, including removing hoses, cables, and loosening bolts.
Guidance on adjusting mast play, including lateral and radial play adjustments and notes on potential issues.
States that this section applies to all machines with a mast.
Explains the need for regular lift chain adjustment due to stretching and refers to maintenance schedule and C codes.
Describes chain inspection for wear, stretching, rust, stiff links, bolt rotation, loose bolts, damage, and dirt.
Identifies insufficient lubrication as a cause of metallic friction and noise in the chain, recommending replacement.
Describes surface rust as reddish brown, indicating potential deep-seated rust and impaired strength, recommending chain replacement.
Explains fretting corrosion causing reddish brown powder and potential bleeding, recommending chain replacement.
Identifies stiff links due to rust or seizing as a reason for the chain not returning to normal position, recommending replacement.
Describes bolt rotation as a sign of stiff links, recommending chain replacement after comparison with a new chain.
Identifies loose bolts protruding from the chain side due to stiff links or rotation, recommending chain replacement.
Explains how to measure disc height (H2, H3) and permissible wear (5% of H2), recommending chain replacement if wear is excessive.
Describes how to measure chain stretch (max 2% over 300-1000 mm) and refers to tables for nominal and maximum permitted lengths.
States that the chain should be replaced if it is damaged in any way.
Attributes damaged discs to overloading or corrosion, recommending chain replacement.
Recommends chain replacement if very dirty, but provides cleaning instructions using solvent and compressed air.
Specifies lubricants for Rexnord chains and recommended lubrication intervals based on operating conditions.
Refers to ISO standard 5057 for fork arms and general inspection intervals.
Specifies inspection intervals for fork arms (max 12 months) and requirements for heavy use inspections.
Details requirements for careful inspection of fork arms by trained personnel to detect damage and ensure safe use.
Emphasizes visual and non-destructive crack detection for fork arms, especially at the heel and hooks.
Describes checking fork tip height differences and withdrawal from service if exceeding 3% or manufacturer recommendations.
Confirms the need for good repair and working order of the positioning lock, with withdrawal from service if faults are found.
States that fork arms with illegible markings per ISO 2330 shall be removed from service.
Requires thorough checks for wear on blade and shank, especially the heel, and withdrawal if thickness is reduced.
Details checks for wear, crushing, and deformation on top hook and retaining faces, and withdrawal if clearance becomes excessive.
States that repairs should only be done by the manufacturer or competent expert, recommending against welding cracks or wear.
Requires repairs (except lock/marking) to undergo a yield test with specified load according to ISO 2330.
Describes the use of extended forks for bulkier items, notes on load capacity reduction, and required maintenance.
Outlines maintenance procedures for telescopic forks, including system bleeding, extending/retracting forks, and checking hoses.
Provides a table of common fork symptoms, possible causes, and solutions.
Detailed steps for replacing hydraulic parts, including leveling forks, removing outer fork, unscrewing couplings, and handling piston rods.
Describes the BTM battery charger as a microprocessor-controlled WA charger for open lead acid batteries.
Provides instructions for installing the charger, including placement, ventilation, and checking the rating plate.
Explains display functions, charging process, shutdown conditions, delayed power, extra charging, and characteristics.
Lists common error codes (E01-E62) and their corresponding messages, causes, and appropriate actions.
Details how to read analogue measurement values and statistics from the charger's memory, including register numbers and functions.
Explains how BTM saves utilization statistics and how to read them from registers, covering cycles and recharged Ah.
Describes how parameters are stored in EE-prom memory and the process for changing them.
Instructions for changing parameter values, including examples for battery capacity and warnings about incorrect settings.
Discusses acid circulation systems for batteries, including BTM models and pump types, to ensure electrolyte circulation.
Covers basic programming (code 30), resetting statistics (code 31), and calibration procedures for measurement values.
Details calibration of measurement values using trimming constants, including steps for ambient temperature and battery voltage.
Instructions for calibrating charging current by measuring and entering the value, with an example provided.
Steps for calibrating mains voltage display by measuring voltage between phases and entering the value.
Procedures for calibrating zero pressure, pressure, and programming alarm limits for the charger.
Explains how to adjust charging characteristics by moving a strap based on mains voltage and charging current.
Provides a guide to analyzing and acting upon error messages and abnormal charging conditions.
Introduces TruckCom, a communications program for interacting with trucks equipped with CAN communication.
Details the requirements for connecting to the truck via a CAN interface, PC, and associated cable.
Describes the TruckCom program's main window, including menu row, tool buttons, work area, and status window.
Steps to connect the PC to the network by selecting 'Scan units' to perform a check and set up the CAN interface.
Instructions to disconnect from the network by selecting 'Disconnect' function, which resets the CAN interface.
Details on downloading new programs to nodes using the 'Download' function via menu or tool button.
Explains how to generate a truck configuration and status report to a file or disk using the TruckCom software.
Instructions for changing truck parameters via the 'Parameter' function, including notes on normal mode and parameter numbers.
Steps to access diagnostics by selecting the 'Diagnostic' function via menu or tool button, with notes on status LEDs and information display.
Describes functions for saving/loading parameters, resetting CAN adapter, deleting fault logs, and adjusting date/time.
Provides specifications for the CAN interface, including current consumption, supply voltage, transfer speed, and temperature ranges.
Notes and procedures for installing the software on a PC with Windows XP/2000/NT or Windows 95/98.
States that trucks can be equipped with warning lights to attract driver attention during operation.
Introduces height indication and height pre-set functions, explaining how the system measures and displays fork height.
Describes the height indicator that shows current fork height in the main lift range, based on height meter information.
Explains how the height indication system works with reference switches, pulse sensors, and electronic cards.
Shows the display and underside, describing terminal numbers, connections, and functions for length display.
Details how to use the height pre-set to program lifting heights, stop movements at desired levels, and the role of the height meter.
Instructions for entering programming mode, programming new lifting heights, modifying or deleting values.
Lists error codes, their remarks, and explains how errors are displayed and registered.
Outlines BT's environment management program for recycling materials and minimizing hazardous substance discharge.
Emphasizes the need to know component material composition for proper sorting and disposal.
Lists abbreviations used in dismantling instructions for Service Manuals and plastic materials.
Details the sorting method for component parts based on recyclability and special handling requirements.
Provides instructions for dismantling the main mast mounting, cab, and support arm, treating them as iron and steel scrap.
Instructions for dismantling the operator's seat, including removing cushions and belts, and material handling guidance.
Instructions for dismantling the ventilation equipment for cab heating/ventilation systems.
Steps for dismantling driver controls, including removing the pedal rack, rubber surface, and potentiometer.
Instructions for dismantling interior fittings for RR-B models, including removing cushions, panels, and the instrument panel.
Instructions for dismantling interior fittings for RR-E models, including removing cushions, panels, windows, and the instrument panel.
Steps for dismantling interior fittings for RR-B-CC models, covering cushions, mirrors, panels, windows, and units.
Instructions for dismantling the rollover/head guard, including removing the protection plate.
Instructions for dismantling finger protectors, including material handling guidance.
Instructions for dismantling finger/foot protectors, including material handling for PMMA and PE.
Instructions for dismantling finger and foot protectors, specifying material handling containers.
Instructions for dismantling electric motors (steering, pump, travel drive), including removing cables and components.
Steps for dismantling the electric fan motor, including removing cables and fans.
Instructions for dismantling the drive unit/final gear, including draining oil, removing gearbox, and drive wheel.
Instructions for dismantling drive and support arm wheels, including material handling for vulcanization and rims.
Steps for dismantling the electric steering system, including removing wrist support, cushions, panels, knob, wheel, motor, and console.
Instructions for dismantling the truck battery, including removing cables and the battery itself, with material handling guidance.
Steps for dismantling the travel direction selector, including removing the handle and cables.
Instructions for dismantling the frequency converter, including removing the guard, cables, and the converter itself.
Steps for dismantling control system components like switches, keypad, display, height indicator, and potentiometer.
Instructions for dismantling steering/protective electronics, including removing cables and the electronic circuit board.
Describes the hydraulic unit, tank, and pipes, and provides instructions for dismantling the hydraulic unit.
Details the hydraulic system fitted on the chassis, including main valve and hydraulic lines.
Describes the hydraulic system fitted on the mast, including hydraulic lines and routing valve.
Illustrates main lift, free lift, cab, and tilt cylinders, and provides dismantling instructions for cylinders.
Instructions for dismantling the reach cylinder, including hoses, bolts, and the cylinder itself.