Do you have a question about the Buderus Logamax plus GB142-30 and is the answer not in the manual?
Defines the intended use of this kit for the Logamax plus boiler.
Details the meaning of warning triangles and lightning symbols used in the manual.
Highlights critical safety warnings for gas explosion and electrical shock hazards.
Procedure to safely disconnect power and gas supply before installation.
Step-by-step guide to detach the existing condensate trap.
Instructions for safely removing the heat exchanger component.
Guidance on installing the new condensate trap and flue gas adapter.
Procedure for checking all connections for gas leaks after installation.
Instructions for filling the heating system to the correct pressure.
Steps to safely start the appliance after installation and checks.
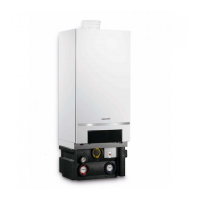
This document provides installation and maintenance instructions for a service kit designed for Buderus Logamax plus GB142-24/30/45/60 condensing gas boilers. The primary function of this service kit is to integrate an internal condensate bypass, along with a new condensate trap and flue gas adapter, into the existing boiler system. This modification is crucial for ensuring the efficient and safe operation of the boiler by managing condensate effectively and maintaining proper flue gas pathways.
The installation process for this service kit is detailed and requires adherence to specific safety considerations and procedural steps. Before any work begins, it is imperative to shut off the gas supply to the appliance and disconnect all electrical power. This is a critical safety measure to prevent gas explosions, electrical shocks, and potential personal injury or death. The instructions emphasize that only a qualified service agency should perform the installation, in accordance with the manufacturer's guidelines and all applicable local codes and requirements. This ensures that the installation is not only correct but also compliant with safety standards.
The initial steps of the installation involve shutting down the appliance, which includes closing the gas shut-off valve and setting the mains switch to "0." The control panel cover must be opened to access internal components. Following this, the existing condensate trap needs to be removed. This involves pulling it from the condensate collector and loosening it from its connection point. The next major phase is the removal of the heat exchanger. This process requires closing maintenance shut-off valves, draining the system, and then disconnecting various electrical components such as the cable plug from the gas control valve and both cable plugs from the fan unit. Further steps involve loosening retaining clips on the burner cover, removing the burner itself, and disconnecting supply, return, and safety sensors. The hot surface ignitor and ionization electrode plugs must also be disconnected, and the ground cable pulled from the hot surface ignitor. Finally, the supply and return pipes of the heat exchanger need to be removed, along with opening the latches of the condensate collector and dismantling the tension spring. The combustion air supply and flue gas exhaust connections are then removed, followed by loosening and removing the flue gas adapter. The heat exchanger itself is then removed by pulling it forward and pushing it upwards.
Once the old components are removed, the installation of the new service kit begins. This involves first installing the gas ring on the flue gas collector. The condensate bypass pipe is then fitted onto the gas ring. The heat exchanger is reassembled back into the appliance in reverse order of its removal. A crucial step before installing the new condensate trap is to fill it with water. This prevents exhaust gases from entering the room, enhancing safety. The new condensate trap is then reassembled to the appliance, and the new condensate bypass pipe is connected. Finally, the new flue gas adapter is screwed onto the appliance.
After the physical installation, several critical checks and procedures must be performed to ensure the safe and proper functioning of the boiler. These include testing for gas leaks, which is highlighted as a critical safety step. The instructions warn against electrical short circuits and emphasize the importance of carrying out a proper leak test using only approved leak detection agents. It is explicitly stated not to spray leak testing agents onto cables, plugs, or electrical connection lines to prevent damage.
Following the leak test, the appliance needs to be filled. This involves switching on the heating system and filling it to a pressure of approximately 20 psi (1.5 bar). The pressure should be monitored on the control panel or the P/T gauge. The document provides specific pressure ranges, noting that the minimum pressure is 15 psi (1.0 bar) on a cold system, and the maximum is 44 psi (3.0 bar) at the highest heating medium temperature. Exceeding this maximum pressure will cause the pressure relief valve to open.
The final stage is starting up the appliance. Before lighting, users are strongly advised to read the safety information provided. This section reiterates the danger of gas explosions and emphasizes that the appliance does not have a pilot light but an automatic ignition device. Users are warned not to attempt to light the burner manually. A critical safety instruction is to smell around the appliance area for gas, especially near the floor, as some gases are heavier than air. If gas is detected, users must stop, follow specific safety protocols (no open fire, no smoking, no electrical switches, shut off main gas supply, open windows, evacuate, and call a qualified service technician), and wait 5 minutes for the gas to clear before smelling again. If no gas is detected, the casing can be reinstalled. The thermostat or other operating control should be set to the desired setting, the appliance connected to the power supply, and then switched on using the mains switch. Finally, all gas and water fittings must be checked for leaks.
Throughout the document, various symbols are used to convey important information and warnings. An "i" symbol denotes general important information, while a warning triangle with an exclamation mark on a grey background indicates safety instructions. A lightning symbol within a warning triangle specifically highlights electrical hazards. Signal words like "NOTICE," "CAUTION," "WARNING," and "DANGER" are used to indicate the seriousness of potential hazards, ranging from property damage to risk of life. These symbols and signal words are crucial for guiding the installer through the process safely and effectively. The document also uses arrows and bullet points to denote action sequences and list entries, making the instructions clear and easy to follow.