2002 Buell X1: Engine 3-61
HOME
12. See Figure 3-97. Install pinion shaft bearing.
a. Lubricate pinion shaft bearing with engine oil.
b. Slip bearing on pinion shaft.
c. Install new retaining ring in groove of pinion shaft
bearing inner race.
13. Assemble crankcase halves together.
a. Apply a thin coat of DOW CORNING SILASTIC or 3-
M 800 sealant to crankcase joint faces.
b. Slide pinion shaft through outer race in right crank-
case.
c. Attach crankcase halves using hardware shown in
Figure 3-76.
d. Tighten the 3/8-in. fasteners to 22-27 ft-lbs (30-
37 Nm)
e. Tighten the 5/16-in. fasteners to 15-19 ft-lbs (20-26
Nm).
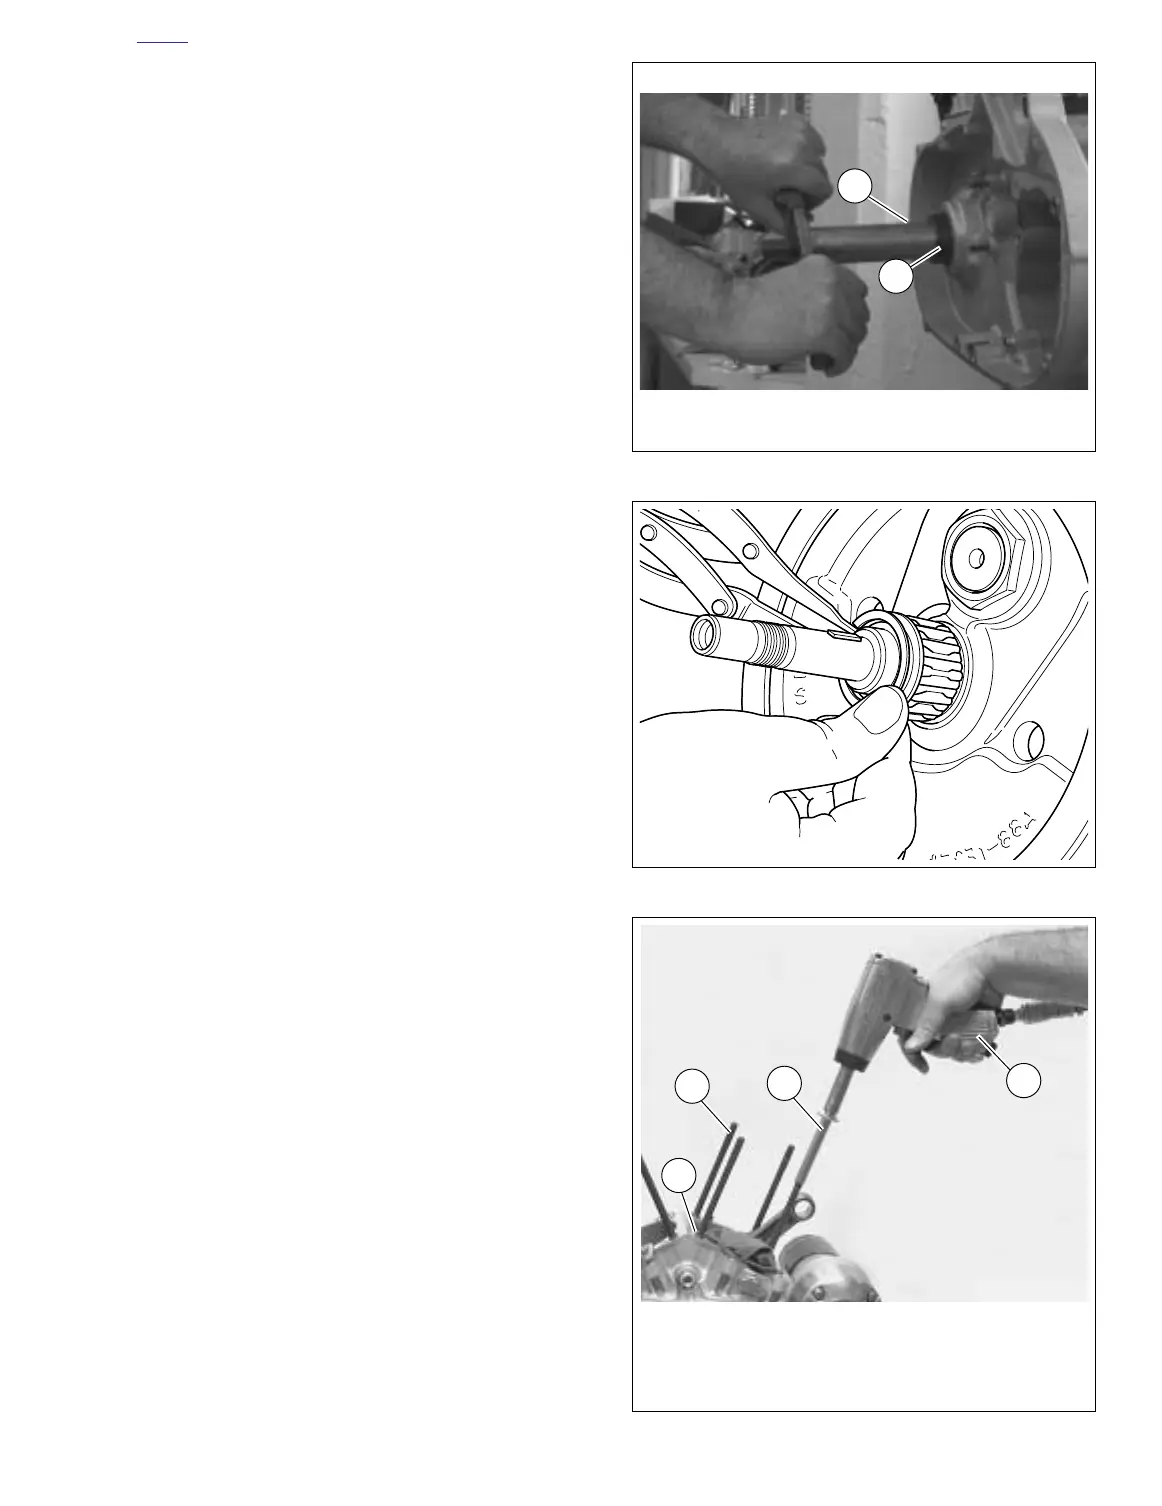
14. See Figure 3-98. Install cylinder studs.
a. Pack clean towels into crankcase opening.
b. Place a steel ball into a head screw (1).
c. The cylinder studs (2) have a shoulder (3) at the
lower end. Place the end of the stud without the
shoulder into the head screw.
d. Install the stud in the crankcase with the shoulder
end down. Use an air gun (4) to drive the stud until
the shoulder reaches the crankcase.
e. Remove air gun. Use a torque wrench to tighten
stud to 10-20 ft-lbs (14-27 Nm).
15. Install pistons and cylinders. See 3.6 CYLINDER AND
PISTON.
16. Install oil pump. See 3.13 OIL PUMP.
17. Install cam gears, gearcase cover, lifter guides and lift-
ers. See 3.16 GEARCASE COVER AND CAM GEARS.
18. Install cylinder heads. See 3.5 CYLINDER HEAD.
19. Install starter. See 5.7 STARTER.
20. Install transmission. See 6.13 TRANSMISSION INSTAL-
LATION AND SHIFTER PAWL ADJUSTMENT.
21. Install all primary drive components. This includes
engine sprocket, primary chain, complete clutch assem-
bly, engine sprocket nut and mainshaft nut. See 6.5 PRI-
MARY DRIVE/CLUTCH.
22. Install primary cover. See PRIMARY COVER under 6.2
PRIMARY CHAIN.
NOTE
Be sure to refill transmission to proper level with fresh lubri-
cant. See 1.10 CLUTCH.
23. See 3.4 INSTALLING THE ENGINE and perform the
applicable steps.
Figure 3-96. Install Bearing Seal/Spacer
Figure 3-97. Pinion Shaft Bearing
Figure 3-98. Cylinder Studs
8608
1. Bearing/Seal Installer (Part No. HD-42579)
2. Seal/Spacer Installer (Part No. HD-45206)
2
1
1
3
2
4
1. Head Screw with Ball Inside
2. Cylinder Stud
3. Shoulder on Cylinder Stud
4. Air Gun
 Loading...


