wARNINg: If any debris such as drill bits, metal shav-
ings, spews etc. drops inside the manifold, we advise
disassembly of the turbo to remove the debris.
Installation Steps
INSTALLATION STEPS
TOOL TIP, PRETURBO MOUNT
When drilling into the exhaust manifold, metal spews, shavings, and broken drill bits can fall inside. This
can be hazardous to your turbo when the engine starts. Try doing four things to avoid this possible prob-
lem: One, use a high quality twist bit and a slow speed drill, about 500-800 rpm; Two, start with a small
pilot bit about 1/8”, then use the full 5/16” bit after the smaller one has punched through; Three, grease
your drill bit in addition to the normal lubricant, this will catch ying spews as they are cut; Four, just prior
to punching through into the inside of the manifold, start the engine and build up exhaust pressure on the
inside of the manifold (blows spews outside the manifold instead of letting them fall inside).
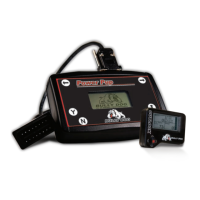
IMPORTANT: At least one Pyrometer Probe is required for OutLook installation.
PRETURBO MOUNT:
1. Drill a 5/16” hole into the Exhaust Manifold where all the exhaust runners of the manifold come together just
before the turbo exhaust inlet. Then tap the hole with a 1/8” pipe tap and mount the Pyrometer probe in the
hole. Use a 9/16” wrench to tighten the probe holder or tube tting to the down tube. Then tighten the Pyro
Probe Cap to the holder using a 5/8” wrench.
2. Run the Pyro Cable up to engine bay and through the rewall to inside the cab so the end meets the end of
the OutLook Main harness. Use zip ties to secure the line.
3. Connect the Pyrometer to the OutLook Main harness: if you want Pre-turbo temperatures displayed in the
bottom left quadrant on the OutLook screen, connect the Pre-turbo Pyrometer connectors to Pyro 1 connec-
tors on the OutLook Main Harness. Connect the shorter wire from the Pyrometer to the longer wire on the
OutLook Main harness labeled Pyro 1 using a 5/16” wrench and a phillips screw driver. Connect the longer
wire from the Pyrometer to the shorter wire coming o the OutLook Main harness labeled Pyro 1.
4. If a second Pyro is not used, then connect the remaining Pyro 2 wires to the long black ground wire that is
sticking out from the Main Harness using the existing hardware. This will ensure that there is no electrical
interference between the Pyro connections. To further protect the connections, wrap all of the Pyrometer
connections in electrical tape.