15
SERVICE
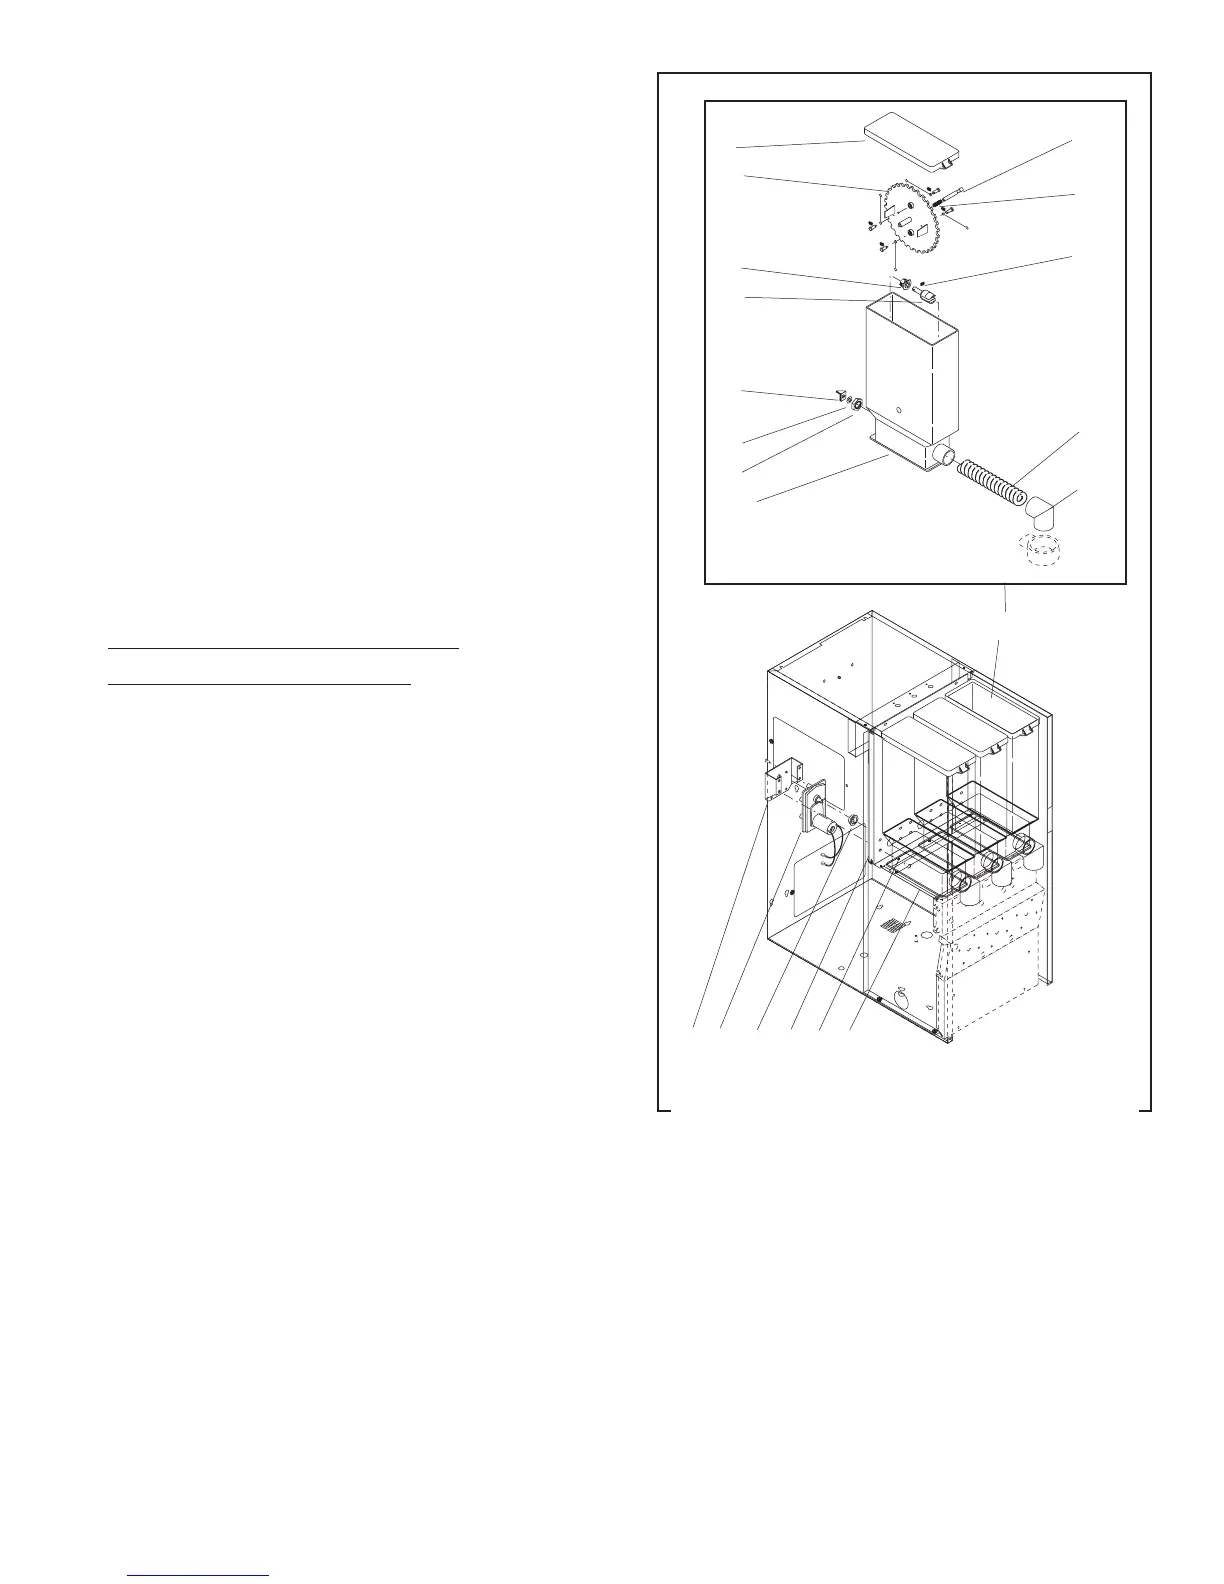
FIG. 2 AUGER DRIVE & HOPPER DISASSEMBLY
1. Hopper Lid
2. Agitator Disk Assy
3 Auger Drive Shaft
Bushing
4. Agitator Support Rod
5. Auger Drive Shaft
6. Retainer Clip
7. Auger Drive Bracket
8. Washer
9. Locknut
10. Hopper
P1638.30
1
2
3
5
7
8
9
10
4
11
6
12
13
15 16 17 14 18 19
29170 080900
Early Models
11. Spring
12. Auger Wire
13. Ejector Elbow
14. Auger Motor Mount-
ing Panel
15. Auger Motor Bracket
16. Auger Motor
17. Dust Seal
18. Shoulder Screw
19. Hopper Support plate
20. Hopper Assembly
AUGER DRIVE COMPONENTS (CONT.)
If voltage is present as described, proceed to #5.
If voltage is not present as described, refer to the
Wiring Diagrams and check the dispenser wiring
harness.
5. With the wires removed from the motor to be
tested. Check for continuity across the black wire
and the red wire on the auger motor.
If continuity is present as described, reconnect the
wires to the terminals on the bottom of the auger
motor, the auger motor is operating properly.
If continuity is not present as described, replace the
auger motor.
Removal, Cleaning and Replacement:
Hopper & Auger (Early models):
1. Open the dispenser door and raise the top front
cover.
2. Lift the front edge of hopper assy (20) over the
tab on hopper support plate (19) and slide hopper
assembly out the front of the dispenser.
3. Remove hopper lid (1) and empty product.
4. Pull off the ejector elbow (13).
5. Remove auger disk assy (2) by pulling agitator
support rod (4) towards agitator disc assy and
lifting agitator disk assy from hopper (10).
6. Remove auger (12) by pulling it out the front of
the hopper (10).
7. Remove auger drive shaft (5) by removing the
retaining clip (6) from auger drive shaft.
8. Slide washer (8) and auger drive shaft bracket (7)
off of the auger drive shaft (5).
9. Slide auger drive shaft (5) from auger drive shaft
bushing (3) and remove from hopper (10).
10. Remove locknut (9) from auger drive shaft bushing
(3) and remove auger drive shaft bushing from
hopper (10).
11. Wash components in a mild solution of dish de-
tergent using a bristle brush when needed.
12. Rinse and dry each item thoroughly.
13. Check for damaged or broken components, replace
any if necessary and reassemble hopper assem-
bly.
20