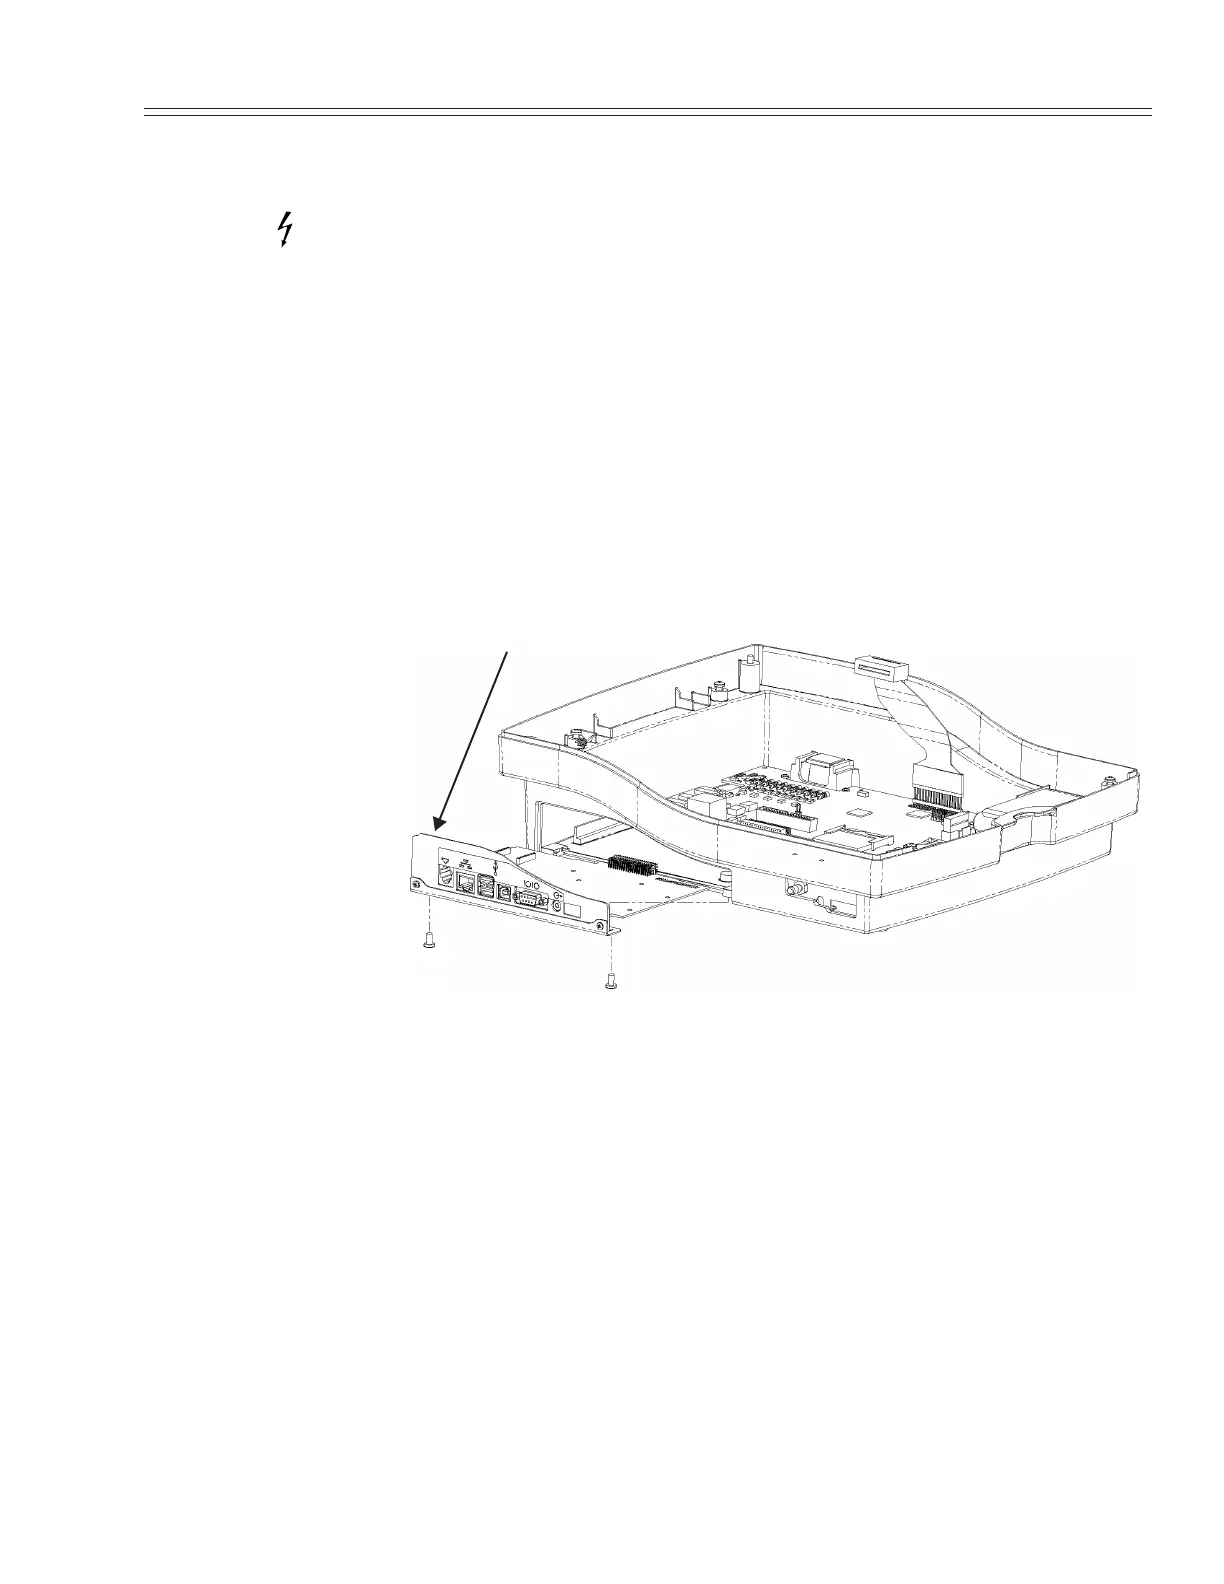
Optional I/O Board and I/O Board Cover
Atria Service Manual 4-7
Optional I/O Board and I/O Board Cover
CAUTION: The optional I/O board is very sensitive to static
electricity. Use an antistatic work surface.
1. Unplug the electrocardiograph.
2. Disconnect the battery as described earlier.
3. Turn the electrocardiograph over and remove the two (2) screws from
the I/O cover assembly.
4. Remove the top enclosure as described earlier.
5. Remove the paper drive assembly as described earlier.
6. If replacing the I/O board cover only, remove the two (2) screws on the
I/O board then slide the I/O board cover out. Continue with step 9.
7. Disconnect the ground cable from JP9 on the I/O board.
8. Slide the I/O board out of the bottom enclosure assembly.
9. Replace in reverse order. Be careful not to bend any of the I/O board
connector pins.
10. Once the I/O board cover is in place, gently lift up on the cover to
ensure it is securely seated within the bottom enclosure frame. Make
sure all wires are properly routed before you put the top enclosure back on.


 To Next Page