BURLEY.COM
8
ASSEMBLY & USE
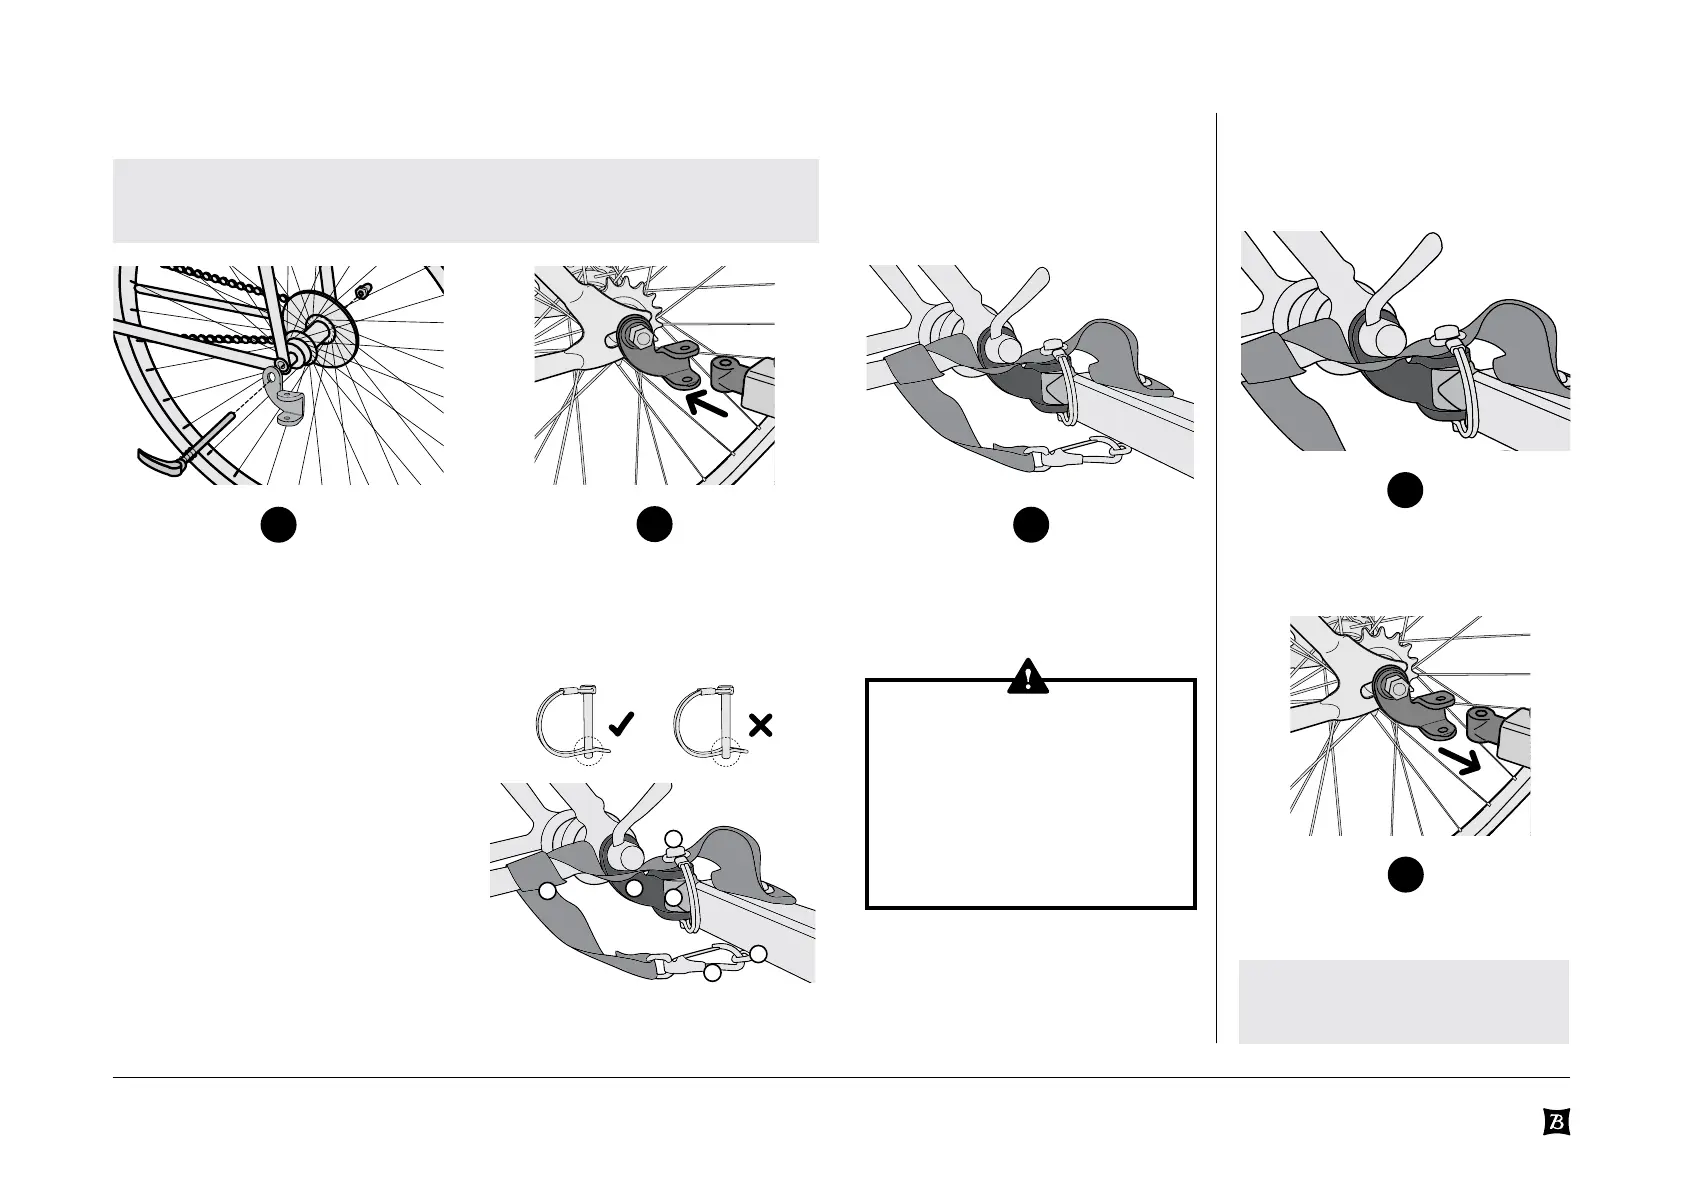
Connecting Your Trailer to Your Bike Disconnecting Your
Trailer From
Your Bike
WARNING
ONCE INSTALLED, ENSURE
THE SAFETY STRAP
DOES NOT COME INTO
CONTACT WITH ANY
MOVING PARTS SUCH
AS THE DISC BRAKE
ROTOR OR SPOKES.
Quick Release or Nutted Axle:
Remove quick release skewer or axle nut
from left side of bike’s rear-wheel.
Install the hitch between quick release
or axle nut and frame with the hitch tabs
parallel to ground. Tighten quick release
or axle nut following bike manufacturer’s
recommendation. Consult Burley.
com for adapters designed to help fit
your trailer to your bike if necessary.
Thru Axle:
Requires adapted thru axle to install
hitch. Consult Burley.com to obtain
proper fit and installation to your bike.
Connecting the tow bar to the hitch:
Insert flex connector between the
two tabs of the hitch, such that all the
holes are aligned. Insert the retaining
pin through the holes from the top
and close the retainer at the bottom.
Remove the flex connector from the
hitch by pulling away from the bike.
Unfasten the clasp from the D-Ring and
unwrap the safety strap from the frame of
the bike. Open the retainer on the retaining
pin and pull it upwards to remove it.
Wrap safety strap around the frame of the
bike and secure the clasp to the D-ring on
the tow bar. Ensure the strap is tight and
cannot be caught in other components.
1
2
2
3
1
note
To identify your bike’s rear axle, see the Hitch Guide on Burley.com/hitching-guide
or confirm with your local bike shop
note
The hitch can remain on the bike when
trailer is removed.
1. Safety strap
2. Hitch
3. Retainer
4. Retaining Pin
5. Flex Connector
6. Clasp
1
6
5
4
3
2